Reorder Operation
About
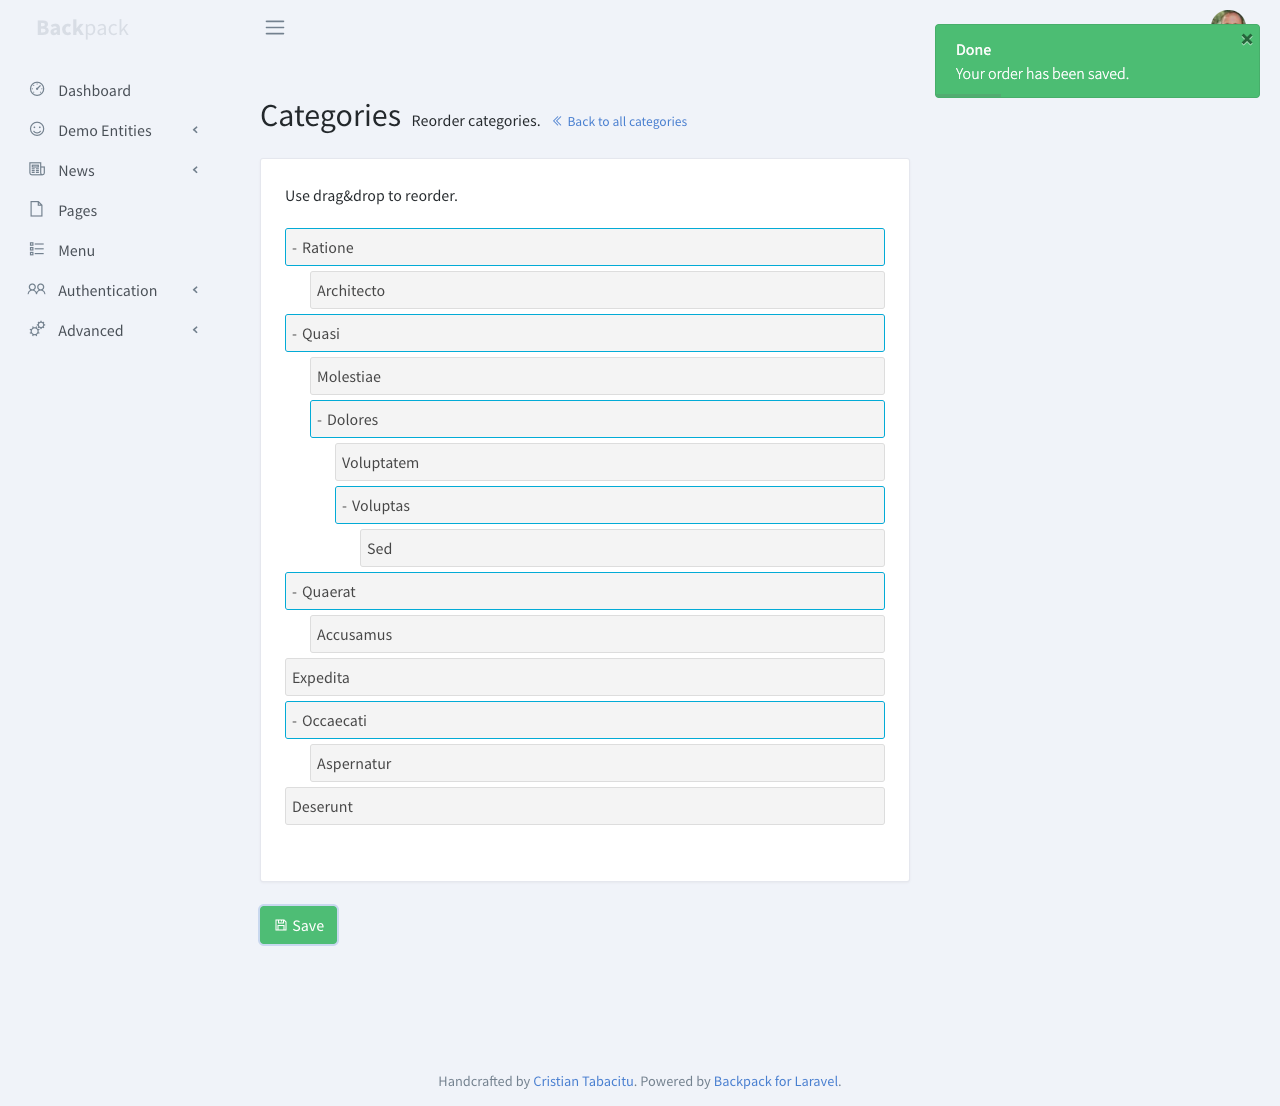
This operation allows your admins to reorder & nest entries.

Requirements
Your model should have the following integer fields, with a default value of 0: parent_id, lft, rgt, depth.
Additionally, the parent_id field has to be nullable.
How to Use
In order to enable this operation in your CrudController, you need to use the ReorderOperation trait, and have a setupReorderOperation() method that defines the label and max_level of allowed depth.
<?php

namespace App\Http\Controllers\Admin;

use Backpack\CRUD\app\Http\Controllers\CrudController;

class ProductCrudController extends CrudController
{
    use \Backpack\CRUD\app\Http\Controllers\Operations\ReorderOperation;

    protected function setupReorderOperation()
    {
        // define which model attribute will be shown on draggable elements
        $this->crud->set('reorder.label', 'name');
        // define how deep the admin is allowed to nest the items
        // for infinite levels, set it to 0
        $this->crud->set('reorder.max_level', 2);
    }
}
This will:
- allow access to the Reorder operation;
- make a "Reorder" button appear next to "Add entry" in the List view, if the List operation is enabled;
- enable the routes needed by the Reorder operation;
Where:
attribute_nameshould be the attribute you want shown on the draggable elements (ex:name);ALLOWED_DEPTHshould be an integer, how many levels deep would you allow your admin to go when nesting; for infinite levels, you should set it to0;
How It Works
The /reorder route points to a reorder() method in your EntityCrudController.
How to add custom sections(aka. Widgets)
Widgets (aka cards, aka charts, aka graphs) provide a simple way to insert blade files into admin panel pages. You can use them to insert cards, charts, notices or custom content into pages. You can use the default widget types or create your own custom widgets.
Backpack's default template includes two sections where you can push widgets:
before_contentafter_content
To use widgets on reorder operation, define them inside setupReorderOperation() function.
public function setupReorderOperation()
{
    // dynamic data to render in the following widget
    $userCount = \App\Models\User::count();

    //add div row using 'div' widget and make other widgets inside it to be in a row
    Widget::add()->to('before_content')->type('div')->class('row')->content([

        //widget made using fluent syntax
        Widget::make()
            ->type('progress')
            ->class('card border-0 text-white bg-primary')
            ->progressClass('progress-bar')
            ->value($userCount)
            ->description('Registered users.')
            ->progress(100 * (int)$userCount / 1000)
            ->hint(1000 - $userCount . ' more until next milestone.'),

        //widget made using the array definition
        Widget::make(
            [
                'type'       => 'card',
                'class'   => 'card bg-dark text-white',
                'wrapper' => ['class' => 'col-sm-3 col-md-3'],
                'content'    => [
                    'header' => 'Example Widget',
                    'body'   => 'Widget placed at "before_content" secion in same row',
                ]
            ]
        ),
    ]);

    //you can also add Script & CSS to your page using 'script' & 'style' widget
    Widget::add()->type('script')->stack('after_scripts')->content('https://code.jquery.com/ui/1.12.0/jquery-ui.min.js');
    Widget::add()->type('style')->stack('after_styles')->content('https://cdn.jsdelivr.net/npm/@shoelace-style/[email protected]/dist/themes/light.css');
}
Output:
- Using
before_content:

- Using
after_content

How to Overwrite
In case you need to change how this operation works, take a look at the ReorderOperation.php trait to understand how it works. You can easily overwrite the reorder() or the saveReorder() methods:
use \Backpack\CRUD\app\Http\Controllers\Operations\ReorderOperation { reorder as traitReorder; }

public function reorder()
{
    // your custom code here

    // call the method in the trait
    return $this->traitReorder();
}
You can also overwrite the reorder button by creating a file with the same name inside your resources/views/vendor/backpack/crud/buttons/. You can easily publish the reorder button there to make changes using:
php artisan backpack:button --from=reorder