1. Basics
Duration: 5 minutes
Are you already comfortable with Laravel? In order to understand this series and make use of Backpack, you'll need to have a decent understanding of the Laravel framework. If you don't, please watch this excellent intro series on Laracasts and familiarize yourself with Laravel first.
What is Backpack?
A software package that helps Laravel professionals build administration panels - secure areas where administrators login and create, read, update, and delete application information. It is not a CMS, it is more a framework that lets you build your own CMS. You can install it in your existing project or in a totally new project.
It's designed to be flexible enough to allow you to build admin panels for everything from simple presentation websites to CRMs, ERPs, eCommerce, eLearning, etc. We can vouch for that, because we have built all that stuff using Backpack already.
What's a CRUD?
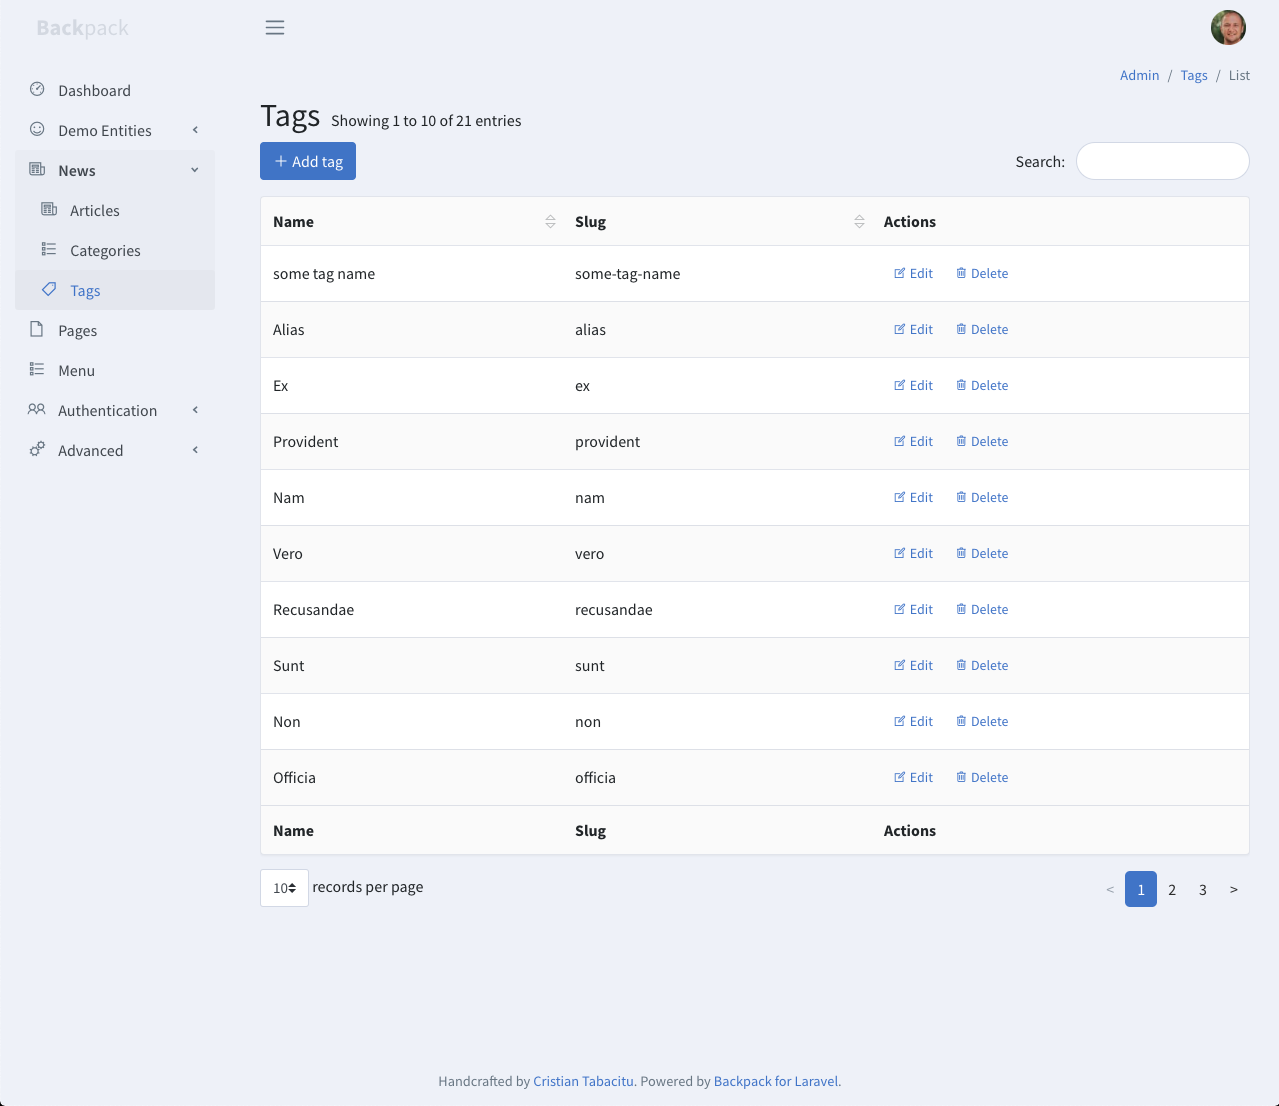
A CRUD is what we call a section of your admin panel that lets the admin Create, Read, Update, or Delete entries of a certain entity (or Model). So you can have a CRUD for Products, a CRUD for Articles, a CRUD for Categories, or whatever else you might want to create, read, update, or delete.
For the purpose of this series, we'll show examples on the Tag entity. This is how a Tag CRUD might look like:
But Backpack is prepared for feature-packed CRUDs - since it's a good tool for very complex projects too. This is how a CRUD that uses all of Backpack's features might look like:
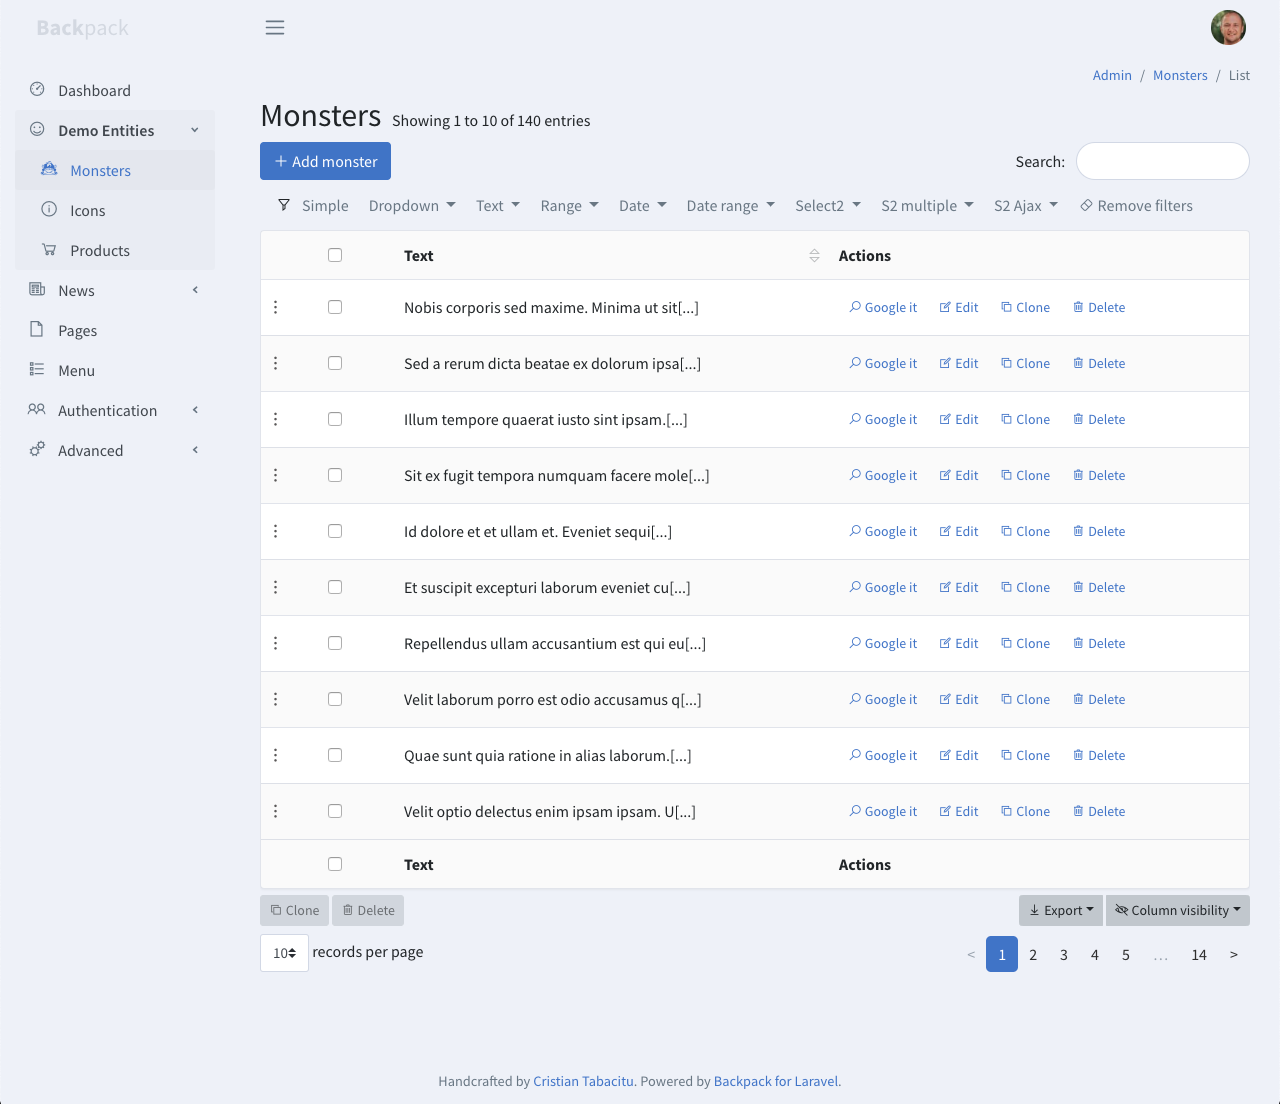
However, you will almost never use all of Backpack's features in one CRUD. But if you do, it will still look good, and it will be intuitive to use.
Main Features
Front-End Design
New Backpack installs come with an HTML theme installed - you choose which theme. All themes use Bootstrap, and have many HTML blocks ready for you to use. When you're building a custom page in your admin panel, it's easy to just copy-paste the HTML from the the theme's demo or from its documentation. And the page will look good, without you having to design anything. Currently, we have three first-party themes:
You can also create your own custom theme. In fact, we've built our theming system in such a way that if you buy a Bootstrap-based HTML template from Envato / GetBootstrap / WrapBootstrap, it should take you no more than 5 hours to create a Backpack theme that uses that HTML template.
All themes also install Noty for triggering JS notification bubbles, and SweetAlerts. So you can easily use these across your admin panel. You can trigger notification bubbles in PHP or trigger notification bubbles in JavaScript.
Authentication
Backpack comes with an authentication system that's separate from Laravel's. This way, you can have different login screens for users and admins, if you need to. If not, you can choose to use only one authentication - either Laravel's or Backpack's.
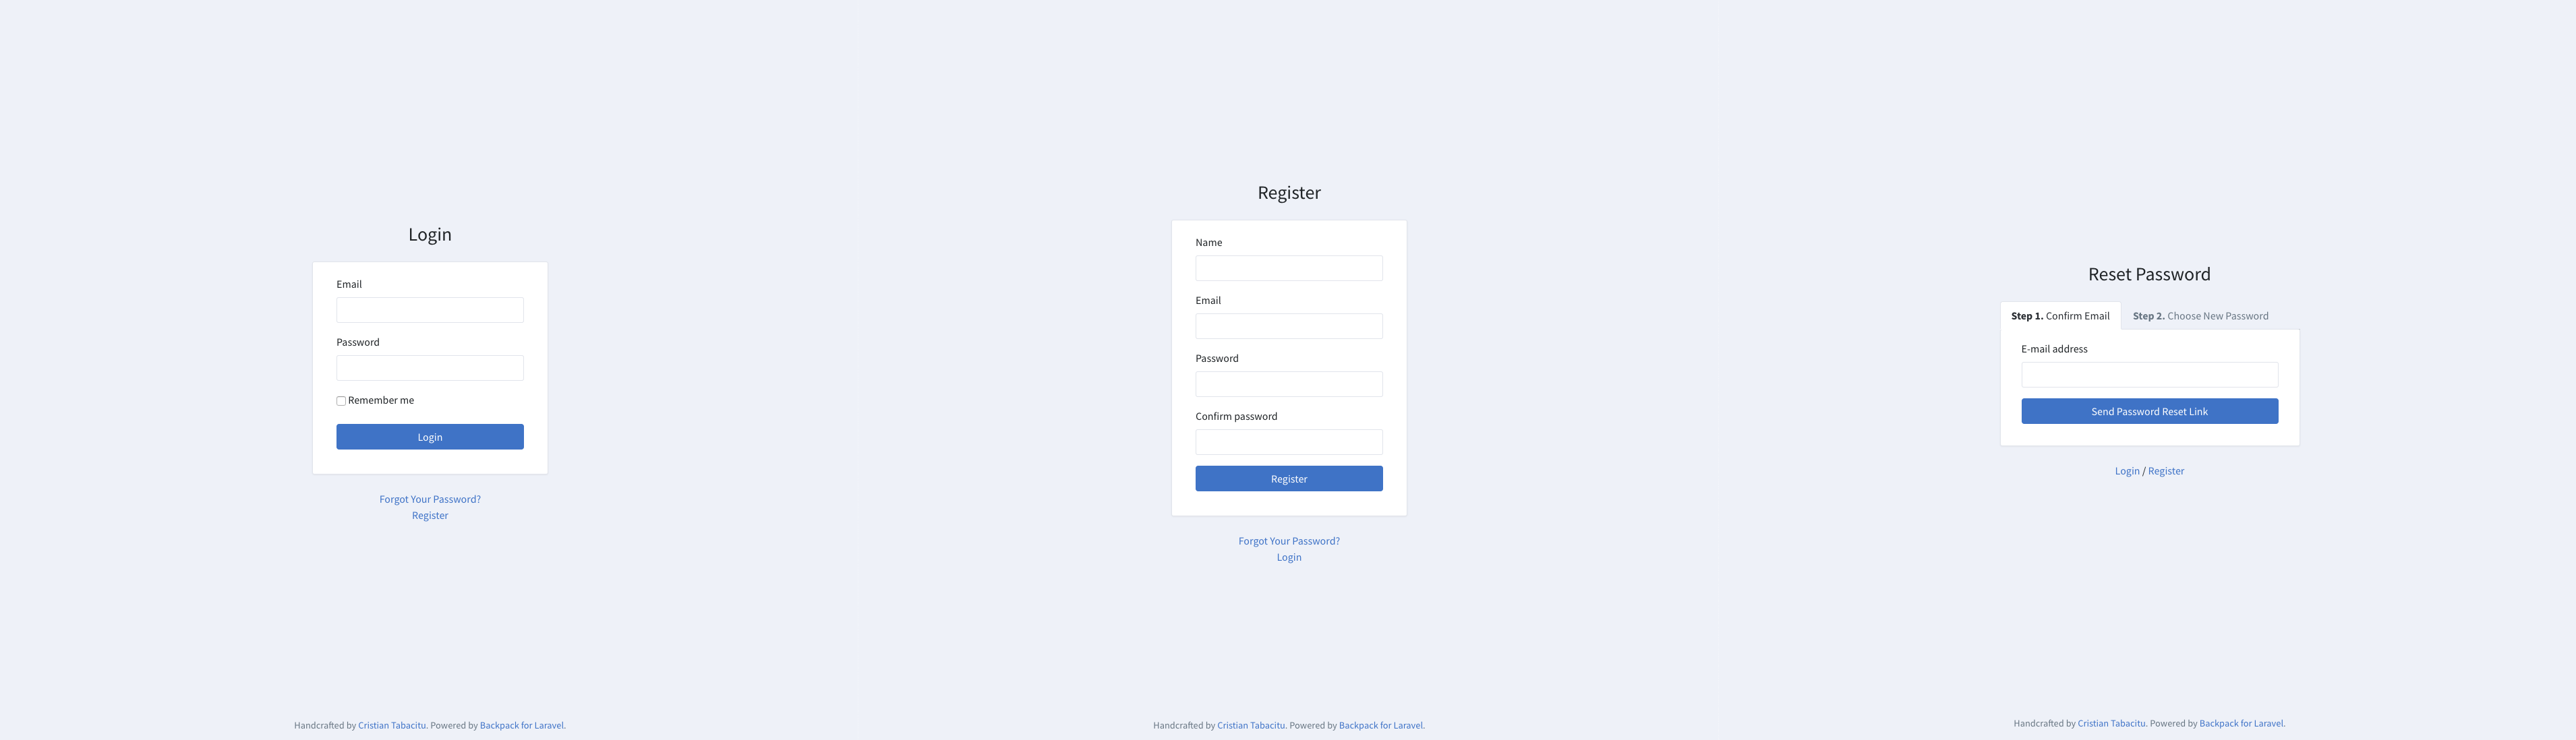
After you install Backpack (don't do it now), you'll be able to log into your admin panel at http://yourapp/admin. You can change the URL prefix from admin to something else in your config/backpack/base.php file, along with a bunch of other configuration options. Click here to browse the configuration file and see what it can do for you.
CRUDs
This is where it gets interesting. As soon as you install Backpack in your project, you can create CRUDs for your admins to easily manipulate database entries. Let's browse through a simple example of creating a CRUD administration panel for a Tag entity.
You can generate everything a CRUD needs using one of the methods below:
Option A) PRO - using our GUI, Backpack DevTools
Just install DevTools, fill in a web form with the columns for your entity, and it'll generate all the needed files. It's that simple. Check out the images here to see how it works. It's especially useful for more complex entities. It is a paid tool though, so if you are not yet ready to purchase, let's explore the free option too.
Option B) FREE - using the command-line interface
You can use anything you want to generate the Migration and Model, so in this case we're going to use laracasts/generators:
# STEP 0. install a 3d party tool to generate migrations
composer require --dev laracasts/generators

# STEP 1. create a migration
php artisan make:migration:schema create_tags_table --model=0 --schema="name:string:unique,slug:string:unique"
php artisan migrate

# STEP 2. create a CRUD for it
php artisan backpack:crud tag #use singular, not plural
In both cases, what we're getting is a simple CRUD panel, which you should now be able to see in the Sidebar.
For a simple entry like this, the generated CRUD panel will even work "as is", with no need for customisations. But don't expect this for more complex entities. They will usually have specific requirements and need customization. That's where Backpack shines - modifying anything in the CRUD panel is easy and intuitive, once you understand how it works.
The methods above will generate:
- a migration file
- a model (
app\Models\Tag.php) - a request file, for form validation (
app\Http\Requests\TagCrudRequest.php) - a controller file, where you can customize how the CRUD panel looks and feels (
app\Http\Controllers\Admin\TagCrudController.php) - a route, as a line inside
routes/backpack/custom.php
It will also add:
- a route inside
routes/backpack/custom.php, pointing to that controller - a menu item inside
resources/views/vendor/backpack/ui/inc/menu_items.blade.php
You might have noticed that no views are generated. That's because in most cases you don't need custom views with Backpack. All your custom code is in the controller, model, or request, so the default views are loaded from the package. If you do, however, need to customize a view, it is really easy.
Also, we won't be covering the migration, model, and request files here, as they are in no way custom. The only thing you need to make sure is that the Model is properly configured (database table, relationships, $fillable or $guarded properties, etc.) and that it uses our CrudTrait. What we will be covering is TagCrudController - which is where most of your logic will reside. Here's a copy of a simple one that you might use to achieve the above:
<?php namespace App\Http\Controllers\Admin;

use Backpack\CRUD\app\Http\Controllers\CrudController;
use App\Http\Requests\TagCrudRequest;

class TagCrudController extends CrudController {

  use \Backpack\CRUD\app\Http\Controllers\Operations\ListOperation;
  use \Backpack\CRUD\app\Http\Controllers\Operations\ShowOperation;
  use \Backpack\CRUD\app\Http\Controllers\Operations\CreateOperation;
  use \Backpack\CRUD\app\Http\Controllers\Operations\UpdateOperation;
  use \Backpack\CRUD\app\Http\Controllers\Operations\DeleteOperation;

  public function setup()
  {
      CRUD::setModel("App\Models\Tag");
      CRUD::setRoute("admin/tag");
      CRUD::setEntityNameStrings('tag', 'tags');
  }

  public function setupListOperation()
  {
      CRUD::column('name');
      CRUD::column('slug');
  }

  public function setupCreateOperation()
  {
      CRUD::setValidation(TagCrudRequest::class);

      CRUD::field('name')->type('text');
      CRUD::field('slug')->type('text')->label('URL Segment (slug)');
  }

  public function setupUpdateOperation()
  {
      $this->setupCreateOperation();
  }
}
You should notice:
- It uses basic inheritance (
TagCrudController extends CrudController); so if you want to modify a behaviour (save, update, reorder, etc.), you can easily do that by overwriting the corresponding method in yourTagCrudController - All operations are enabled by using that operation's trait on the controller
- The
setup()method defines the basics of the CRUD panel - Each operation is set up inside a
setupXxxOperation()method
That's it! If you want to learn more, please read the next lesson of this series.