Update Operation
About
This operation allows your admins to edit entries from the database.
Requirements
All editable attributes should be $fillable on your Model.
How to Use
Step 0. Use the operation trait on your controller:
<?php

namespace App\Http\Controllers\Admin;

use Backpack\CRUD\app\Http\Controllers\CrudController;

class ProductCrudController extends CrudController
{
    use \Backpack\CRUD\app\Http\Controllers\Operations\UpdateOperation;

    protected function setupUpdateOperation()
    {
        // $this->crud->setValidation(StoreRequest::class);
        // $this->crud->addField()

        // or just do everything you've done for the Create Operation
        // $this->crud->setupCreateOperation();

        // You can also do things depending on the current entry
        // (the database item being edited or updated)
        // if ($this->crud->getCurrentEntry()->smth == true) {}
    }
}
This will:
- allow access to this operation;
- make an Edit button appear in the
linestack, next to each entry, in the List operation view;
To use the Update operation, you must:
Step 1. Specify what field types you'd like to show for each attribute, in your controller's setupUpdateOperation() method. You can do that using the Fields API. In short you can:
// add a field only to the Update operation
$this->crud->addField($field_definition_array);
Step 2. Specify which FormRequest file to use for validation and authorization, inside your setupUpdateOperation() method. You can pass the same FormRequest as you did for the Create operation if there are no differences. If you need separate validation for Create and Update look here.
$this->crud->setValidation(StoreRequest::class);For more on how to manipulate fields, please read the Fields documentation page. For more on validation rules, check out Laravel's validation docs.
Step 3. (optional recommended) eager load relationships. If you're displaying relationships in your fields, you might want to eager load them to avoid the N+1 problem. You can do that in the setupUpdateOperation() method:
$this->crud->setOperationSetting('eagerLoadRelationships', true);Note: You can enable this setting globally for all your cruds in the config/backpack/operations/update.php file.
How It Works
CrudController is a RESTful controller, so the Update operation uses two routes:
- GET to
/entity-name/{id}/edit- points toedit()which shows the Edit form (edit.blade.php); - POST to
/entity-name/{id}/edit- points toupdate()which uses Eloquent to update the entry in the database;
The edit() method will show all the fields you've defined for this operation using the Fields API, then upon Save the update() method will first check the validation from the type-hinted FormRequest, then create the entry using the Eloquent model. Only attributes that have a field type added and are $fillable on the model will actually be updated in the database.
How to add custom sections(aka. Widgets)
Widgets (aka cards, aka charts, aka graphs) provide a simple way to insert blade files into admin panel pages. You can use them to insert cards, charts, notices or custom content into pages. You can use the default widget types or create your own custom widgets.
Backpack's default template includes two sections where you can push widgets:
before_contentafter_content
To use widgets on update operation, define them inside setupUpdateOperation() function.
public function setupUpdateOperation()
{
    // dynamic data to render in the following widget
    $userCount = \App\Models\User::count();

    //add div row using 'div' widget and make other widgets inside it to be in a row
    Widget::add()->to('before_content')->type('div')->class('row')->content([

        //widget made using fluent syntax
        Widget::make()
            ->type('progress')
            ->class('card border-0 text-white bg-primary')
            ->progressClass('progress-bar')
            ->value($userCount)
            ->description('Registered users.')
            ->progress(100 * (int)$userCount / 1000)
            ->hint(1000 - $userCount . ' more until next milestone.'),

        //widget made using the array definition
        Widget::make(
            [
                'type'       => 'card',
                'class'   => 'card bg-dark text-white',
                'wrapper' => ['class' => 'col-sm-3 col-md-3'],
                'content'    => [
                    'header' => 'Example Widget',
                    'body'   => 'Widget placed at "before_content" secion in same row',
                ]
            ]
        ),
    ]);

    //you can also add Script & CSS to your page using 'script' & 'style' widget
    Widget::add()->type('script')->stack('after_scripts')->content('https://code.jquery.com/ui/1.12.0/jquery-ui.min.js');
    Widget::add()->type('style')->stack('after_styles')->content('https://cdn.jsdelivr.net/npm/@shoelace-style/[email protected]/dist/themes/light.css');
}
Output:
- Using
before_content:

- Using
after_content

Advanced Features and Techniques
Validation
There are three ways you can define the validation rules for your fields:
Validating fields using FormRequests
When you generate a CrudController, you'll notice a Laravel FormRequest has also been generated, and that FormRequest is mentioned as the source of your validation rules:
protected function setupUpdateOperation()
{
    $this->crud->setValidation(StoreRequest::class);
}
This works particularly well for bigger models, because you can mention a lot of rules, messages and attributes in your FormRequest and it will not increase the size of your CrudController.
Do you need different Create and Update validations? Then create a separate request file for each operation and instruct your EntityCrudController to use those files:
use App\Http\Requests\CreateTagRequest as StoreRequest;
use App\Http\Requests\UpdateTagRequest as UpdateRequest;

// ...

public function setupCreateOperation()
{
    $this->crud->setValidation(CreateRequest::class);
}

public function setupUpdateOperation()
{
    $this->crud->setValidation(UpdateRequest::class);
}
Validating fields using a rules array
For smaller models (with just a few validation rules), creating an entire FormRequest file to hold them might be overkill. If you prefer, you can pass an array of validation rules to the same setValidation() method (with an optional second parameter for the validation messages):
protected function setupUpdateOperation()
{
    $this->crud->setValidation([
        'name' => 'required|min:2',
    ]);

    // or maybe
    $rules = ['name' => 'required|min:2'];
    $messages = [
        'name.required' => 'You gotta give it a name, man.',
        'name.min' => 'You came up short. Try more than 2 characters.',
    ];
    $this->crud->setValidation($rules, $messages);
}
This is more convenient for small and medium models. Plus, it's very easy to read.
Validating fields using field attributes
Another good option for small & medium models is to define the validation rules directly on your fields:
protected function setupUpdateOperation()
{
    $this->crud->addField([
        'name' => 'content',
        'label' => 'Content',
        'type' => 'ckeditor',
        'placeholder' => 'Your textarea text here',
        'validationRules' => 'required|min:10',
        'validationMessages' => [
            'required' => 'You gotta write smth man.',
            'min' => 'More than 10 characters, bro. Wtf... You can do this!',
        ]
    ]);
    // CAREFUL! This MUST be called AFTER the fields are defined, NEVER BEFORE
    $this->crud->setValidation();
}
You must then call setValidation() without a parameter, and Backpack will go through all defined fields, get their validationRules and validate them. It is VERY IMPORTANT to call setValidation() after you've defined the fields! Otherwise Backpack won't find any validationRules.
Callbacks
Developers coming other CRUD systems (like GroceryCRUD) will be looking for callbacks to run "before_insert", "before_update", "after_insert", "after_update". There are no callbacks in Backpack, because... they're not needed. There are plenty of other ways to do things before/after an entry is updated.
Use Events in your setup() method
Laravel already triggers multiple events in an entry's lifecycle. Those also include:
updatingandupdated, which are triggered by the Update operation;savingandsaved, which are triggered by both the Create and the Update operations;
So if you want to do something to a Product entry before it's updated, you can easily do that:
public function setupUpdateOperation()
{

    // ...

    Product::updating(function($entry) {
        $entry->last_edited_by = backpack_user()->id;
    });
}
Take a closer look at Eloquent events if you're not familiar with them, they're really really powerful once you understand them. Please note that these events will only get registered when the function gets called, so if you define them in your CrudController, then:
- they will NOT run when an entry is changed outside that CrudController;
- if you want to expand the scope to cover both the
CreateandUpdateoperations, you can easily do that, for example by using thesavingandsavedevents, and moving the event-calling to your mainsetup()method;
Use events in your field definition
You can tell a field to do something to the entry when that field gets saved to the database. Rephrased, you can define standard Eloquent events directly on fields. For example:
// FLUENT syntax - use the convenience method "on" to define just ONE event
CRUD::field('name')->on('updating', function ($entry) {
    $entry->last_edited_by = backpack_user()->id;
});

// FLUENT SYNTAX - you can define multiple events in one go
CRUD::field('name')->events([
    'updating' => function ($entry) {
        $entry->last_edited_by = backpack_user()->id;
    },
    'saved' => function ($entry) {
        // TODO: upload some file
    },
]);

// using the ARRAY SYNTAX, define an array of events and closures
CRUD::addField([
    'name' => 'name',
    'events' => [
        'updating' => function ($entry) {
            $entry->author_id = backpack_user()->id;
        },
    ],
]);
Override the update() method
The store code is inside a trait, so you can easily overwrite it:
<?php

namespace App\Http\Controllers\Admin;

use Backpack\CRUD\app\Http\Controllers\CrudController;

class ProductCrudController extends CrudController
{
    use \Backpack\CRUD\app\Http\Controllers\Operations\UpdateOperation { update as traitUpdate; }

    // ...

    public function update()
    {
        // do something before validation, before save, before everything; for example:
        // $this->crud->addField(['type' => 'hidden', 'name' => 'author_id']);
        // $this->crud->removeField('password_confirmation');

        // Note: By default Backpack ONLY saves the inputs that were added on page using Backpack fields.
        // This is done by stripping the request of all inputs that do NOT match Backpack fields for this
        // particular operation. This is an added security layer, to protect your database from malicious
        // users who could theoretically add inputs using DeveloperTools or JavaScript. If you're not properly
        // using $guarded or $fillable on your model, malicious inputs could get you into trouble.

        // However, if you know you have proper $guarded or $fillable on your model, and you want to manipulate
        // the request directly to add or remove request parameters, you can also do that.
        // We have a config value you can set, either inside your operation in `config/backpack/crud.php` if
        // you want it to apply to all CRUDs, or inside a particular CrudController:
            // $this->crud->setOperationSetting('saveAllInputsExcept', ['_token', '_method', 'http_referrer', 'current_tab', 'save_action']);
        // The above will make Backpack store all inputs EXCEPT for the ones it uses for various features.
        // So you can manipulate the request and add any request variable you'd like.
        // $this->crud->getRequest()->request->add(['author_id'=> backpack_user()->id]);
        // $this->crud->getRequest()->request->remove('password_confirmation');
        // $this->crud->getRequest()->request->add(['author_id'=> backpack_user()->id]);
        // $this->crud->getRequest()->request->remove('password_confirmation');

        $response = $this->traitUpdate();
        // do something after save
        return $response;
    }
}
But before you do that, ask yourself - is this something that should be done when an entry is added/updated/deleted from the application, too? Not just the admin admin? If so, a better place for it would be the Model. Remember your Model is a pure Eloquent Model, so the cleanest way might be to use Eloquent Event Observers or accessors and mutators.
Translatable models and multi-language CRUDs

For localized apps, you can let your admins edit multi-lingual entries. Translations are stored using spatie/laravel-translatable.
In order to make one of your Models translatable (localization), you need to: 0. Be running MySQL 5.7+ (or a PostgreSQL with JSON column support);
- Install spatie/laravel-translatable;
- In your database, make all translatable columns either JSON or TEXT.
- Use Backpack's
HasTranslationstrait on your model (instead of using spatie'sHasTranslations) and define what fields are translatable, inside the$translatableproperty. For example:
<?php

namespace App\Models;

use Backpack\CRUD\app\Models\Traits\CrudTrait;
use Illuminate\Database\Eloquent\Model;
use Backpack\CRUD\app\Models\Traits\SpatieTranslatable\HasTranslations;

class Product extends Model
{
    use CrudTrait;
    use HasTranslations;

    protected $table = 'products';
    protected $primaryKey = 'id';
    protected $fillable = ['name', 'category_id', 'options', 'price', 'tags'];
    protected $translatable = ['name', 'options'];
}
You DO NOT need to cast translatable string columns as array/json/object in the Eloquent model. From Eloquent's perspective they're strings. So:
- you should NOT cast
name; it's a string in Eloquent, even though it's stored as JSON in the db by SpatieTranslatable;- you should cast
extrastoarray, if each translation stores an array of some sort;
Change the languages available to translate to/from, in your crud config file (config/backpack/crud.php). By default there are quite a few enabled (English, French, German, Italian, Romanian).
Updating and creating translatable entries
When you're creating a translatable entry, the entry will be created in the current user app locale. Either the one set in config/app.php or if you allow your admins to change the panel locale, the one set by them will be used.
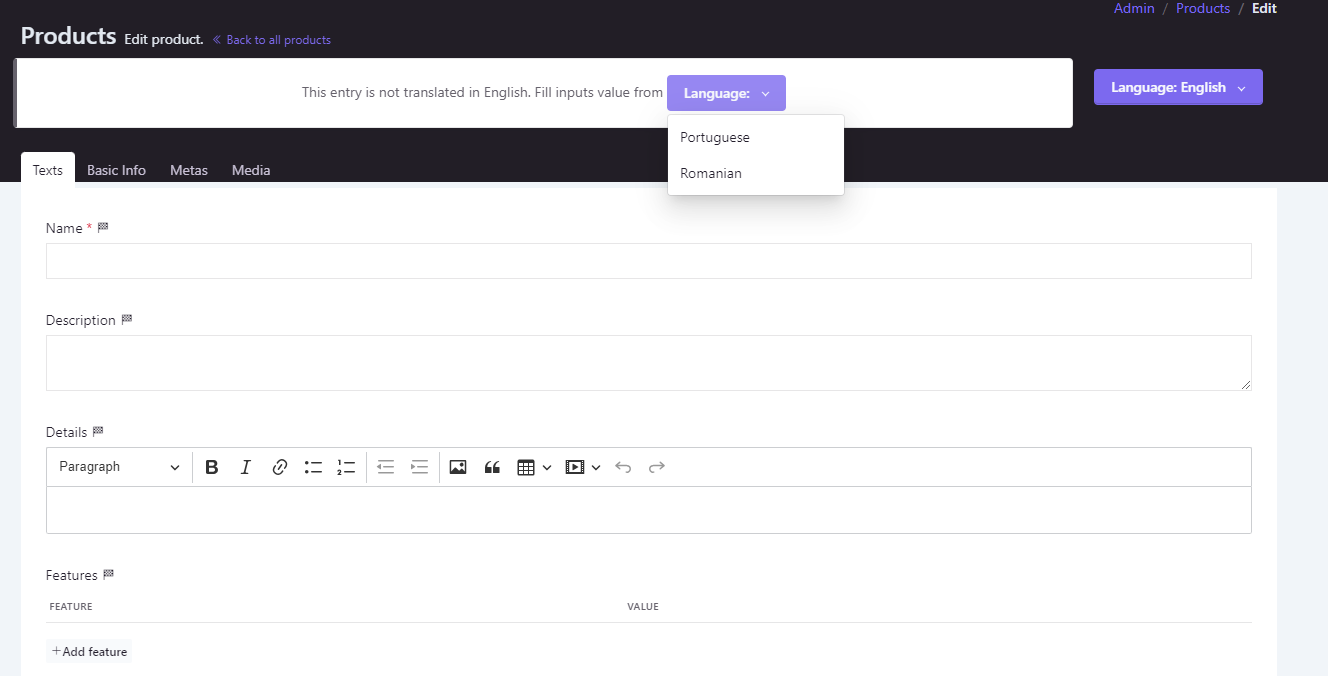
When you update a translatable entry you choose in what language you want to create the translation for, idependently of the panel language or app locale.
When the entry has no translations in the chosen language for translation, you will get the option to select another language to copy the translations from.
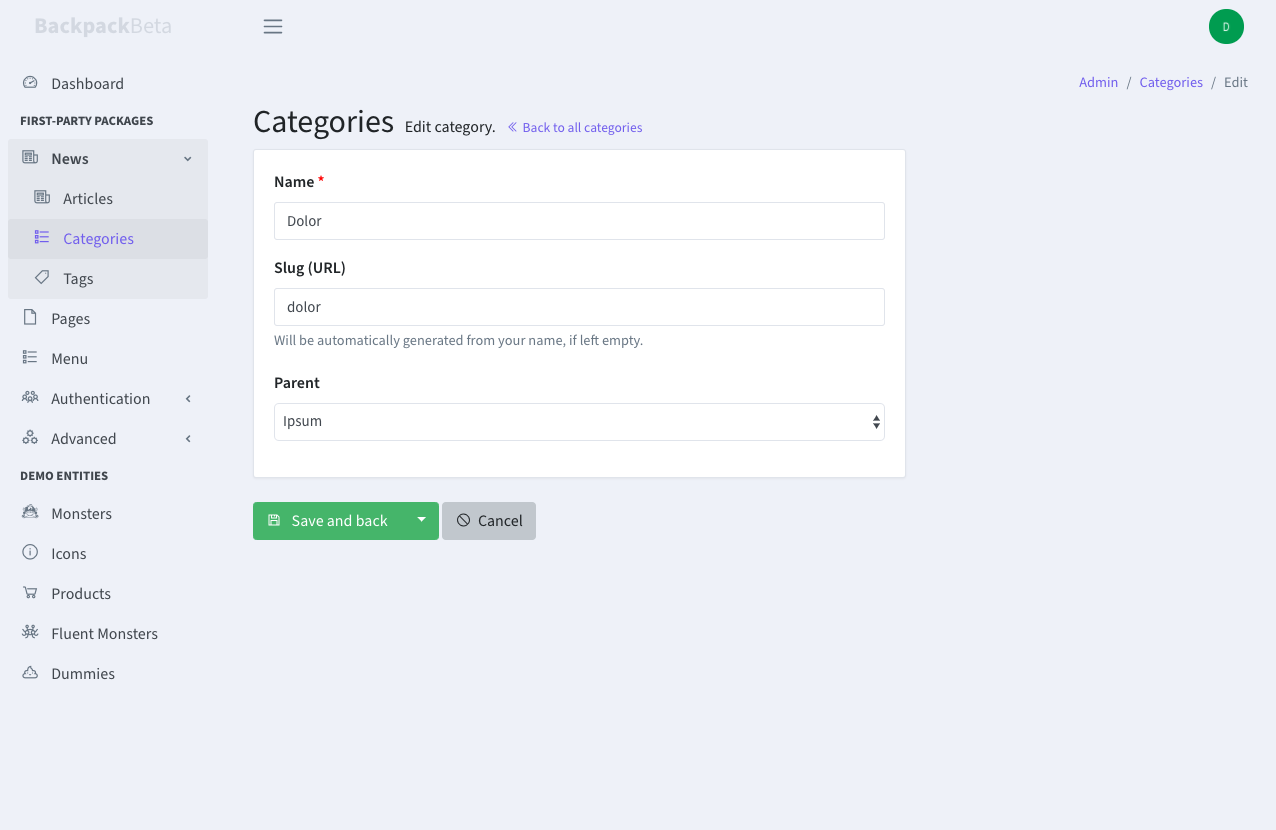
Additionally, if you have slugs (but only if you need translatable slugs), you'll need to use backpack's classes instead of the ones provided by cviebrock/eloquent-sluggable.
Make sure you have cviebrock/eloquent-sluggable installed as well, if not, please do it with composer require cviebrock/eloquent-sluggable:
<?php

namespace Backpack\NewsCRUD\app\Models;

use Illuminate\Database\Eloquent\Model;
use Backpack\CRUD\app\Models\Traits\CrudTrait;
use Backpack\CRUD\app\Models\Traits\SpatieTranslatable\Sluggable;
use Backpack\CRUD\app\Models\Traits\SpatieTranslatable\SluggableScopeHelpers;
use Backpack\CRUD\app\Models\Traits\SpatieTranslatable\HasTranslations;

class Category extends Model
{
    use CrudTrait;
    use Sluggable, SluggableScopeHelpers;
    use HasTranslations;

    /*
    |--------------------------------------------------------------------------
    | GLOBAL VARIABLES
    |--------------------------------------------------------------------------
    */

    protected $table = 'categories';
    protected $primaryKey = 'id';
    // public $timestamps = false;
    // protected $guarded = ['id'];
    protected $fillable = ['name', 'parent_id'];
    // protected $hidden = [];
    // protected $dates = [];
    protected $translatable = ['name', 'slug'];

    /**
     * Return the sluggable configuration array for this model.
     *
     * @return array
     */
    public function sluggable(): array
    {
        return [
            'slug' => [
                'source' => 'slug_or_name',
            ],
        ];
    }
}
If your slugs are not translatable, use the
cviebrock/eloquent-sluggabletraits. The Backpack'sSluggabletrait saves your slug as a JSON object, regardless of theslugfield being defined inside the$translatableproperty.
Delete button on Update operation
If you want to display a Delete button right on the Update operation, you simply need to add a line to the setupUpdateOperation() method:
    protected function setupUpdateOperation()
    {
        // your code...

        $this->crud->setOperationSetting('showDeleteButton', true); // <--- add this!

        // alternatively you can pass an URL to where user should be redirected after entry is deleted:
        // $this->crud->setOperationSetting('showDeleteButton', 'https://someurl.com');
    }
This will allow admins to remove entries right from the Update Operation, and it will redirect them back to the List Operation afterwards.