List Operation
About
This operation shows a table with all database entries. It's the first page the admin lands on (for an entity), and it's usually the gateway to all other operations, because it holds all the buttons.
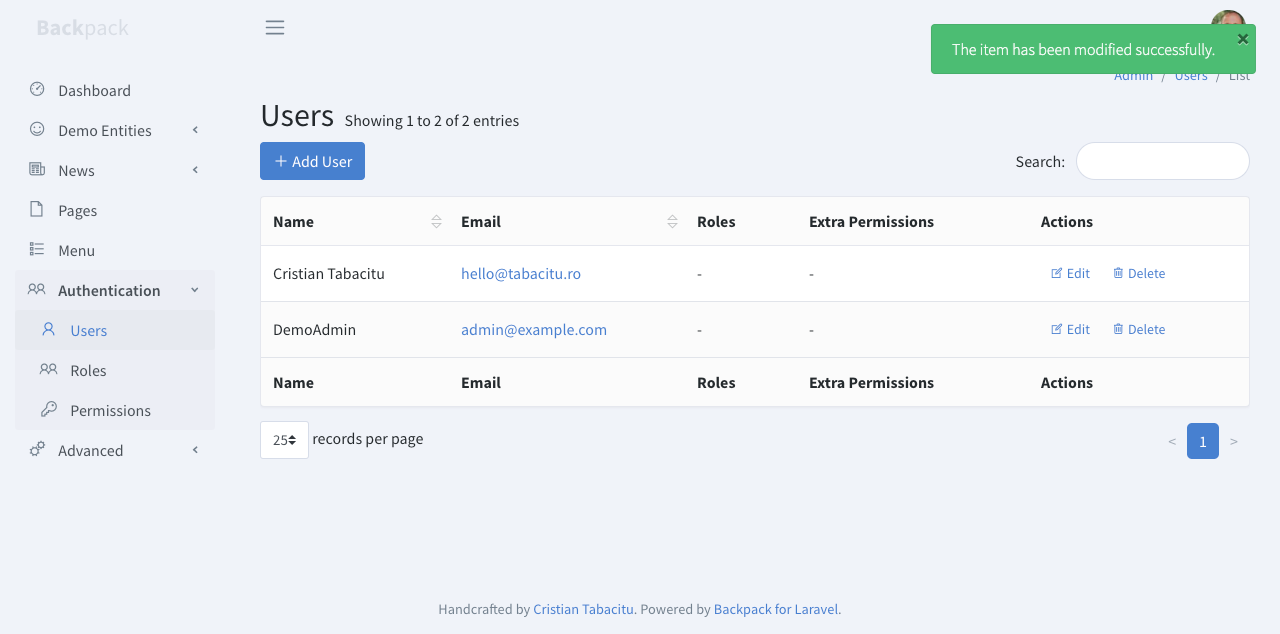
A simple List view might look like this:
But a complex implementation of the ListEntries operation, using Columns, Filters, custom Buttons, custom Operations, responsive table, Details Row, Export Buttons will still look pretty good:
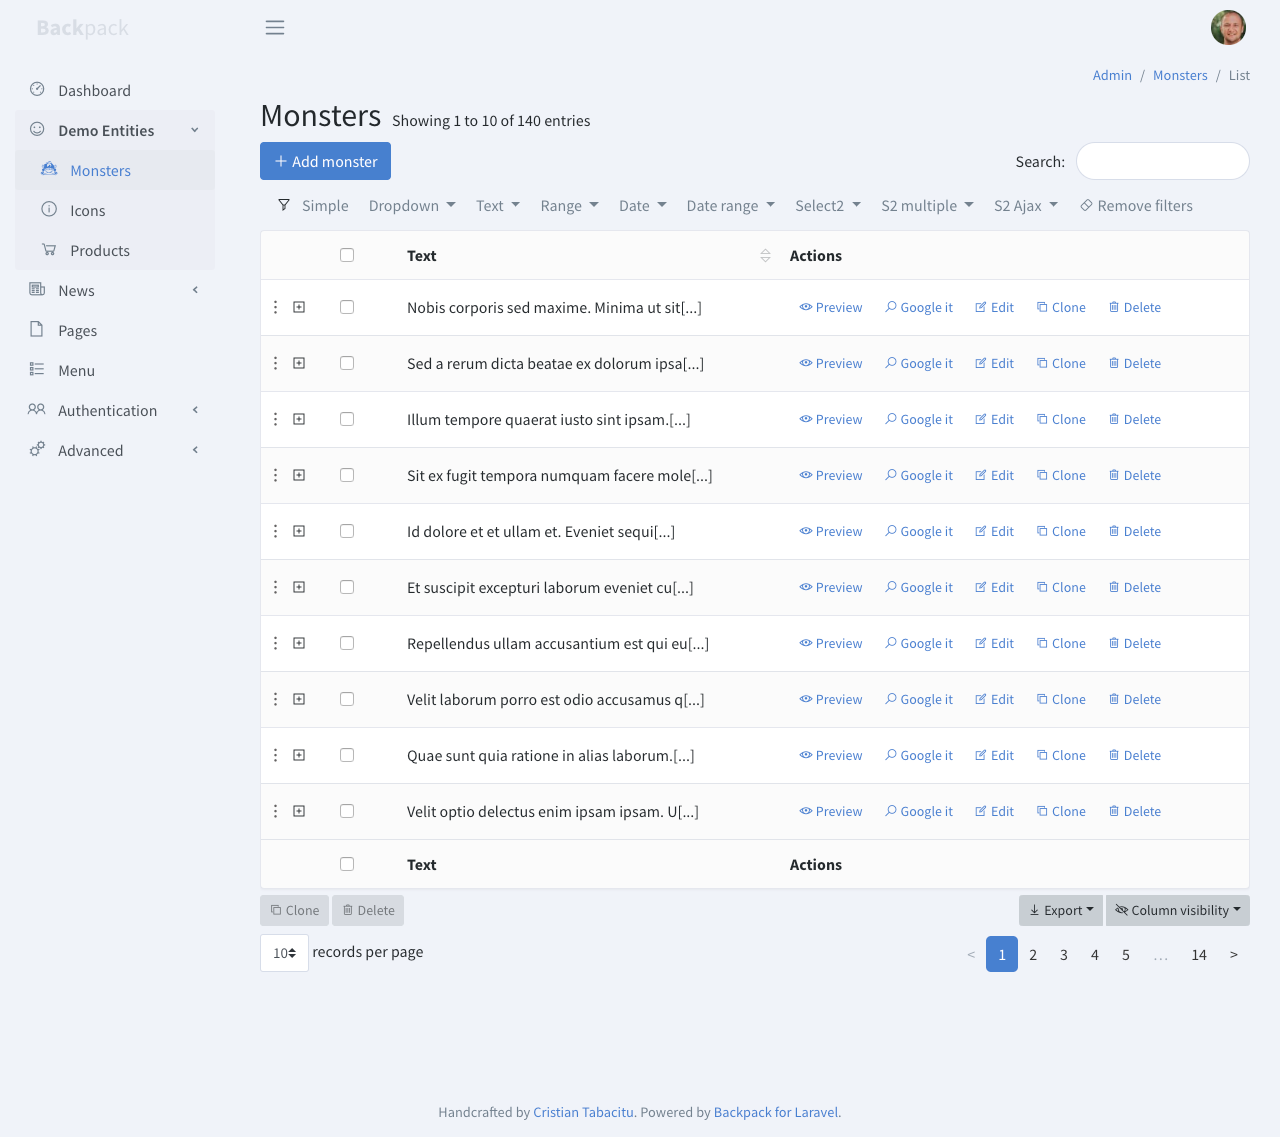
You can easily customize columns, buttons, filters, enable/disable additional features we've built, or overwrite the view and build your own features.
How It Works
The main route leads to EntityCrudController::index(), which shows the table view (list.blade.php. Inside that table view, we're using AJAX to fetch the entries and place them inside DataTables. That AJAX points to the same controller, EntityCrudController::search().
Actions:
index()search()
For views, it uses:
list.blade.phpcolumns/buttons/
How to Use
Use the operation trait on your controller:
<?php

namespace App\Http\Controllers\Admin;

use Backpack\CRUD\app\Http\Controllers\CrudController;

class ProductCrudController extends CrudController
{
    use \Backpack\CRUD\app\Http\Controllers\Operations\ListOperation;

    protected function setupListOperation()
    {
       // CRUD::column('something');
    }
}
Configuration for this operation should be done inside your setupListOperation() method. For a minimum setup, you only need to define the columns you need to show in the table.
Columns
The List operation uses "columns" to determine how to show the attributes of an entry to the user. All column types must have their name, label and type specified, but some could require some additional attributes.
CRUD::column([
  'name' => 'name', // The db column name
  'label' => "Tag Name", // Table column heading
  'type' => 'Text'
]);
Backpack has 22+ column types you can use. Plus, you can easily create your own type of column. Check out the Columns documentation page for a detailed look at column types, API and usage.
Buttons
Buttons are used to trigger other operations. Some point to entirely new routes (create, update, show), others perform the operation on the current page using AJAX (delete).
The List/Show operations have 3 places where buttons can be placed:
top(where the Add button is)line(where the Edit and Delete buttons are)bottom(after the table)
Backpack adds a few buttons by default:
addto thetopstack;editanddeleteto thelinestack;
Merging line buttons into a dropdown
NOTE: The line stack buttons can be converted into a dropdown to improve the available table space.

This is done by setting the lineButtonsAsDropdown setting in list operation to true.
a) For all CrudController (globally) in the config/backpack/operations/list.php file.
b) For a specific CrudController, in its setupListOperation() define CRUD::setOperationSetting('lineButtonsAsDropdown', true);
Available options
Additionally you can control the dropdown behavior with lineButtonsAsDropdownMinimum and lineButtonsAsDropdownShowBefore. By default the dropdown is created no matter how many buttons are present in the line stack. You can change this behavior by setting lineButtonsAsDropdownMinimum to a number. If the number of buttons in the line stack is less than this number, the buttons will not be converted to a dropdown. You can also set lineButtonsAsDropdownShowBefore to a number to drop the buttons after that number of buttons.
CRUD::setOperationSetting('lineButtonsAsDropdown', true);
CRUD::setOperationSetting('lineButtonsAsDropdownMinimum', 5); // if there are less than 5 buttons, don't create the dropdown (default: 1)
CRUD::setOperationSetting('lineButtonsAsDropdownShowBefore', 3); // force the first 3 buttons to be inline, and the rest in a dropdown (default: 0)

// in the above example, when:
// - there are 3 or less buttons, they will be shown inline
// - there are 4 buttons, all 4 will be shown inline
// - there are 5 or more buttons, the first 3 will be shown inline, and the rest in a dropdown
To learn more about buttons, check out the Buttons documentation page.
Filters PRO
Filters show up right before the actual table, and provide a way for the admin to filter the results in the ListEntries table. To learn more about filters, check out the Filters documentation page. Please note that filters are a PRO feature. Check out more differences in FREE vs PRO.
Other Features
Details Row
The details row functionality allows you to present more information in the table view of a CRUD. When enabled, a "+" button will show up next to every row, which on click will expand a "details row" below it, showing additional information.
On click, an AJAX request is sent to the entity/{id}/details route, which calls the showDetailsRow() method on your EntityCrudController. Everything returned by that method is then shown in the details row (usually a blade view).
To use, inside your EntityCrudController you must first enable the functionality in your setupListOperation with: CRUD::enableDetailsRow();
The details_row provided by Backpack display widgets from the details_row section by default. In your setupListOperation you can add widgets to the details_row section to display them in the details row. Inside those widgets you have access to $entry and $crud variables.
public function setupListOperation()
{
    // ...
    Widget::add()->to('details_row')->type('progress')->value(135)->description('Progress')->progress(50);
    // ...
}
Alternatively, if you don't want to use widgets and want to build your own details row, you can:
- Create a file in your resources folder, with the details row template for that entity. For example,
resources/views/admin/articles_details_row.blade.php. You can use the$entryand$crudvariables inside that view, to show information about the current entry. - Tell Backpack what view to load with:
CRUD::setDetailsRowView('admin.articles_details_row')in yoursetupListOperation()method.
NOTE: Even when you don't enableDetailsRow(), Backpack register the necessary routes for it when using the ListOperation. If you are sure you don't want to use details row in that CrudController you can set protected $setupDetailsRowRoute = false; in your CrudController.
Overwrite default details row functionality
Backpack ships with a default details row template. If you want to use the same template across all your cruds you can overwrite it by creating a resources/views/vendor/backpack/crud/inc/details_row.blade.php file. When doing CRUD::enableDetailsRow() this template will be used by default.
You can also create a showDetailsRow($id) method in your CrudController to overwrite the default behaviour.
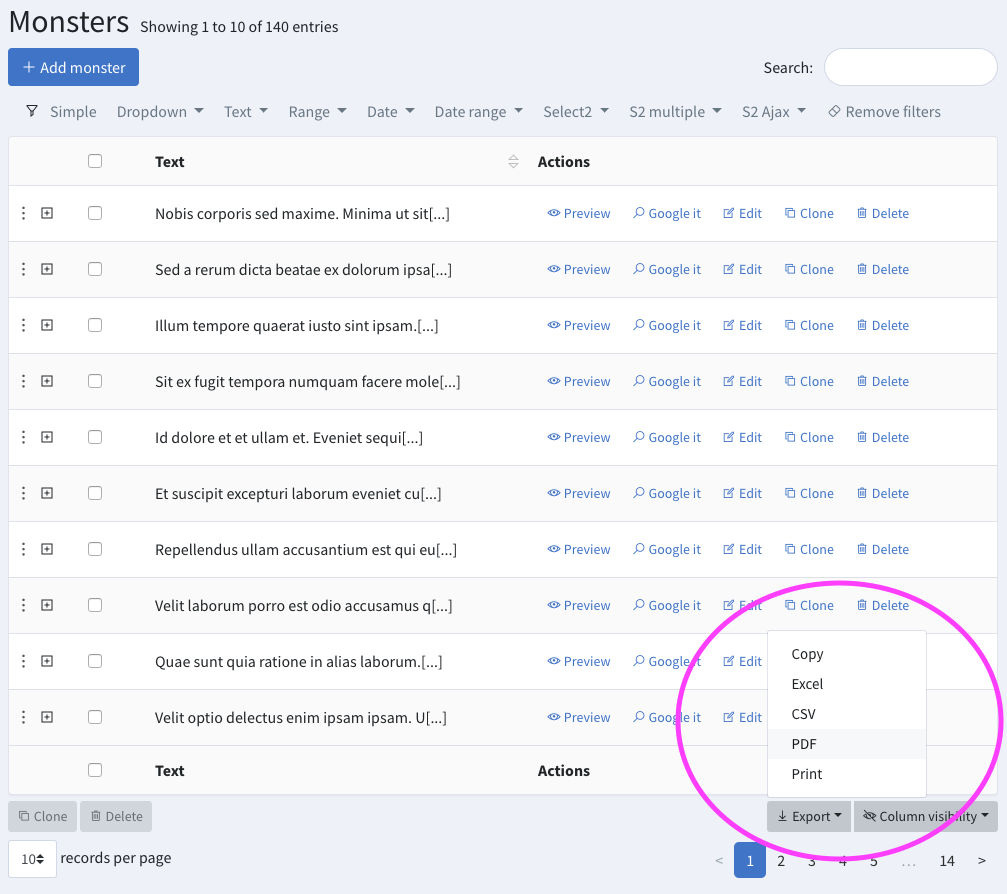
Export Buttons PRO
Exporting the DataTable to PDF, CSV, XLS is as easy as typing CRUD::enableExportButtons(); in your constructor.
Please note that when clicked, the button will export
- the currently visible table columns (except columns marked as
visibleInExport => false); - the columns that are forced to export (with
visibleInExport => trueorexportOnlyColumn => true);
In the UI, the admin can use the "Visibility" button, and the "Items per page" dropdown to manipulate what is visible in the table - and consequently what will be exported.
Export Buttons Rules
Available customization:
'visibleInExport' => true/false
'visibleInTable' => true/false
'exportOnlyColumn' => true
By default, the field will start visible in the table. Users can hide it toggling visibility. Will be exported if visible in the table.
If you force visibleInExport => true you are saying that independent of field visibility in table it will always be exported.
Contrary is visibleInExport => false, even if visible in table, field will not be exported as per developer instructions.
Setting visibleInTable => true will force the field to stay in the table no matter what. User can't hide it. (By default all fields visible in the table will be exported. If you don't want to export this field use with combination with visibleInExport => false)
Using 'visibleInTable' => false will make the field start hidden in the table. But users can toggle it's visibility.
If you want a field that is not on table, user can't show it, but will ALWAYS be exported use the exportOnlyColumn => true. If used will ignore any other custom visibility you defined.
How to use different separator in DataTables (eg. semicolon instead of comma)
If you want to change the separator in dataTable export to use semicolon (;) instead of comma (,) :
Step 1. Copy vendor/backpack/crud/src/resources/views/crud/inc/export_buttons.blade.php to resources/views/vendor/backpack/crud/inc/export_buttons.blade.php
Step 2. Change it in your dataTableConfiguration:
{
    name: 'csvHtml5',
    extend: 'csvHtml5',
    fieldSeparator: ';',
    exportOptions: {
        columns: function ( idx, data, node ) {
            var $column = crud.table.column( idx );
                return  ($column.visible() && $(node).attr('data-visible-in-export') != 'false') || $(node).attr('data-force-export') == 'true';
        }
    },
    action: function(e, dt, button, config) {
        crud.responsiveToggle(dt);
        $.fn.DataTable.ext.buttons.csvHtml5.action.call(this, e, dt, button, config);
        crud.responsiveToggle(dt);
    }
},
Custom Query
By default, all entries are shown in the ListEntries table, before filtering. If you want to restrict the entries to a subset, you can use the methods below in your EntityCrudController's setupListOperation() method:
// Change what entries are shown in the table view.
// This changes all queries on the table view,
// as opposed to filters, who only change it when that filter is applied.
CRUD::addClause('active'); // apply a local scope
CRUD::addClause('type', 'car'); // apply local dynamic scope
CRUD::addClause('where', 'name', '=', 'car');
CRUD::addClause('whereName', 'car');
CRUD::addClause('whereHas', 'posts', function($query) {
     $query->activePosts();
 });
CRUD::groupBy();
CRUD::limit();
CRUD::orderBy(); // please note it's generally a good idea to use crud->orderBy() inside "if (!CRUD::getRequest()->has('order')) {}"; that way, your custom order is applied ONLY IF the user hasn't forced another order (by clicking a column heading)

// The above will change the used query, so the ListOperation will say
// "Showing 140 entries, filtered from 1.000 entries". If you want to
// that, and make it look like only those entries are in the databse,
// you can change the baseQuery instead, by using:
CRUD::addBaseClause('where', 'name', '=', 'car');
NOTE: The query constraints added in the setup() method operation cannot be reset by Reset Button. They are permanent for that CRUD, for all operation.
Custom Order
By default, the List operation gets sorted by the primary key (usually id), descending. You can modify this behaviour by defining your own ordering:
protected function setupListOperation()
{
    //change default order key
    if (! $this->crud->getRequest()->has('order')){
        $this->crud->orderBy('updated_at', 'desc');
    }
}NOTE: We only apply the orderBy when the request don't have an order key.
This is because we need to keep the ability to order in the Datatable Columns.
If we didn't conditionally add the orderBy, it would become a permanent order that can't be cleared by the Datatables Reset button and applied to every request.
Responsive Table
If your CRUD table has more columns than can fit inside the viewport (on mobile / tablet or smaller desktop screens), unimportant columns will start hiding and an expansion icon (three dots) will appear to the left of each row. We call this behaviour "responsive table", and consider this to be the best UX. By behaviour we consider the 1st column the most important, then 2nd, then 3rd, etc; the "actions" column is considered as important as the 1st column. You can of course change the importance of columns.
If you do not like this, you can toggle off the responsive behaviour for all CRUD tables by changing this config value in your config/backpack/crud.php to false:
    // enable the datatables-responsive plugin, which hides columns if they don't fit?
    // if not, a horizontal scrollbar will be shown instead
    'responsive_table' => true
To turn off the responsive table behaviour for just one CRUD panel, you can use CRUD::disableResponsiveTable() in your setupListOperation() method.
Persistent Table
By default, ListEntries will NOT remember your filtering, search and pagination when you leave the page. If you want ListEntries to do that, you can enable a ListEntries feature we call persistent_table.
This will take the user back to the filtered table after adding an item, previewing an item, creating an item or just browsing around, preserving the table just like he/she left it - with the same filtering, pagination and search applied. It does so by saving the pagination, search and filtering for an arbitrary amount of time (by default: forever).
To use persistent_table you can:
- enable it for all CRUDs with the config option
'persistent_table' => truein yourconfig/backpack/crud.php; - enable it inside a particular crud controller with
CRUD::enablePersistentTable(); - disable it inside a particular crud controller with
CRUD::disablePersistentTable();
You can configure the persistent table duration in
config/backpack/crud.phpunderoperations > list > persistentTableDuration. False is forever. Set any amount of time you want in minutes. Note: you can configure it's expiring time on a per-crud basis usingCRUD::setOperationSetting('persistentTableDuration', 120); in your setupListOperation()for 2 hours persistency. The default isfalsewhich means forever.
Large Tables (millions of entries)
By default, ListEntries uses a few features that are not appropriate for Eloquent models with millions (or billions) of records:
- it shows the total number of entries (which can be a very slow query for big tables);
- it paginates using 1/2/3 page buttons, instead of just previous & next;
Starting with Backpack v5.4 we have an easy way to disable both of those, in order to make the ListOperation super-fast on big database tables. You just need to do:
protected function setupListOperation()
{
// ...
CRUD::setOperationSetting('showEntryCount', false);
// ...
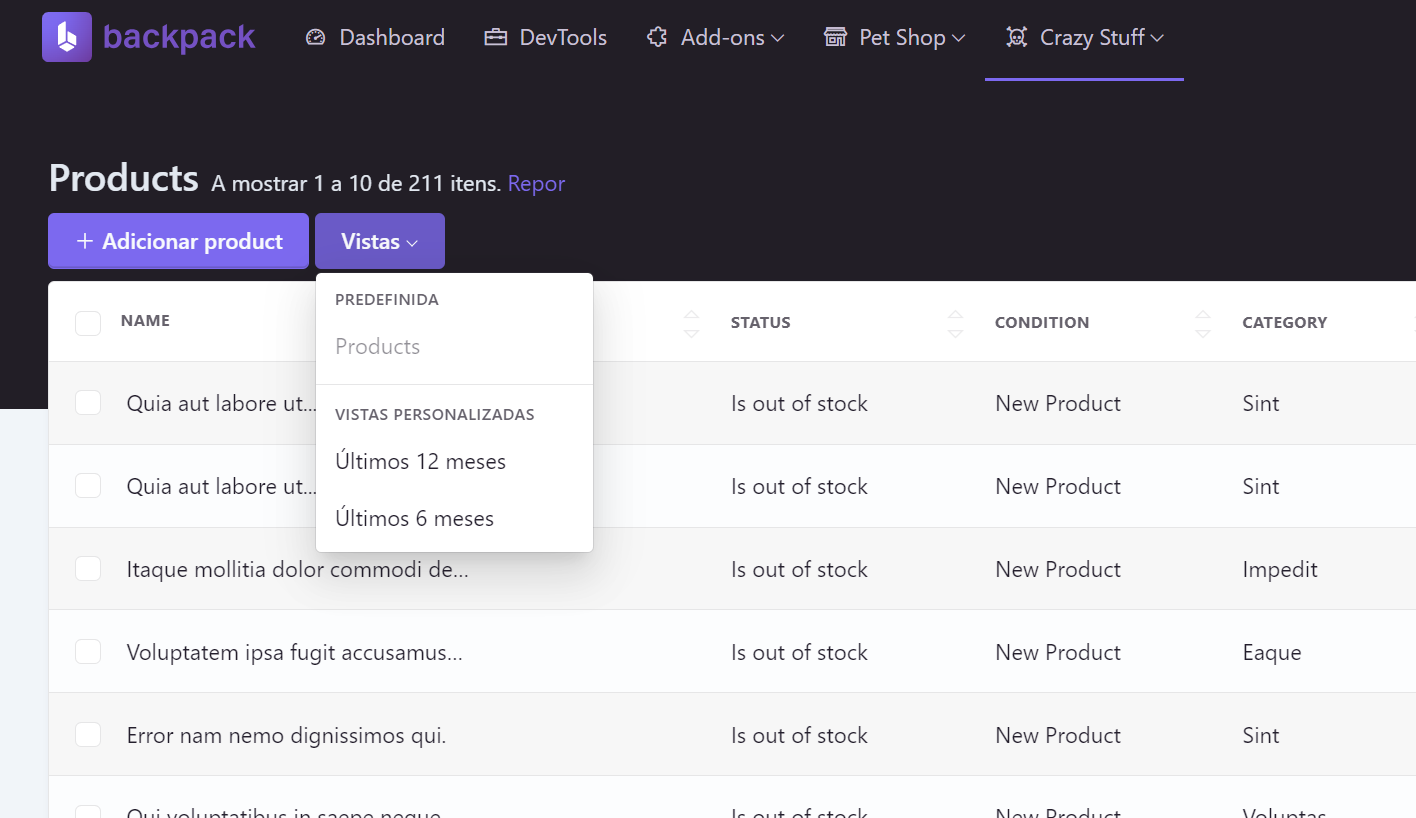
}Custom Views (for ListOperation) PRO
You might need different "views" or "pages" for your ListOperation, where each view has some filters/columns. For example:
- default
Productlist view - show all products; - different
Best Sold Productslist view; - different
Products for accountinglist view
The CustomViews operation helps you do exactly that - create alternative "views" for your ListOperation. Your admin will get a new dropdown right next to the "Add" button, to toggle between the different list views:
To do that:
- Use the
CustomViewOperationtrait in your CrudController:
class YourCrudController extends CrudController
{
    ...
use \Backpack\Pro\Http\Controllers\Operations\CustomViewOperation;- Add
$this->runCustomViews()at the end of yoursetupListOperation()method. That will look for all the views you have defined. If you want to costumize the the title of your views, you can pass an array with the key being the name of the method and the value being the title of the view:
public function setupListOperation()
{
    // ...

    $this->runCustomViews();
    // or
    $this->runCustomViews([
        'setupLast12MonthsView' => __('Last 12 months'),
        'setupLast6MonthsView' => __('Last 6 months'),
    ]);
}- Add the view logic you want to use in your CrudController. This is meant to be run after all the the
setupListOperation()columns, filters, buttons, etc. have been defined, so it should perform operations over the current state, like add or remove, columns, filters, buttons, etc, depending on your needs for that view.
public function setupLast6MonthsView()
{
    // ...
}

public function setupLast12MonthsView()
{
    // ...
}
NOTE: The CustomView will apply the query "on top" of the current $crud->query. If you would like to use a "fresh query" for your custom view you can use the CRUD::setQuery() method that will overwrite the previous set query.
How to add custom sections (aka. Widgets)
Widgets (aka cards, aka charts, aka graphs) provide a simple way to insert blade files into admin panel pages. You can use them to insert cards, charts, notices or custom content into pages. You can use the default widget types or create your own custom widgets.
Backpack's default template includes two sections where you can push widgets:
before_contentafter_content
To use widgets on list operation, define them inside setupListOperation() function.
public function setupListOperation()
{
    // dynamic data to render in the following widget
    $userCount = \App\Models\User::count();

    //add div row using 'div' widget and make other widgets inside it to be in a row
    Widget::add()->to('before_content')->type('div')->class('row')->content([

        //widget made using fluent syntax
        Widget::make()
            ->type('progress')
            ->class('card border-0 text-white bg-primary')
            ->progressClass('progress-bar')
            ->value($userCount)
            ->description('Registered users.')
            ->progress(100 * (int)$userCount / 1000)
            ->hint(1000 - $userCount . ' more until next milestone.'),

        //widget made using the array definition
        Widget::make(
            [
                'type'       => 'card',
                'class'   => 'card bg-dark text-white',
                'wrapper' => ['class' => 'col-sm-3 col-md-3'],
                'content'    => [
                    'header' => 'Example Widget',
                    'body'   => 'Widget placed at "before_content" secion in same row',
                ]
            ]
        ),
    ]);

    //you can also add Script & CSS to your page using 'script' & 'style' widget
    Widget::add()->type('script')->stack('after_scripts')->content('https://code.jquery.com/ui/1.12.0/jquery-ui.min.js');
    Widget::add()->type('style')->stack('after_styles')->content('https://cdn.jsdelivr.net/npm/@shoelace-style/[email protected]/dist/themes/light.css');
}
Output:
- Using
before_content:

- Using
after_content

How to Overwrite
The main route leads to EntityCrudController::index(), which loads list.blade.php. Inside that table view, we're using AJAX to fetch the entries and place them inside a DataTables. The AJAX points to the same controller, EntityCrudController::search().
The View
You can change how the list.blade.php file looks and works, by just placing a file with the same name in your resources/views/vendor/backpack/crud/list.blade.php. To quickly do that, run:
php artisan backpack:publish crud/listKeep in mind that by publishing this file, you won't be getting any updates we'll be pushing to it.
The Operation Logic
Getting and showing the information is done inside the index() method. Take a look at the CrudController::index() method (your EntityCrudController is extending this CrudController) to see how it works.
To overwrite it, just create an index() method in your EntityCrudController.
The Search Logic
An AJAX call is made to the search() method:
- when entries are shown in the table;
- when entries are filtered in the table;
- when search is performed on the table;
- when pagination is performed on the table;
You can of course overwrite this search() method by just creating one with the same name in your EntityCrudController. In addition, you can overwrite what a specific column is searching through (and how), by using the searchLogic attribute on columns.
How to Debug
Because the entries are fetched using AJAX requests, debugging the ListOperation can be a little difficult. Fortunately, we've thought of that.
Errors in AJAX requests
If an error is thrown during the AJAX request, Backpack will show that error in a modal. Easy-peasy.
See query, models, views, exceptions in AJAX requests
If you want to see or optimize database queries, you can do that using any Laravel tool that analyzes AJAX request. For example, here's how to analyze AJAX requests using the excellent barryvdh/laravel-debugbar. You just click the Folder icon to the right, and you select the latest request. Debugbar will then show you all info for that last AJAX request:
