Fields
About
Field types define how the admin can manipulate an entry's values. They're used by the Create and Update operations.
Think of the field type as the type of input: <input type="text" />. But for most entities, you won't just need text inputs - you'll need datepickers, upload buttons, 1-n relationship, n-n relationships, textareas, etc.
We have a lot of default field types, detailed below. If you don't find what you're looking for, you can create a custom field type. Or if you just want to tweak a default field type a little bit, you can overwrite default field types.
NOTE: Starting with Backpack 4.1, if the field name is the exact same as a relation method in the model, Backpack will assume you're adding a field for that relationship and infer relation attributes from it. To disable this behaviour, you can use
'entity' => falsein your field definition.
Fields API
To manipulate fields, you can use the methods below. The action will be performed on the currently running operation. So make sure you run these methods inside setupCreateOperation(), setupUpdateOperation() or in setup() inside operation blocks:
// add a field to both Create and Update operation
$this->crud->addField($field_definition_array);

// add a field only to the Update operation
$this->crud->addField($field_definition_array);

// shorthand: add a text field to both Create and Update operations
$this->crud->addField('db_column_name');

// add multiple fields
$this->crud->addFields([$field_definition_array_1, $field_definition_array_2]);

// change the attributes of a field
$this->crud->modifyField($name, $modifs_array);

// remove a field from both operations
$this->crud->removeField('name');

// remove multiple fields from both operations
$this->crud->removeFields($array_of_names);

// remove all fields from all operations
$this->crud->removeAllFields();

// FIELD ORDER

// add a field before a given field
$this->crud->addField($field_definition_array)->beforeField('name');

// add a field after a given field
$this->crud->addField($field_definition_array)->afterField('name');


// -------------------
// New in Backpack 4.1
// -------------------
// add a field with this name
$this->crud->field('price');

// change the type attribute on the 'price' field
$this->crud->field('price')->type('number');
Field Attributes
Mandatory Field Attributes
The only attribute that's mandatory when you define a field is its name, which will be used:
- inside the inputs, as
<input name='your_db_column' />; - to store the information in the database, so your
nameshould correspond to a database column (if the field type doesn't have different instructions);
Every other field attribute other than name, Backpack 4.1+ will try to guess.
Recommended Field Attributes
Normally developers define the following attributes for all fields:
- the
nameof the column in the database (ex: "title") - the human-readable
labelfor the input (ex: "Title") - the
typeof the input (ex: "text")
So at minimum, your field definition array should look like:
[
    'name'  => 'description',
    'type'  => 'textarea',
    'label' => 'Article Description',
]
Please note that label and type are not mandatory, just recommended:
labelcan be omitted, and Backpack will try to construct it from thename;typecan be omitted, and Backpack will try to guess it from the column type, or if there's a relationship on the Model with the samename;
Optional - Field Attributes for Presentation Purposes
There are a few optional attributes on most default field types, that you can use to easily achieve a few common customizations:
[
    'prefix'     => '',
    'suffix'     => '',
    'default'    => 'some value', // set a default value
    'hint'       => 'Some hint text', // helpful text, shows up after the input
    'attributes' => [
       'placeholder' => 'Some text when empty',
       'class'       => 'form-control some-class',
       'readonly'    => 'readonly',
       'disabled'    => 'disabled',
     ], // change the HTML attributes of your input
     'wrapper'   => [
        'class'      => 'form-group col-md-12'
     ], // change the HTML attributes for the field wrapper - mostly for resizing fields
]
These will help you:
- prefix - add a text or icon before the actual input;
- suffix - add a text or icon after the actual input;
- default - specify a default value for the input, on create;
- hint - add descriptive text for this input;
- attributes - change or add actual HTML attributes of the input (ex: readonly, disabled, class, placeholder, etc);
- wrapper - change or add actual HTML attributes to the div that contains the input;
Optional - Fake Field Attributes (stores fake attributes as JSON in the database)
In case you want to store insignificant information for an entry that doesn't need a database column, you can add any number of Fake Fields, and all their information will be stored inside one column in the db, as JSON. By default, an extras column is assumed on the database table, but you can change that.
Step 1. Use the fake attribute on your field:
[
    'name'     => 'name', // JSON variable name
    'label'    => "Tag Name", // human-readable label for the input

    'fake'     => true, // show the field, but don't store it in the database column above
    'store_in' => 'extras' // [optional] the database column name where you want the fake fields to ACTUALLY be stored as a JSON array
],
Step 2. On your model, make sure the db columns where you store the JSONs (by default only extras):
- are in your
$fillableproperty; - are on a new
$fakeColumnsproperty (create it now); - are casted as array in
$casts;
If you need your fakes to also be translatable, remember to also place
extrasin your model's$translatableproperty and remove it from$casts.
Example:
[
    'name'     => 'meta_title',
    'label'    => "Meta Title",
    'fake'     => true,
    'store_in' => 'metas' // [optional]
],
[
    'name'     => 'meta_description',
    'label'    => "Meta Description",
    'fake'     => true,
    'store_in' => 'metas' // [optional]
],
[
    'name'     => 'meta_keywords',
    'label'    => "Meta Keywords",
    'fake'     => true,
    'store_in' => 'metas' // [optional]
],
In this example, these 3 fields will show up in the create & update forms, the CRUD will process as usual, but in the database these values won't be stored in the meta_title, meta_description and meta_keywords columns. They will be stored in the metas column as a JSON array:
{"meta_title":"title","meta_description":"desc","meta_keywords":"keywords"}If the store_in attribute wasn't used, they would have been stored in the extras column.
Optional - Tab Attribute Splits Forms into Tabs
You can now split your create/edit inputs into multiple tabs.
In order to use this feature, you just need to specify the tab name for each of your fields. Example:
// select_from_array
$this->crud->addField([
    'name'            => 'select_from_array',
    'label'           => "Select from array",
    'type'            => 'select_from_array',
    'options'         => ['one' => 'One', 'two' => 'Two', 'three' => 'Three'],
    'allows_null'     => false,
    'allows_multiple' => true,
    'tab'             => 'Tab name here',
]);
If you forget to specify a tab name for a field, Backpack will place it above all tabs.
Optional - Attributes for Fields Containing Related Entries
When a field works with related entities (relationships like BelongsTo, HasOne, HasMany, BelongsToMany, etc), Backpack needs to know how the current model (being create/edited) and the other model (that shows up in the field) are related. And it stores that information in a few additional field attributes, right after you add the field.
Normally, Backpack 4.1+ will guess all this relationship information for you. If you have your relationships properly defined in your Models, you can just use a relationship field the same way you would a normal field. Pretend that the method in your Model that defines your relationship is a real column, and Backpack will do all the work for you.
But if you want to overwrite any of the relationship attributes Backpack guesses, here they are:
entity- points to the method on the model that contains the relationship; having this defined, Backpack will try to guess from it all other field attributes; ex:categoryortags;model- the classname (including namespace) of the related model (ex:App\Models\Category); usually deduced from the relationship function in the model;attribute- the attribute on the related model (aka foreign attribute) that will be show to the user; for example, you wouldn't want a dropdown of categories showing IDs - no, you'd want to show the category names; in this case, theattributewill bename; usually deduced using the identifiable attribute functionality explained below;multiple- boolean, allows the user to pick one or multiple items; usually deduced depending on whether it's a 1-to-n or n-n relationship;pivot- boolean, instructs Backpack to store the information inside a pivot table; usually deduced depending on whether it's a 1-to-n or n-n relationship;relation_type- text, deduced fromentity; not a good idea to overwrite;
If you do need a field that contains relationships to behave a certain way, it's usually enough to just specify a different entity. However, you can specify any of the attributes above, and Backpack will take your value for it, instead of trying to guess one.
Identifiable Attribute for Relationship Fields
Fields that work with relationships will allow you to select which attribute on the related entry you want to show to the user. All relationship fields (relationship, select, select2, select_multiple, select2_multiple, select2_from_ajax, select2_from_ajax_multiple) let you define the attribute for this specific purpose.
For example, when the admin creates an Article they'll have to select a Category from a dropdown. It's important to show an attribute for Category that will help the admin easily identify the category, even if it's not the ID. In this example, it would probably be the category name - that's what you'd like the dropdown to show.
In Backpack, you can explicitly define this, by giving the field an attribute. But you can also NOT explicitly define this - Backpack will try to guess it. If you don't like what Backpack guessed would be a good identifiable attribute, you can either:
- (A) explicitly define an
attributefor that field, or - (B) you can specify the identifiable attribute in your model, and all fields will pick this up:
use Backpack\CRUD\app\Models\Traits\CrudTrait;

class Category
{
    use CrudTrait;

    // you can define this

    /**
     * Attribute shown on the element to identify this model.
     *
     * @var string
     */
    protected $identifiableAttribute = 'title';

    // or for more complicated use cases you can do

    /**
     * Get the attribute shown on the element to identify this model.
     *
     * @return string
     */
    public function identifiableAttribute()
    {
        // process stuff here
        return 'whatever_you_want_even_an_accessor';
    }
}
Default Field Types
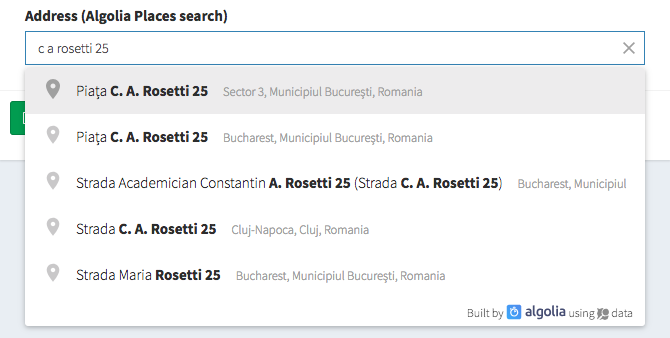
address_algolia
Use Algolia Places autocomplete to help users type their address faster. With the store_as_json option, it will store the address, postcode, city, country, latitude and longitude in a JSON in the database. Without it, it will just store the address string. For information stored as JSON in the database, it's recommended that you use attribute casting to array or object. That way, every time you get the info from the database you'd get it in a usable format.
[   // Address algolia
    'name'          => 'address',
    'label'         => 'Address',
    'type'          => 'address_algolia',
    // optional
    'store_as_json' => true
],
Algolia is killing Places. Please note that Algolia Places will stop working in May 2022, as reported in this announcement. For that reason, it's probably a good idea to use the
address_googlefield instead (it's right after this one).
Input preview:
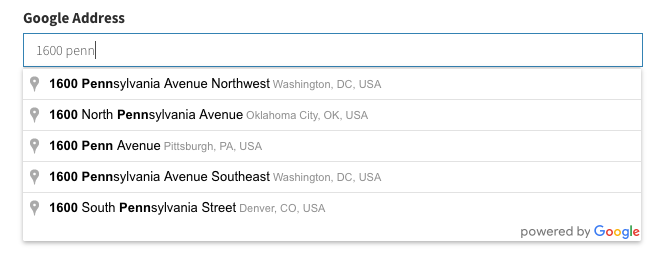
address_google
Use Google Places Search to help users type their address faster. With the store_as_json option, it will store the address, postcode, city, country, latitude and longitude in a JSON in the database. Without it, it will just store the complete address string.
[   // Address google
    'name'          => 'address',
    'label'         => 'Address',
    'type'          => 'address_google',
    // optional
    'store_as_json' => true
],
Using Google Places API is dependent on using an API Key. Please get an API key - you do have to configure billing, but you qualify for $200/mo free usage, which covers most use cases. Then copy-paste that key as your services.google_places.key value. So inside your config/services.php please add the items below:
'google_places' => [
    'key' => 'the-key-you-got-from-google-places'
],
Use attribute casting. For information stored as JSON in the database, it's recommended that you use attribute casting to
arrayorobject. That way, every time you get the info from the database you'd get it in a usable format. Also, it is heavily recommended that your database column can hold a large JSON - so usetextrather thanstringin your migration (in MySQL this translates totextinstead ofvarchar).
Input preview:
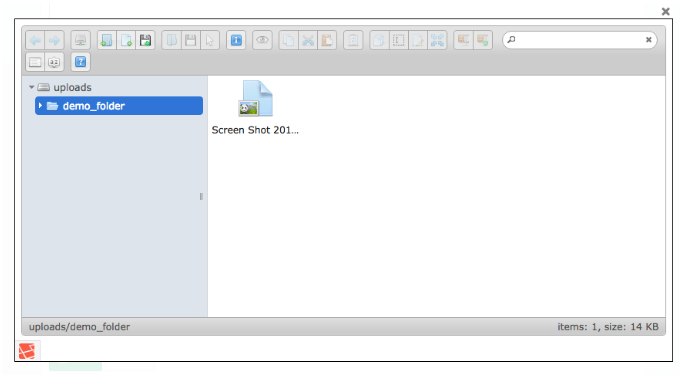
browse
This button allows the admin to open elFinder and select a file from there. Run composer require backpack/filemanager && php artisan backpack:filemanager:install to install FileManager, then you can use the field:
[   // Browse
    'name'  => 'image',
    'label' => 'Image',
    'type'  => 'browse'
],
Input preview:

Onclick preview:
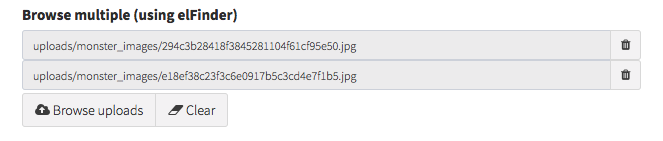
browse_multiple
Open elFinder and select multiple files from there. Run composer require backpack/filemanager && php artisan backpack:filemanager:install to install FileManager, then you can use the field:
[   // Browse multiple
    'name'          => 'files',
    'label'         => 'Files',
    'type'          => 'browse_multiple',
    // 'multiple'   => true, // enable/disable the multiple selection functionality
    // 'sortable'   => false, // enable/disable the reordering with drag&drop
    // 'mime_types' => null, // visible mime prefixes; ex. ['image'] or ['application/pdf']
],
The field assumes you've cast your attribute as array on your model. That way, when you do $entry->files you get a nice array.
NOTE: If you use multiple => false you should NOT cast your attribute as array
Input preview:
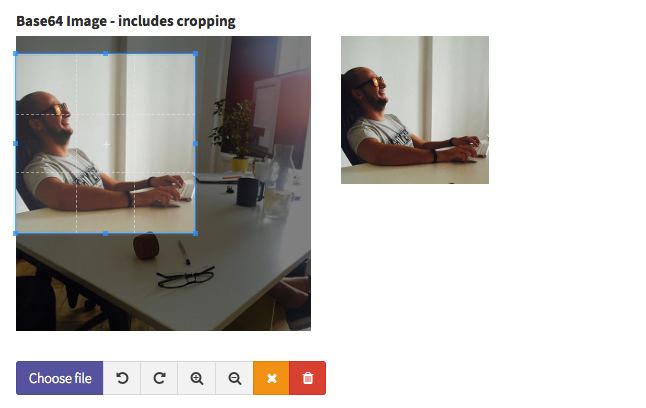
base64_image
Upload an image and store it in the database as Base64. Notes:
- make sure the column type is LONGBLOB;
- detailed instructions and customizations here;
// base64_image
$this->crud->addField([
    'label'        => "Profile Image",
    'name'         => "image",
    'filename'     => "image_filename", // set to null if not needed
    'type'         => 'base64_image',
    'aspect_ratio' => 1, // set to 0 to allow any aspect ratio
    'crop'         => true, // set to true to allow cropping, false to disable
    'src'          => NULL, // null to read straight from DB, otherwise set to model accessor function
]);
Input preview:
checkbox
Checkbox for true/false.
[   // Checkbox
    'name'  => 'active',
    'label' => 'Active',
    'type'  => 'checkbox'
],
Input preview:

checklist
Show a list of checkboxes, for the user to check one or more of them.
[   // Checklist
    'label'     => 'Roles',
    'type'      => 'checklist',
    'name'      => 'roles',
    'entity'    => 'roles',
    'attribute' => 'name',
    'model'     => "Backpack\PermissionManager\app\Models\Role",
    'pivot'     => true,
],
Note: If you don't use a pivot table (pivot = false), you need to cast your db column as array in your model,by adding your column to your model's $casts.
Input preview:

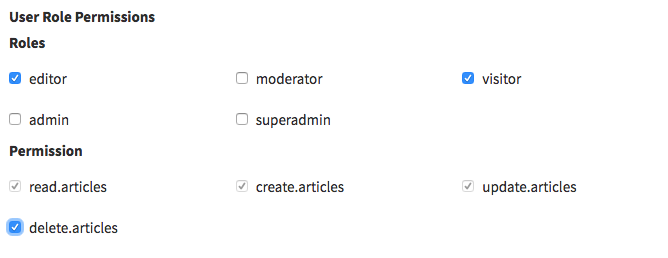
checklist_dependency
[   // two interconnected entities
    'label'             => 'User Role Permissions',
    'field_unique_name' => 'user_role_permission',
    'type'              => 'checklist_dependency',
    'name'              => ['roles', 'permissions'], // the methods that define the relationship in your Models
    'subfields'         => [
        'primary' => [
            'label'            => 'Roles',
            'name'             => 'roles', // the method that defines the relationship in your Model
            'entity'           => 'roles', // the method that defines the relationship in your Model
            'entity_secondary' => 'permissions', // the method that defines the relationship in your Model
            'attribute'        => 'name', // foreign key attribute that is shown to user
            'model'            => "Backpack\PermissionManager\app\Models\Role", // foreign key model
            'pivot'            => true, // on create&update, do you need to add/delete pivot table entries?]
            'number_columns'   => 3, //can be 1,2,3,4,6
        ],
        'secondary' => [
            'label'          => 'Permission',
            'name'           => 'permissions', // the method that defines the relationship in your Model
            'entity'         => 'permissions', // the method that defines the relationship in your Model
            'entity_primary' => 'roles', // the method that defines the relationship in your Model
            'attribute'      => 'name', // foreign key attribute that is shown to user
            'model'          => "Backpack\PermissionManager\app\Models\Permission", // foreign key model
            'pivot'          => true, // on create&update, do you need to add/delete pivot table entries?]
            'number_columns' => 3, //can be 1,2,3,4,6
        ],
    ],
],
Input preview:
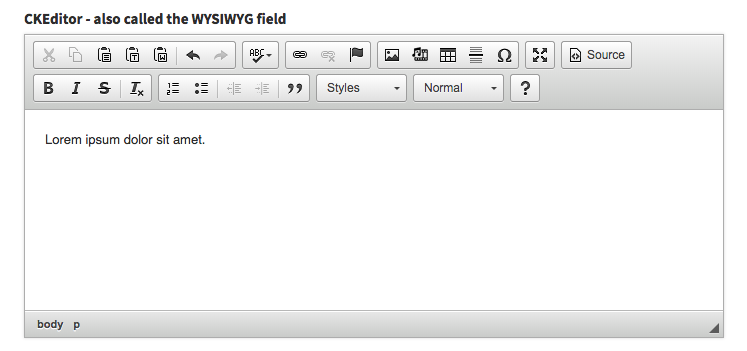
ckeditor
Show a wysiwyg CKEditor to the user.
[   // CKEditor
    'name'          => 'description',
    'label'         => 'Description',
    'type'          => 'ckeditor',

    // optional:
    'extra_plugins' => ['oembed', 'widget'],
    'options'       => [
        'autoGrow_minHeight'   => 200,
        'autoGrow_bottomSpace' => 50,
        'removePlugins'        => 'resize,maximize',
    ]
],
If you'd like to be able to select files from elFinder, you need to also run composer require backpack/filemanager to install elFinder.
Input preview:
color
[   // Color
    'name'    => 'background_color',
    'label'   => 'Background Color',
    'type'    => 'color',
    'default' => '#000000',
],
Input preview:

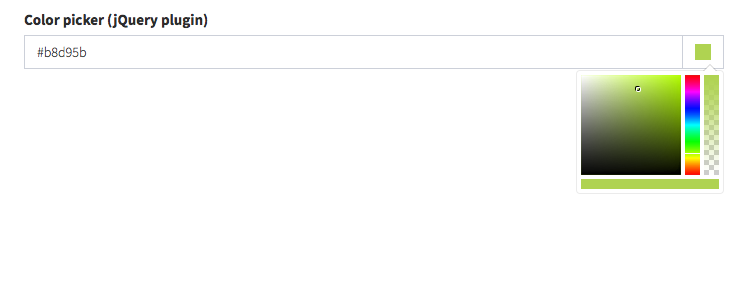
color_picker
Show a pretty colour picker using Bootstrap Colorpicker.
[   // color_picker
    'label'                => 'Background Color',
    'name'                 => 'background_color',
    'type'                 => 'color_picker',
    'default'              => '#000000',

    // optional
    // Anything your define inside `color_picker_options` will be passed as JS
    // to the JavaScript plugin. For more information about the options available
    // please see the plugin docs at:
    //  ### https://itsjavi.com/bootstrap-colorpicker/module-options.html
    'color_picker_options' => [
        'customClass' => 'custom-class',
        'horizontal' => true,
        'extensions' => [
            [
                'name' => 'swatches', // extension name to load
                'options' => [ // extension options
                    'colors' => [
                        'primary' => '#337ab7',
                        'success' => '#5cb85c',
                        'info' => '#5bc0de',
                        'warning' => '#f0ad4e',
                        'danger' => '#d9534f'
                    ],
                    'namesAsValues' => false
                ]
            ]
        ]
    ]
],
Input preview:
custom_html
Allows you to insert custom HTML in the create/update forms. Usually used in forms with a lot of fields, to separate them using h1-h5, hr, etc, but can be used for any HTML.
[ // CustomHTML
'name' => 'separator',
'type' => 'custom_html',
'value' => '<hr>'
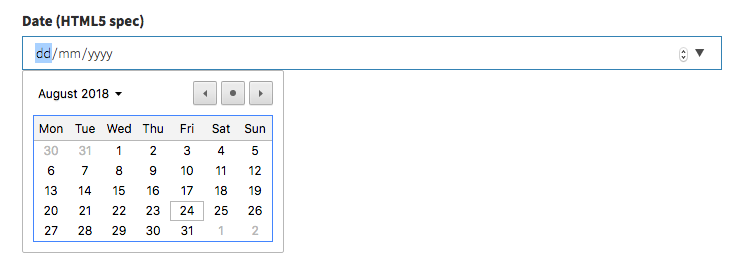
],date
[   // Date
    'name'  => 'birthday',
    'label' => 'Birthday',
    'type'  => 'date'
],
Input preview:
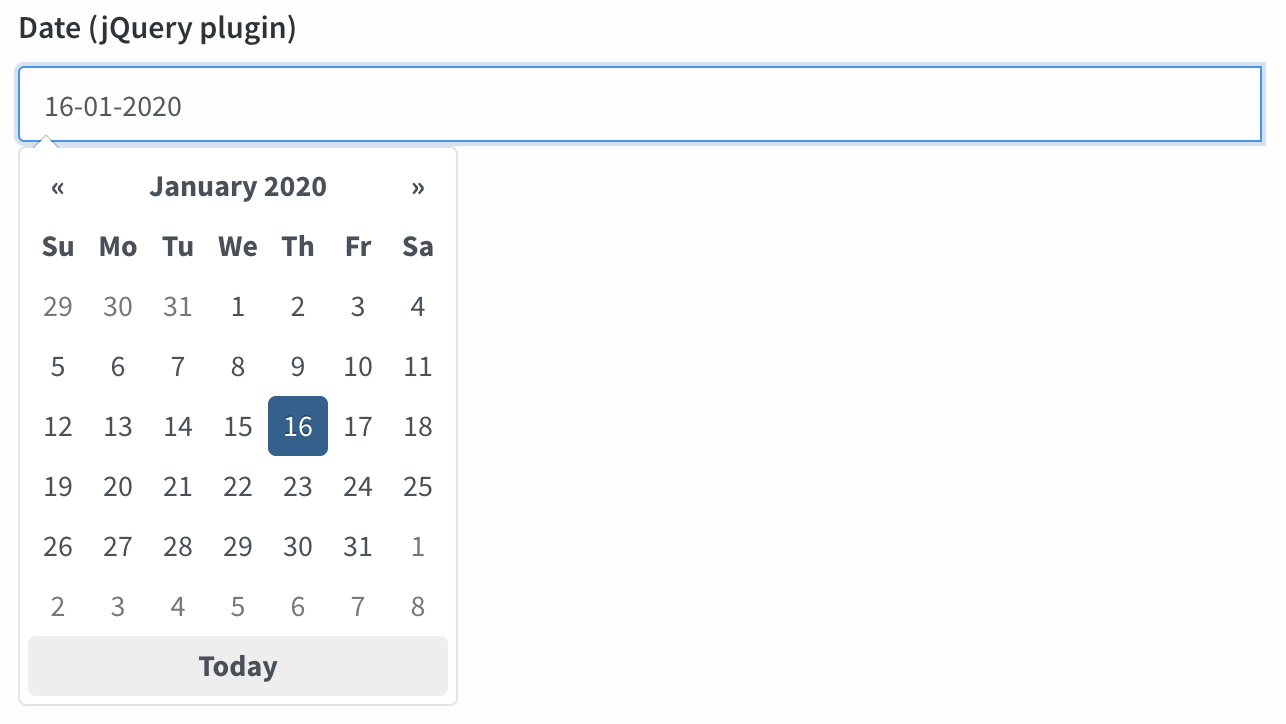
date_picker
Show a pretty Bootstrap Datepicker.
[   // date_picker
   'name'  => 'date',
   'type'  => 'date_picker',
   'label' => 'Date',

   // optional:
   'date_picker_options' => [
      'todayBtn' => 'linked',
      'format'   => 'dd-mm-yyyy',
      'language' => 'fr'
   ],
],
Please note it is recommended that you use attribute casting on your model (cast to date).
Input preview:
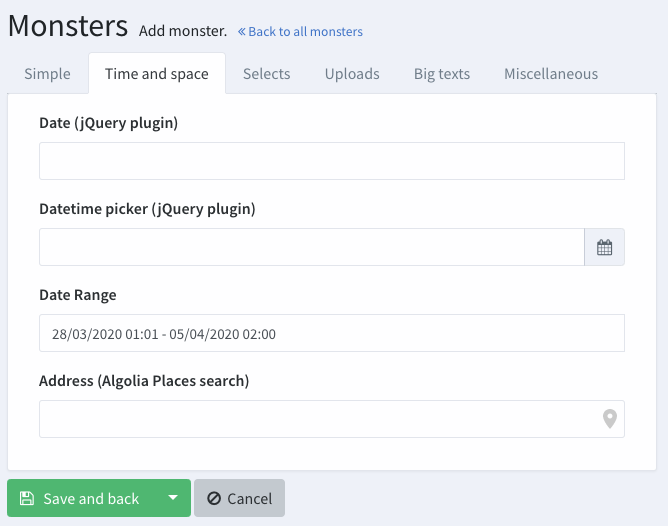
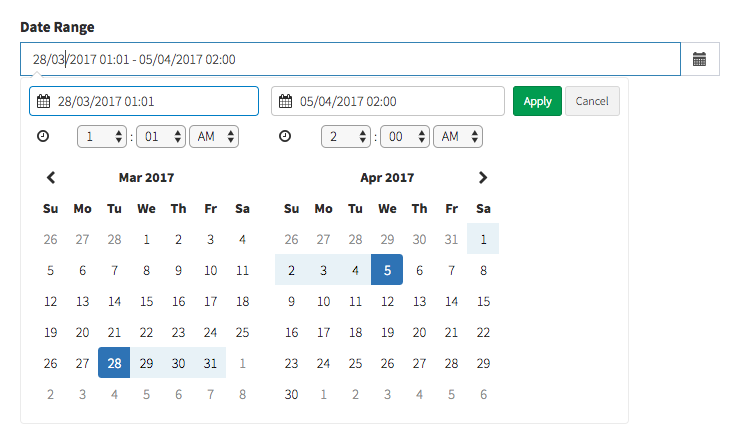
date_range
Starting with Backpack\CRUD 3.1.59
Show a DateRangePicker and let the user choose a start date and end date.
[   // date_range
    'name'  => ['start_date', 'end_date'], // db columns for start_date & end_date
    'label' => 'Event Date Range',
    'type'  => 'date_range',

    // OPTIONALS
    // default values for start_date & end_date
    'default'            => ['2019-03-28 01:01', '2019-04-05 02:00'],
    // options sent to daterangepicker.js
    'date_range_options' => [
        'drops' => 'down', // can be one of [down/up/auto]
        'timePicker' => true,
        'locale' => ['format' => 'DD/MM/YYYY HH:mm']
    ]
],
Please note it is recommended that you use attribute casting on your model (cast to date).
Your end result will look like this:
Input preview:
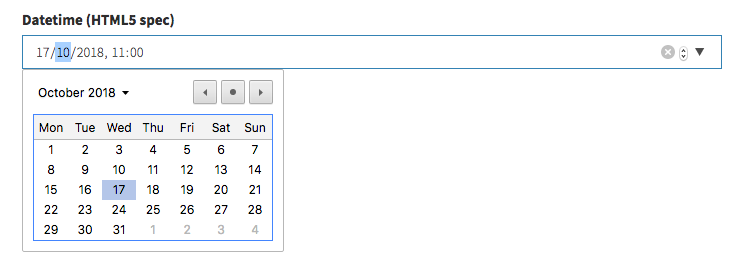
datetime
[   // DateTime
    'name'  => 'start',
    'label' => 'Event start',
    'type'  => 'datetime'
],
Please note: if you're using datetime attribute casting on your model, you also need to place this mutator inside your model:
    public function setDatetimeAttribute($value) {
        $this->attributes['datetime'] = \Carbon\Carbon::parse($value);
    }
Otherwise the input's datetime-local format will cause some errors.
Input preview:
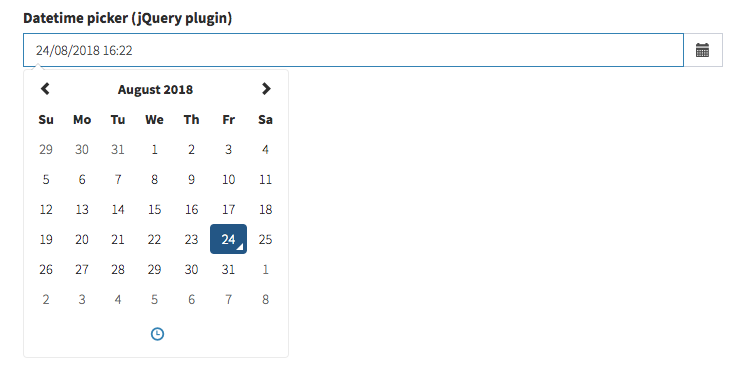
datetime_picker
Show a Bootstrap Datetime Picker.
[   // DateTime
    'name'  => 'start',
    'label' => 'Event start',
    'type'  => 'datetime_picker',

    // optional:
    'datetime_picker_options' => [
        'format' => 'DD/MM/YYYY HH:mm',
        'language' => 'pt',
        'tooltips' => [ //use this to translate the tooltips in the field
                'today' => 'Hoje',
                'selectDate' => 'Selecione a data',
                // available tooltips: today, clear, close, selectMonth, prevMonth, nextMonth, selectYear, prevYear, nextYear, selectDecade, prevDecade, nextDecade, prevCentury, nextCentury, pickHour, incrementHour, decrementHour, pickMinute, incrementMinute, decrementMinute, pickSecond, incrementSecond, decrementSecond, togglePeriod, selectTime, selectDate
        ]
    ],
    'allows_null' => true,
    // 'default' => '2017-05-12 11:59:59',
],
Please note: if you're using date attribute casting on your model, you may also need to place this mutator inside your model:
    public function setDatetimeAttribute($value) {
        $this->attributes['datetime'] = \Carbon\Carbon::parse($value);
    }
Otherwise the input's datetime-local format will cause some errors. Remember to change "datetime" with the name of your attribute (column name).
Input preview:
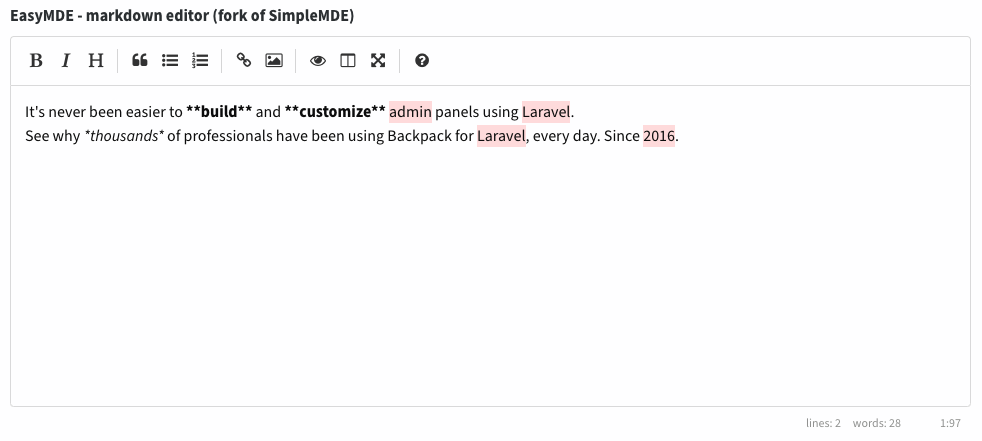
easymde
Show an EasyMDE - Markdown Editor to the user. EasyMDE is a well-maintained fork of SimpleMDE.
[   // easymde
    'name'  => 'description',
    'label' => 'Description',
    'type'  => 'easymde',
    // optional
    // 'easymdeAttributes' => [
    //   'promptURLs'   => true,
    //   'status'       => false,
    //   'spellChecker' => false,
    //   'forceSync'    => true,
    // ],
    // 'easymdeAttributesRaw' => $some_json
],
NOTE: The contents displayed in this editor are NOT stripped, sanitized or escaped by default. Whenever you store Markdown or HTML inside your database, it's HIGHLY recommended that you sanitize the input or output. Laravel makes it super-easy to do that on the model using accessors. If you do NOT trust the admins who have access to this field (or end-users can also store information to this db column), please make sure this attribute is always escaped, before it's shown. You can do that by running the value through
strip_tags()in an accessor on the model (here's an example) or better yet, using an HTML Purifier package (here's an example).
Input preview:
[   // Email
    'name'  => 'email',
    'label' => 'Email Address',
    'type'  => 'email'
],
Input preview:

enum
Show a select with the values in the database for that ENUM field. Requires that the db column type is "enum". If the db column allows null, the " - " value will also show up in the select.
[   // Enum
    'name'  => 'status',
    'label' => 'Status',
    'type'  => 'enum'
],
PLEASE NOTE the enum field only works for MySQL databases.
Input preview:

hidden
Include an in the form.
[   // Hidden
    'name'  => 'status',
    'type'  => 'hidden',
    'value' => 'active',
],
icon_picker
Show an icon picker. Supported icon sets are fontawesome, lineawesome, glyphicon, ionicon, weathericon, mapicon, octicon, typicon, elusiveicon, materialdesign as per the jQuery plugin, bootstrap-iconpicker.
The stored value will be the class name (ex: fa-home).
[   // icon_picker
    'label'   => "Icon",
    'name'    => 'icon',
    'type'    => 'icon_picker',
    'iconset' => 'fontawesome' // options: fontawesome, lineawesome, glyphicon, ionicon, weathericon, mapicon, octicon, typicon, elusiveicon, materialdesign
],
Your input will look like button, with a dropdown where the user can search or pick an icon:
Input preview:
![]()
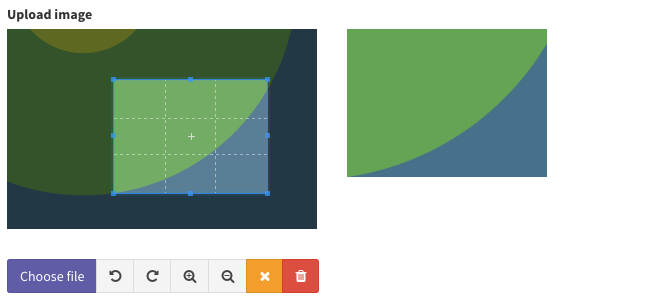
image
Upload an image and store it on the disk.
Step 1. Show the field.
// image
$this->crud->addField([
    'label' => "Profile Image",
    'name' => "image",
    'type' => 'image',
    'crop' => true, // set to true to allow cropping, false to disable
    'aspect_ratio' => 1, // omit or set to 0 to allow any aspect ratio
    // 'disk'      => 's3_bucket', // in case you need to show images from a different disk
    // 'prefix'    => 'uploads/images/profile_pictures/' // in case your db value is only the file name (no path), you can use this to prepend your path to the image src (in HTML), before it's shown to the user;
]);
Step 2. Add a mutator to your Model, where you pick up the uploaded file and store it wherever you want. You can use this boilerplate code and modify it to match your use case.
NOTE: The code below requires that you have intervention/image installed. If you don't, please do composer require intervention/image first.
// ..

use Illuminate\Support\Str;
use Intervention\Image\ImageManagerStatic as Image;

// ..

Class Product extends Model
{
    // ..

    public function setImageAttribute($value)
    {
        $attribute_name = "image";
        // or use your own disk, defined in config/filesystems.php
        $disk = config('backpack.base.root_disk_name');
        // destination path relative to the disk above
        $destination_path = "public/uploads/folder_1/folder_2";

        // if the image was erased
        if ($value==null) {
            // delete the image from disk
            \Storage::disk($disk)->delete($this->{$attribute_name});

            // set null in the database column
            $this->attributes[$attribute_name] = null;
        }

        // if a base64 was sent, store it in the db
        if (Str::startsWith($value, 'data:image'))
        {
            // 0. Make the image
            $image = \Image::make($value)->encode('jpg', 90);

            // 1. Generate a filename.
            $filename = md5($value.time()).'.jpg';

            // 2. Store the image on disk.
            \Storage::disk($disk)->put($destination_path.'/'.$filename, $image->stream());

            // 3. Delete the previous image, if there was one.
            \Storage::disk($disk)->delete($this->{$attribute_name});

            // 4. Save the public path to the database
            // but first, remove "public/" from the path, since we're pointing to it
            // from the root folder; that way, what gets saved in the db
            // is the public URL (everything that comes after the domain name)
            $public_destination_path = Str::replaceFirst('public/', '', $destination_path);
            $this->attributes[$attribute_name] = $public_destination_path.'/'.$filename;
        }
    }

// ..
The uploaded images are not deleted for you. If you delete an entry (using the CRUD or anywhere inside your app), the image file won't be deleted from the disk. If you're NOT using soft deletes on that Model and want the image to be deleted at the same time the entry is, just specify that in your Model's
deletingevent:public static function boot() { parent::boot(); static::deleted(function($obj) { \Storage::disk('public_folder')->delete($obj->image); }); }
A note about aspect_ratio The value for aspect ratio is a float that represents the ratio of the cropping rectangle height and width. By way of example,
- Square = 1
- Landscape = 2
- Portrait = 0.5
And you can, of course, use any value for more extreme rectangles.
Input preview:
NOTE: if you are having trouble uploading big images, please check your php extensions apcu and/or opcache, users have reported some issues with these extensions when trying to upload very big images. REFS: https://github.com/Laravel-Backpack/CRUD/issues/3457
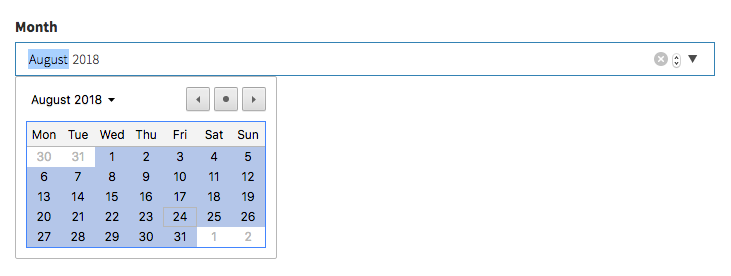
month
[   // Month
    'name'  => 'month',
    'label' => 'Month',
    'type'  => 'month'
],
Input preview:
number
Shows an input type=number to the user, with optional prefix and suffix:
[   // Number
    'name' => 'number',
    'label' => 'Number',
    'type' => 'number',

    // optionals
    // 'attributes' => ["step" => "any"], // allow decimals
    // 'prefix'     => "$",
    // 'suffix'     => ".00",
],
Input preview:

page_or_link
Select an existing page from PageManager or an internal or external link. It's used in the MenuManager package, but can be used in any other model just as well. Its definition looks like this:
[   // PageOrLink
    'name'       => ['type', 'link', 'page_id'],
    'label'      => "Type",
    'type'       => 'page_or_link',
    'page_model' => '\Backpack\PageManager\app\Models\Page'
],
Input preview:

password
[   // Password
    'name'  => 'password',
    'label' => 'Password',
    'type'  => 'password'
],
Input preview:

Please note that this will NOT hash/encrypt the string before it stores it to the database. You need to hash the password manually. The most popular way to do that are:
- Using a mutator on your Model. For example:
public function setPasswordAttribute($value) {
    $this->attributes['password'] = Hash::make($value);
}- By overwriting the Create/Update operation methods, inside the Controller. There's a working example in our PermissionManager package but the gist of it is this:
    use \Backpack\CRUD\app\Http\Controllers\Operations\CreateOperation { store as traitStore; }

    public function store()
    {
        $this->crud->setRequest($this->crud->validateRequest());

        /** @var \Illuminate\Http\Request $request */
        $request = $this->crud->getRequest();

        // Encrypt password if specified.
        if ($request->input('password')) {
            $request->request->set('password', Hash::make($request->input('password')));
        } else {
            $request->request->remove('password');
        }

        $this->crud->setRequest($request);
        $this->crud->unsetValidation(); // Validation has already been run

        return $this->traitStore();
    }
radio
Show radios according to an associative array you give the input and let the user pick from them. You can choose for the radio options to be displayed inline or one-per-line.
[   // radio
    'name'        => 'status', // the name of the db column
    'label'       => 'Status', // the input label
    'type'        => 'radio',
    'options'     => [
        // the key will be stored in the db, the value will be shown as label;
        0 => "Draft",
        1 => "Published"
    ],
    // optional
    //'inline'      => false, // show the radios all on the same line?
],
Input preview:

range
Shows an HTML5 range element, allowing the user to drag a cursor left-right, to pick a number from a defined range.
[   // Range
    'name'  => 'range',
    'label' => 'Range',
    'type'  => 'range',
    //optional
    'attributes' => [
        'min' => 0,
        'max' => 10,
    ],
],
Input preview:

relationship
Allows the user to choose one/more entries of an Eloquent Model that has a relationship with the current model, using a select2 input. In order to work, this field needs the relationships to be properly defined on the Eloquent models (hasOne, belongsTo, belongsToMany etc).
Input preview (for both 1-n and n-n relationships):

Take a look at the examples below to understand the correct syntax for your use case.
Example 1. Few options (0-100). Entries are loaded onpage, using a simple Eloquent query. No AJAX.
[   // relationship
    'type' => "relationship",
    'name' => 'category', // the method on your model that defines the relationship

    // OPTIONALS:
    // 'label' => "Category",
    // 'attribute' => "name", // foreign key attribute that is shown to user (identifiable attribute)
    // 'entity' => 'category', // the method that defines the relationship in your Model
    // 'model' => "App\Models\Category", // foreign key Eloquent model
    // 'placeholder' => "Select a category", // placeholder for the select2 input
 ],
For more information about the optional attributes that fields use when they interact with related entries - look here.
Example 2. Many options. Entries are loaded using AJAX.
If your related entry can have hundreds, thousands or millions of entries, it's not practical to load the options using an Eloquent query onpage, because the Create/Update page would be very slow to load. In this case, you should instruct select2 to fetch the entries using AJAX calls. To do that, in your relationship field definition you should add 'ajax' => true:
[   // relationship
    'type' => "relationship",
    'name' => 'category', // the method on your model that defines the relationship
    'ajax' => true,

    // OPTIONALS:
    // 'label' => "Category",
    // 'attribute' => "name", // foreign key attribute that is shown to user (identifiable attribute)
    // 'entity' => 'category', // the method that defines the relationship in your Model
    // 'model' => "App\Models\Category", // foreign key Eloquent model
    // 'placeholder' => "Select a category", // placeholder for the select2 input

    // AJAX OPTIONALS:
    // 'delay' => 500, // the minimum amount of time between ajax requests when searching in the field
    // 'data_source' => url("fetch/category"), // url to controller search function (with /{id} should return model)
    // 'minimum_input_length' => 2, // minimum characters to type before querying results
    // 'dependencies'         => ['category'], // when a dependency changes, this select2 is reset to null
    // 'include_all_form_fields'  => false, // optional - only send the current field through AJAX (for a smaller payload if you're not using multiple chained select2s)
 ],
Then, you need to create the route and method that allows select2 to search and fetch the results of that search. Fortunately, the FetchOperation allows you to easily do just that. Inside the CrudController where you've defined the relationship field, use the FetchOperation trait, and define a new method that will respond to AJAX queries:
    use \Backpack\CRUD\app\Http\Controllers\Operations\FetchOperation;

    public function fetchCategory()
    {
        return $this->fetch(\App\Models\Category::class);
    }
This will set up a /fetch/category route, which points to fetchCategory(), which returns the search results in a format select2 likes. For more on how this operation works, and how you can customize it, check out the FetchOperation docs.
Additional operation. InlineCreate - lets the user create a related entry in a modal.
Searching with AJAX provides a great UX. But what if the user doesn't find what they're looking for? In that case, it would be useful to add a related entry on-the-fly, without leaving the form. If you are using the Fetch operation to get the entries, you're already halfway there. In addition, you only need two additional steps:
// Inside ArticleCrudController
// for 1-n relationships (ex: category)
[   // relationship
    'type'          => "relationship",
    'name'          => 'category', // the method on your model that defines the relationship
    'ajax'          => true,
    'inline_create' => true,
],
// Inside ArticleCrudController
// for n-n relationships (ex: tags)
[   // relationship
    'type'          => "relationship",
    'name'          => 'tags', // the method on your model that defines the relationship
    'ajax'          => true,
    'inline_create' => [ 'entity' => 'tag' ] // you need to specify the entity in singular
],
Now, on the CrudController of that secondary entity the user will be able to create on-the-fly (ex: CategoryCrudController or TagCrudController, you'll need to enable the InlineCreate operation:
class CategoryCrudController extends CrudController
{
    use \Backpack\CRUD\app\Http\Controllers\Operations\InlineCreateOperation;

   // ...
}
This InlineCreateOperation will allow us to show the same fields that are inside the Create operation, inside a new operation InlineCreate, that is available in a modal. For more information, check out the InlineCreate Operation docs.
Remember, FetchOperation is still needed on the main crud (ex: ArticleCrudController) so that the entries are fetched by select2 using AJAX.
repeatable
Shows a group of inputs to the user, and allows the user to add or remove groups of that kind:
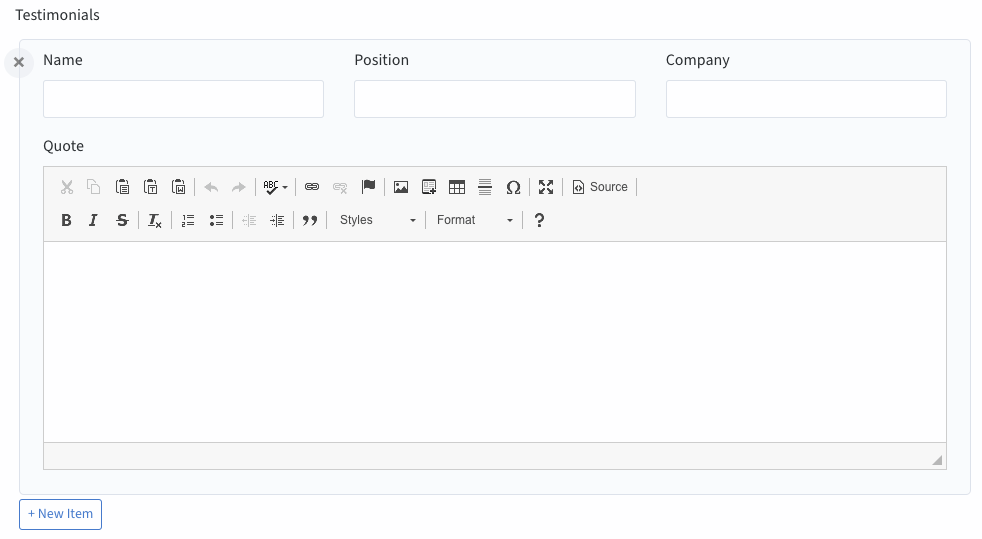
Clicking on the "New Item" button will add another group with the same fields (in the example, another Testimonial). The end result is a JSON with the values for those fields, nicely grouped.
You can use most field types inside the field groups, add as many fields you need, and change their width using wrapper like you would do outside the repeatable field. But please note that:
- all fields defined inside a field group need to have their definition valid and complete; you can't use shorthands, you shouldn't assume fields will guess attributes for you;
- some field types do not make sense to be included inside a field group (for example, relationship fields might not make sense; they will work if the relationship is defined on the main model, but upon save the selected entries will NOT be saved as usual, they will be saved as JSON; you can intercept the saving if you want and do whatever you want);
- a few fields make sense, but cannot work inside a repeatable group (ex: upload, upload_multiple); see the notes inside the PR for more details, and a complete list of the fields; the few fields that do not work inside repeatable have sensible alternatives;
- you can add validation to subfields, but naturally it'll be a little different; for a quick example of how to add validation to your repeatable fields, check out our Demo, particularly
DummyRequest.php;
[ // repeatable
'name' => 'testimonials',
'label' => 'Testimonials',
'type' => 'repeatable',
'fields' => [
[
'name' => 'name',
'type' => 'text',
'label' => 'Name',
'wrapper' => ['class' => 'form-group col-md-4'],
],
[
'name' => 'position',
'type' => 'text',
'label' => 'Position',
'wrapper' => ['class' => 'form-group col-md-4'],
],
[
'name' => 'company',
'type' => 'text',
'label' => 'Company',
'wrapper' => ['class' => 'form-group col-md-4'],
],
[
'name' => 'quote',
'type' => 'ckeditor',
'label' => 'Quote',
],
],
// optional
'new_item_label' => 'Add Group', // customize the text of the button
'init_rows' => 2, // number of empty rows to be initialized, by default 1
'min_rows' => 2, // minimum rows allowed, when reached the "delete" buttons will be hidden
'max_rows' => 2, // maximum rows allowed, when reached the "new item" button will be hidden
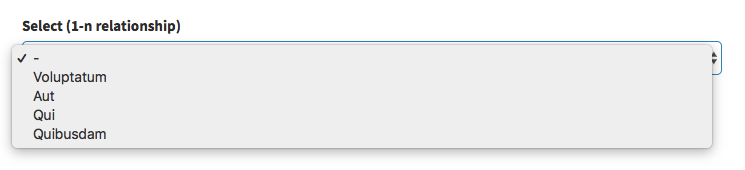
],select (1-n relationship)
Show a Select with the names of the connected entity and let the user select one of them. Your relationships should already be defined on your models as hasOne() or belongsTo().
[  // Select
   'label'     => "Category",
   'type'      => 'select',
   'name'      => 'category_id', // the db column for the foreign key

   // optional
   // 'entity' should point to the method that defines the relationship in your Model
   // defining entity will make Backpack guess 'model' and 'attribute'
   'entity'    => 'category',

   // optional - manually specify the related model and attribute
   'model'     => "App\Models\Category", // related model
   'attribute' => 'name', // foreign key attribute that is shown to user

   // optional - force the related options to be a custom query, instead of all();
   'options'   => (function ($query) {
        return $query->orderBy('name', 'ASC')->where('depth', 1)->get();
    }), //  you can use this to filter the results show in the select
],
For more information about the optional attributes that fields use when they interact with related entries - look here.
Input preview:
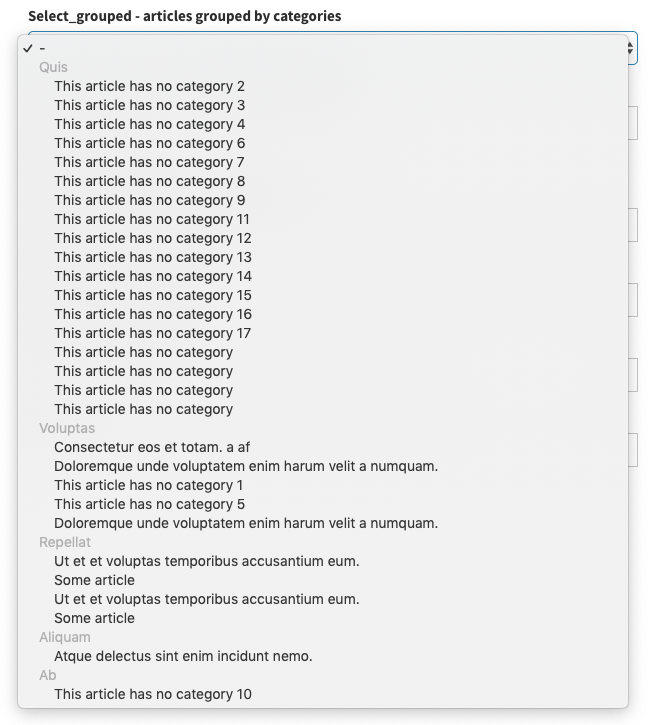
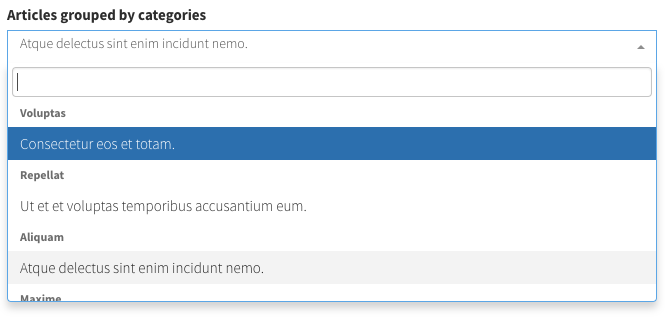
select_grouped
Display a select where the options are grouped by a second entity (like Categories).
[   // select_grouped
    'label'     => 'Articles grouped by categories',
    'type'      => 'select_grouped', //https://github.com/Laravel-Backpack/CRUD/issues/502
    'name'      => 'article_id',
    'entity'    => 'article',
    'attribute' => 'title',
    'group_by'  => 'category', // the relationship to entity you want to use for grouping
    'group_by_attribute' => 'name', // the attribute on related model, that you want shown
    'group_by_relationship_back' => 'articles', // relationship from related model back to this model
],
For more information about the optional attributes that fields use when they interact with related entries - look here.
Input preview:
select2 (1-n relationship)
Works just like the SELECT field, but prettier. Shows a Select2 with the names of the connected entity and let the user select one of them. Your relationships should already be defined on your models as hasOne() or belongsTo().
[  // Select2
   'label'     => "Category",
   'type'      => 'select2',
   'name'      => 'category_id', // the db column for the foreign key

   // optional
   'entity'    => 'category', // the method that defines the relationship in your Model
   'model'     => "App\Models\Category", // foreign key model
   'attribute' => 'name', // foreign key attribute that is shown to user
   'default'   => 2, // set the default value of the select2

    // also optional
   'options'   => (function ($query) {
        return $query->orderBy('name', 'ASC')->where('depth', 1)->get();
    }), // force the related options to be a custom query, instead of all(); you can use this to filter the results show in the select
],
For more information about the optional attributes that fields use when they interact with related entries - look here.
Input preview:

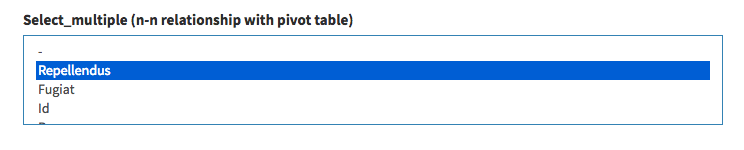
select_multiple (n-n relationship)
Show a Select with the names of the connected entity and let the user select any number of them. Your relationship should already be defined on your models as belongsToMany().
[   // SelectMultiple = n-n relationship (with pivot table)
    'label'     => "Tags",
    'type'      => 'select_multiple',
    'name'      => 'tags', // the method that defines the relationship in your Model

    // optional
    'entity'    => 'tags', // the method that defines the relationship in your Model
    'model'     => "App\Models\Tag", // foreign key model
    'attribute' => 'name', // foreign key attribute that is shown to user
    'pivot'     => true, // on create&update, do you need to add/delete pivot table entries?

    // also optional
    'options'   => (function ($query) {
        return $query->orderBy('name', 'ASC')->where('depth', 1)->get();
    }), // force the related options to be a custom query, instead of all(); you can use this to filter the results show in the select
],
For more information about the optional attributes that fields use when they interact with related entries - look here.
Input preview:
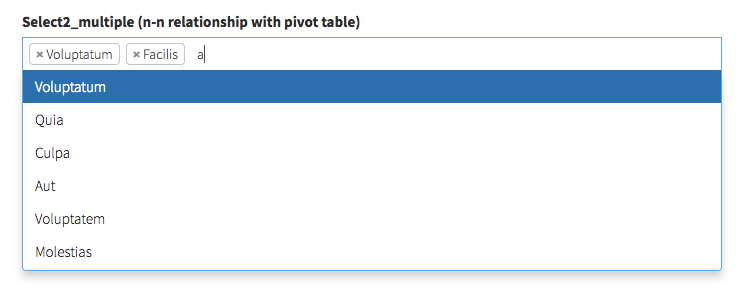
select2_multiple (n-n relationship)
[Works just like the SELECT field, but prettier]
Shows a Select2 with the names of the connected entity and let the user select any number of them. Your relationship should already be defined on your models as belongsToMany().
[    // Select2Multiple = n-n relationship (with pivot table)
     'label'     => "Tags",
     'type'      => 'select2_multiple',
     'name'      => 'tags', // the method that defines the relationship in your Model

     // optional
     'entity'    => 'tags', // the method that defines the relationship in your Model
     'model'     => "App\Models\Tag", // foreign key model
     'attribute' => 'name', // foreign key attribute that is shown to user
     'pivot'     => true, // on create&update, do you need to add/delete pivot table entries?
     // 'select_all' => true, // show Select All and Clear buttons?

     // optional
     'options'   => (function ($query) {
         return $query->orderBy('name', 'ASC')->where('depth', 1)->get();
     }), // force the related options to be a custom query, instead of all(); you can use this to filter the results show in the select
],
For more information about the optional attributes that fields use when they interact with related entries - look here.
Input preview:
select2_nested
Display a select2 with the values ordered hierarchically and indented, for an entity where you use Reorder. Please mind that the connected model needs:
- a
children()relationship pointing to itself; - the usual
lft,rgt,depthattributes;
[   // select2_nested
    'name'      => 'category_id',
    'label'     => "Category",
    'type'      => 'select2_nested',
    'entity'    => 'category', // the method that defines the relationship in your Model
    'attribute' => 'name', // foreign key attribute that is shown to user

    // optional
    'model'     => "App\Models\Category", // force foreign key model
],
For more information about the optional attributes that fields use when they interact with related entries - look here.
Input preview:
select2_grouped
Display a select2 where the options are grouped by a second entity (like Categories).
[   // select2_grouped
    'label'     => 'Articles grouped by categories',
    'type'      => 'select2_grouped', //https://github.com/Laravel-Backpack/CRUD/issues/502
    'name'      => 'article_id',
    'entity'    => 'article', // the method that defines the relationship in your Model
    'attribute' => 'title',
    'group_by'  => 'category', // the relationship to entity you want to use for grouping
    'group_by_attribute' => 'name', // the attribute on related model, that you want shown
    'group_by_relationship_back' => 'articles', // relationship from related model back to this model
],
For more information about the optional attributes that fields use when they interact with related entries - look here.
Input preview:
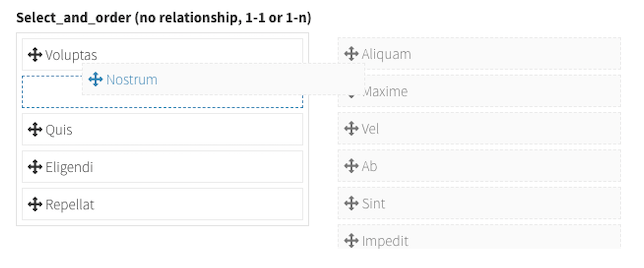
select_and_order
Display items on two columns and let the user drag&drop between them to choose which items are selected and which are not, and reorder the selected items with drag&drop.
Its definition is exactly as select_from_array, but the value will be stored as JSON in the database: ["3","5","7","6"], so it needs the attribute to be cast to array on the Model:
protected $casts = [
    'featured' => 'array'
];
Definition:
[   // select_and_order
    'name'  => 'featured',
    'label' => "Featured",
    'type'  => 'select_and_order',
    'options' => [
        1 => "Option 1",
        2 => "Option 2"
    ]
],
Also possible:
[   // select_and_order
    'name'    => 'featured',
    'label'   => 'Featured',
    'type'    => 'select_and_order',
    'options' => Product::get()->pluck('title','id')->toArray(),
],
Input preview:
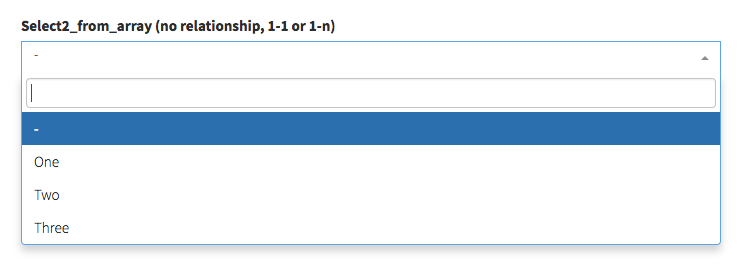
select_from_array
Display a select with the values you want:
[   // select_from_array
    'name'        => 'template',
    'label'       => "Template",
    'type'        => 'select_from_array',
    'options'     => ['one' => 'One', 'two' => 'Two'],
    'allows_null' => false,
    'default'     => 'one',
    // 'allows_multiple' => true, // OPTIONAL; needs you to cast this to array in your model;
],
Input preview:

select2_from_array
Display a select2 with the values you want:
[   // select2_from_array
    'name'        => 'template',
    'label'       => "Template",
    'type'        => 'select2_from_array',
    'options'     => ['one' => 'One', 'two' => 'Two'],
    'allows_null' => false,
    'default'     => 'one',
    // 'allows_multiple' => true, // OPTIONAL; needs you to cast this to array in your model;
],
Input preview:
select2_from_ajax
Display a select2 that takes its values from an AJAX call.
[   // 1-n relationship
    'label'       => "End", // Table column heading
    'type'        => "select2_from_ajax",
    'name'        => 'category_id', // the column that contains the ID of that connected entity
    'entity'      => 'category', // the method that defines the relationship in your Model
    'attribute'   => "name", // foreign key attribute that is shown to user
    'data_source' => url("api/category"), // url to controller search function (with /{id} should return model)

    // OPTIONAL
    // 'delay' => 500, // the minimum amount of time between ajax requests when searching in the field
    // 'placeholder'             => "Select a category", // placeholder for the select
    // 'minimum_input_length'    => 2, // minimum characters to type before querying results
    // 'model'                   => "App\Models\Category", // foreign key model
    // 'dependencies'            => ['category'], // when a dependency changes, this select2 is reset to null
    // 'method'                  => 'GET', // optional - HTTP method to use for the AJAX call (GET, POST)
    // 'include_all_form_fields' => false, // optional - only send the current field through AJAX (for a smaller payload if you're not using multiple chained select2s)
],
For more information about the optional attributes that fields use when they interact with related entries - look here.
Of course, you also need to create make the data_source above respond to AJAX calls. You can use the FetchOperation to quickly do that in your current CrudController, or you can set up your custom API by creating a custom Route and Controller. Here's an example:
Route::get('/api/category', 'Api\CategoryController@index');<?php
namespace App\Http\Controllers\Api;
use Illuminate\Http\Request;
use App\Http\Controllers\Controller;
use Backpack\NewsCRUD\app\Models\Category;
class CategoryController extends Controller
{
public function index(Request $request)
{
$search_term = $request->input('q');
if ($search_term)
{
$results = Category::where('name', 'LIKE', '%'.$search_term.'%')->paginate(10);
}
else
{
$results = Category::paginate(10);
}
return $results;
}
}Note: If you want to also make this field work inside repeatable too, your API endpoint will also need to respond to the keys parameter, with the actual items that have those keys. For example:
        if ($request->has('keys')) {
            return Category::findMany($request->input('keys'));
        }
Input preview:
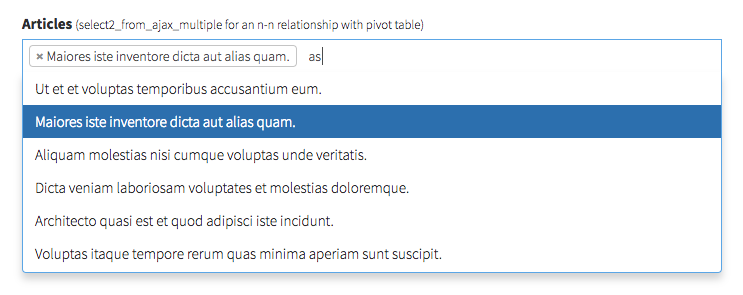
select2_from_ajax_multiple
Display a select2 that takes its values from an AJAX call. Same as select2_from_ajax above, but allows for multiple items to be selected. The only difference in the field definition is the "pivot" attribute.
[   // n-n relationship
    'label'       => "Cities", // Table column heading
    'type'        => "select2_from_ajax_multiple",
    'name'        => 'cities', // a unique identifier (usually the method that defines the relationship in your Model)
    'entity'      => 'cities', // the method that defines the relationship in your Model
    'attribute'   => "name", // foreign key attribute that is shown to user
    'data_source' => url("api/city"), // url to controller search function (with /{id} should return model)
    'pivot'       => true, // on create&update, do you need to add/delete pivot table entries?

    // OPTIONAL
    'delay' => 500, // the minimum amount of time between ajax requests when searching in the field
    'model'                => "App\Models\City", // foreign key model
    'placeholder'          => "Select a city", // placeholder for the select
    'minimum_input_length' => 2, // minimum characters to type before querying results
    // 'include_all_form_fields'  => false, // optional - only send the current field through AJAX (for a smaller payload if you're not using multiple chained select2s)
],
For more information about the optional attributes that fields use when they interact with related entries - look here.
Of course, you also need to create a controller and routes for the data_source above. Here's an example:
Route::get('/api/city', 'Api\CityController@index');
Route::get('/api/city/{id}', 'Api\CityController@show');
<?php
namespace App\Http\Controllers\Api;
use Illuminate\Http\Request;
use App\Http\Controllers\Controller;
use App\Models\City;
class CityController extends Controller
{
public function index(Request $request)
{
$search_term = $request->input('q');
$page = $request->input('page');
if ($search_term)
{
$results = City::where('name', 'LIKE', '%'.$search_term.'%')->paginate(10);
}
else
{
$results = City::paginate(10);
}
return $results;
}
public function show($id)
{
return City::find($id);
}
}Input preview:
Note: If you want to also make this field work inside repeatable too, your API endpoint will also need to respond to the keys parameter, with the actual items that have those keys. For example:
if ($request->has('keys')) {
return City::findMany($request->input('keys'));
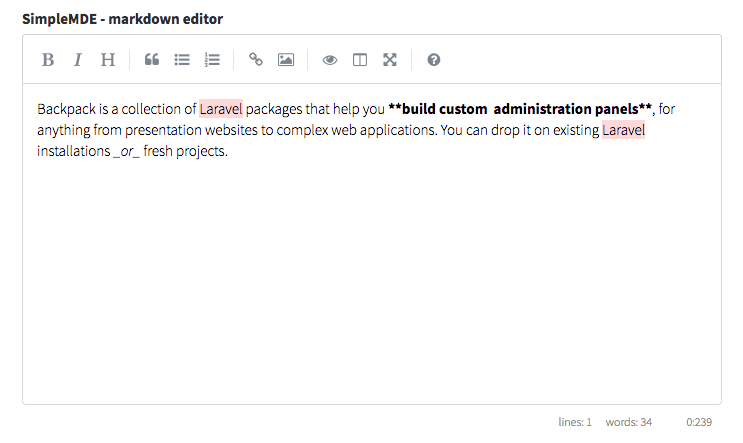
}simplemde
Show a SimpleMDE markdown editor to the user.
NOTE: SimpleMDE works, but it has not received any updates in 4 years. We recommend you use EasyMDE instead, a fork of SimpleMDE that seems to be well looked after. Check out the
easymdefield type for Backpack - it works exactly the same as this one.
[   // SimpleMDE
    'name'  => 'description',
    'label' => 'Description',
    'type'  => 'simplemde',
    // optional
    // 'simplemdeAttributes' => [
    //   'promptURLs'   => true,
    //   'status'       => false,
    //   'spellChecker' => false,
    //   'forceSync'    => true,
    // ],
    // 'simplemdeAttributesRaw' => $some_json
],
NOTE: The contents displayed in this editor are NOT stripped, sanitized or escaped by default. Whenever you store Markdown or HTML inside your database, it's HIGHLY recommended that you sanitize the input or output. Laravel makes it super-easy to do that on the model using accessors. If you do NOT trust the admins who have access to this field (or end-users can also store information to this db column), please make sure this attribute is always escaped, before it's shown. You can do that by running the value through
strip_tags()in an accessor on the model (here's an example) or better yet, using an HTML Purifier package (here's an example).
Input preview:
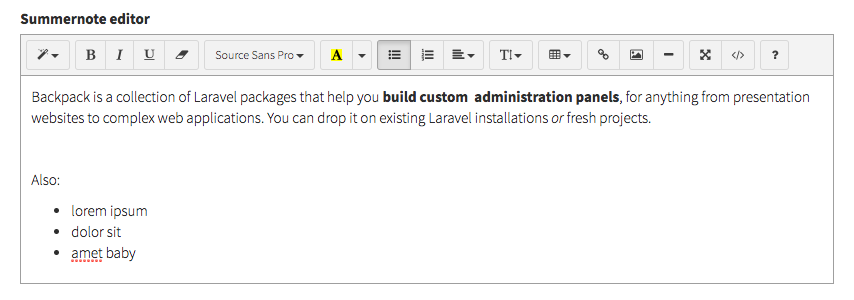
summernote
Show a Summernote wysiwyg editor to the user.
[   // Summernote
    'name'  => 'description',
    'label' => 'Description',
    'type'  => 'summernote',
    'options' => [],
],

// the summernote field works with the default configuration options but allow developer to configure to his needs
// optional configuration check https://summernote.org/deep-dive/ for a list of available configs
[
    'name'  => 'description',
    'label' => 'Description',
    'type'  => 'summernote',
    'options' => [
        'toolbar' => [
            ['font', ['bold', 'underline', 'italic']]
        ]
    ],
],
NOTE: Summernote does NOT sanitize the input. If you do not trust the users of this field, you should sanitize the input or output using something like HTML Purifier. Personally we like to use install mewebstudio/Purifier and add an accessor or mutator on the Model, so that wherever the model is created from (admin panel or app), the output will always be clean. Example here.
Input preview:
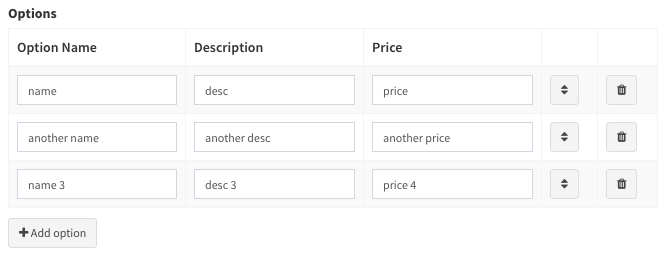
table
Show a table with multiple inputs per row and store the values as JSON array of objects in the database. The user can add more rows and reorder the rows as they please.
[   // Table
    'name'            => 'options',
    'label'           => 'Options',
    'type'            => 'table',
    'entity_singular' => 'option', // used on the "Add X" button
    'columns'         => [
        'name'  => 'Name',
        'desc'  => 'Description',
        'price' => 'Price'
    ],
    'max' => 5, // maximum rows allowed in the table
    'min' => 0, // minimum rows allowed in the table
],
It's highly recommended that you use attribute casting on your model when working with JSON arrays stored in database columns, and cast this attribute to either
objectorarrayin your Model.
Input preview:
text
The basic field type, all it needs is the two mandatory parameters: name and label.
[   // Text
    'name'  => 'title',
    'label' => "Title",
    'type'  => 'text',

    // optional
    //'prefix'     => '',
    //'suffix'     => '',
    //'default'    => 'some value', // default value
    //'hint'       => 'Some hint text', // helpful text, show up after input
    //'attributes' => [
       //'placeholder' => 'Some text when empty',
       //'class' => 'form-control some-class',
       //'readonly'  => 'readonly',
       //'disabled'  => 'disabled',
     //], // extra HTML attributes and values your input might need
     //'wrapper'   => [
       //'class' => 'form-group col-md-12'
     //], // extra HTML attributes for the field wrapper - mostly for resizing fields

],
You can use the optional 'prefix' and 'suffix' attributes to display something before and after the input, like icons, path prefix, etc:
Input preview:

textarea
Show a textarea to the user.
[   // Textarea
    'name'  => 'description',
    'label' => 'Description',
    'type'  => 'textarea'
],
Input preview:

time
[ // Time
'name' => 'start',
'label' => 'Start time',
'type' => 'time'
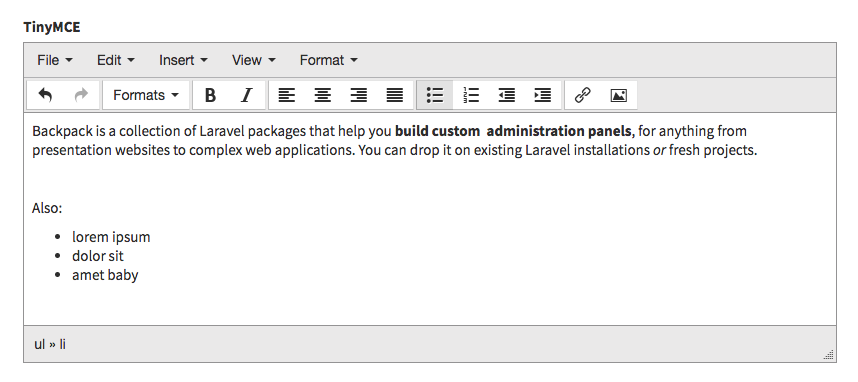
],tinymce
Show a wysiwyg (TinyMCE) to the user.
[   // TinyMCE
    'name'  => 'description',
    'label' => 'Description',
    'type'  => 'tinymce',
    // optional overwrite of the configuration array
    // 'options' => [ 'selector' => 'textarea.tinymce',  'skin' => 'dick-light', 'plugins' => 'image,link,media,anchor' ],
],
Input preview:
upload
Step 1. Show a file input to the user:
[   // Upload
    'name'      => 'image',
    'label'     => 'Image',
    'type'      => 'upload',
    'upload'    => true,
    'disk'      => 'uploads', // if you store files in the /public folder, please omit this; if you store them in /storage or S3, please specify it;
    // optional:
    'temporary' => 10 // if using a service, such as S3, that requires you to make temporary URLs this will make a URL that is valid for the number of minutes specified
],
Step 2. In order to save/update/delete the file from disk&db, we need to create a mutator on your model:
public function setImageAttribute($value)
    {
        $attribute_name = "image";
        $disk = "public";
        $destination_path = "folder_1/subfolder_1";

        $this->uploadFileToDisk($value, $attribute_name, $disk, $destination_path);

    // return $this->attributes[{$attribute_name}]; // uncomment if this is a translatable field
    }
How it works:
The field sends the file, through a Request, to the Controller. The Controller then tries to create/update the Model. That's when the mutator on your model will run. That also means we can do any file validation (file, image, mimetypes, mimes) in the Request, before the file is stored on the disk.
NOTE: If this field is mandatory (required in validation) please use the sometimes laravel validation rule together with required in your validation. (sometimes|required|file etc... )
The uploadFileToDisk() method will take care of everything for most use cases:
/**
     * Handle file upload and DB storage for a file:
     * - on CREATE
     *     - stores the file at the destination path
     *     - generates a name
     *     - stores the full path in the DB;
     * - on UPDATE
     *     - if the value is null, deletes the file and sets null in the DB
     *     - if the value is different, stores the different file and updates DB value
     * /
public function uploadFileToDisk($value, $attribute_name, $disk, $destination_path) {}
If you wish to have a different functionality, you can delete the method call from your mutator and do your own thing.
The uploaded files are not deleted for you. When you delete an entry (whether through CRUD or the application), the uploaded files will not be deleted.
If you're NOT using soft deletes on that Model and want the file to be deleted at the same time the entry is, just specify that in your Model's deleting event:
    public static function boot()
    {
        parent::boot();
        static::deleting(function($obj) {
            \Storage::disk('public_folder')->delete($obj->image);
        });
    }
Input preview:

upload_multiple
Shows a multiple file input to the user and stores the values as a JSON array in the database.
Step 0. Make sure the db column can hold the amount of text this field will have. For example, for MySQL, VARCHAR(255) might not be enough all the time (for 3+ files), so it's better to go with TEXT. Make sure you're using a big column type in your migration or db.
Step 1. Show a multiple file input to the user:
[   // Upload
    'name'      => 'photos',
    'label'     => 'Photos',
    'type'      => 'upload_multiple',
    'upload'    => true,
    'disk'      => 'uploads', // if you store files in the /public folder, please omit this; if you store them in /storage or S3, please specify it;
    // optional:
    'temporary' => 10 // if using a service, such as S3, that requires you to make temporary URLs this will make a URL that is valid for the number of minutes specified
],
Step 2. In order to save/update/delete the files from disk&db, we need to create a mutator on your model:
public function setPhotosAttribute($value)
    {
        $attribute_name = "photos";
        $disk = "public";
        $destination_path = "folder_1/subfolder_1";

        $this->uploadMultipleFilesToDisk($value, $attribute_name, $disk, $destination_path);
    }
Step 3. Since the filenames are stored in the database as a JSON array, we're going to use attribute casting on your model, so every time we get the filenames array from the database it's converted from a JSON array to a PHP array:
    protected $casts = [
        'photos' => 'array'
    ];
How it works:
The field sends the files, through a Request, to the Controller. The Controller then tries to create/update the Model. That's when the mutator on your model will run. That also means we can do any file validation (file, image, mimetypes, mimes) in the Request, before the files are stored on the disk.
The uploadMultipleFilesToDisk() method will take care of everything for most use cases:
/**
     * Handle multiple file upload and DB storage:
     * - if files are sent
     *     - stores the files at the destination path
     *     - generates random names
     *     - stores the full path in the DB, as JSON array;
     * - if a hidden input is sent to clear one or more files
     *     - deletes the file
     *     - removes that file from the DB.
     * /
public function uploadMultipleFilesToDisk($value, $attribute_name, $disk, $destination_path) {}
If you wish to have a different functionality, you can delete the method call from your mutator and do your own thing.
The uploaded files are not deleted for you. When you delete an entry (whether through CRUD or the application), the uploaded files will not be deleted.
If you're NOT using soft deletes on that Model and want the files to be deleted at the same time the entry is, just specify that in your Model's deleting event:
    public static function boot()
    {
        parent::boot();
        static::deleting(function($obj) {
            if (count((array)$obj->photos)) {
                foreach ($obj->photos as $file_path) {
                    \Storage::disk('public_folder')->delete($file_path);
                }
            }
        });
    }
You might notice the field is using a clear_photos variable. Don't worry, you don't need it in your db table. That's just used to delete photos upon "update". If you use $fillable on your model, just don't include it. If you use $guarded on your model, place it in guarded.
Input preview:

url
[   // URL
    'name'  => 'link',
    'label' => 'Link to video file',
    'type'  => 'url'
],
video
Allow the user to paste a YouTube/Vimeo link. That will get the video information with JavaScript and store it as a JSON in the database.
Field definition:
[   // URL
    'name'            => 'video',
    'label'           => 'Link to video file on YouTube or Vimeo',
    'type'            => 'video',
    'youtube_api_key' => 'AIzaSycLRoVwovRmbIf_BH3X12IcTCudAErRlCE',
],
An entry stored in the database will look like this:
$video = {
    id: 234324,
    title: 'my video title',
    image: 'https://provider.com/image.jpg',
    url: 'http://provider.com/video',
    provider: 'youtube'
}
So you should use attribute casting in your model, to cast the video as array or object.
Vimeo does not require an API key in order to query their DB, but YouTube does, even though their free quota is generous. You can get a free YouTube API Key inside Google Developers Console (video tutorial here). Please DO NOT use our API Key - create your own. The key above is there just for your convenience, to easily try out the field. As soon as you decide to use this field type, create an API Key and use your API Key. Our key hits its ceiling every month, so if you use our key most of the time it won't work.
view
Load a custom view in the form.
[   // view
    'name' => 'custom-ajax-button',
    'type' => 'view',
    'view' => 'partials/custom-ajax-button'
],
Note: the same functionality can be achieved using a custom field type, or using the custom_html field type (if the content is really simple).
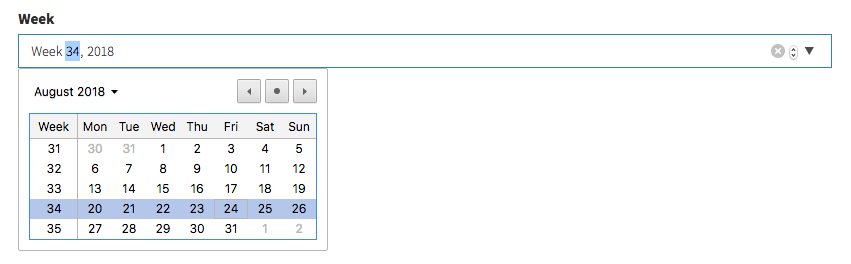
week
[   // Week
    'name'  => 'first_week',
    'label' => 'First week',
    'type'  => 'week'
],
Input preview:
wysiwyg
Show a wysiwyg (CKEditor) to the user.
[   // WYSIWYG Editor
    'name'  => 'description',
    'label' => 'Description',
    'type'  => 'wysiwyg'
],
Overwriting Default Field Types
The actual field types are stored in the Backpack/CRUD package in /resources/views/fields. If you need to change an existing field, you don't need to modify the package, you just need to add a blade file in your application in /resources/views/vendor/backpack/crud/fields, with the same name. The package checks there first, and only if there's no file there, will it load it from the package.
To quickly publish a field blade file in your project, you can use php artisan backpack:publish crud/fields/field_name. For example, to publish the number field type, you'd type php artisan backpack:publish crud/fields/number
Please keep in mind that if you're using your file for a field type, you're not using the package file. So any updates we push to that file, you're not getting them. In most cases, it's recommended you create a custom field type for your use case, instead of overwriting default field types.
Creating a Custom Field Type
If you need to extend the CRUD with a new field type, you create a new file in your application in /resources/views/vendor/backpack/crud/fields. Use a name that's different from all default field types. That's it, you'll now be able to use it just like a default field type.
Your field definition will be something like:
[   // Custom Field
    'name'  => 'address',
    'label' => 'Home address',
    'type'  => 'address'
    /// 'view_namespace' => 'yourpackage' // use a custom namespace of your package to load views within a custom view folder.
],
And your blade file something like:
<!-- field_type_name -->
@include('crud::fields.inc.wrapper_start')
    <label>{!! $field['label'] !!}</label>
    <input
        type="text"
        name="{{ $field['name'] }}"
        value="{{ old($field['name']) ? old($field['name']) : (isset($field['value']) ? $field['value'] : (isset($field['default']) ? $field['default'] : '' )) }}"
        @include('crud::fields.inc.attributes')
    >

    {{-- HINT --}}
    @if (isset($field['hint']))
        <p class="help-block">{!! $field['hint'] !!}</p>
    @endif
@include('crud::fields.inc.wrapper_end')


@if ($crud->fieldTypeNotLoaded($field))
    @php
        $crud->markFieldTypeAsLoaded($field);
    @endphp

    {{-- FIELD EXTRA CSS  --}}
    {{-- push things in the after_styles section --}}
    @push('crud_fields_styles')
        <!-- no styles -->
    @endpush


    {{-- FIELD EXTRA JS --}}
    {{-- push things in the after_scripts section --}}
    @push('crud_fields_scripts')
        <!-- no scripts -->
    @endpush
@endif
Inside your custom field type, you can use these variables:
$crud- all the CRUD Panel settings, options and variables;$entry- in the Update operation, the current entry being modified (the actual values);$field- all attributes that have been passed for this field;
If your field type uses JavaScript, we recommend you:
- put a
data-init-function="bpFieldInitMyCustomField"attribute on your input; - place your logic inside the scripts section mentioned above, inside
function bpFieldInitMyCustomField(element) {}; of course, you choose the name of the function but it has to match whatever you specified as data attribute on the input, and it has to be pretty unique; inside this method, you'll find thatelementis jQuery-wrapped object of the element where you specifieddata-init-function; this should be enough for you to not have to use IDs, or any other tricks, to determine other elements inside the DOM - determine them in relation to the main element; if you want, you can choose to put thedata-init-functionattribute on a different element, like the wrapping div;
FAQs
What field should I use for a relationship?
With so many field types, it can be a little overwhelming for a first-timer to quickly grasp what field type to use for your Eloquent relationship. Here's a list of what most people use, most of the times:
hasOne (1-1 relationship)
- example:
User -> Phone- a User has one Phone; a Phone can only belong to one User
- the foreign key is stored on the Phone (
user_idonphonestable)
- how to use:
- the
hasOnerelationship should be properly defined in the User model; - you can easily add fields for each individual attribute on the related entry; you just need to specify in the field name that the value should not be stored on the main model, but on a related model; you can do that using dot notation (
relationship_name.column_name); note that the prefix (before the dot) is the Relation name, not the table name; - all fields types should work fine - depending on your needs you could choose to add a
textfield,numberfield,textareafield,selectfield etc.;
- the
// inside UserCrudController::setupCreateOperation()
CRUD::field('phone.number')->type('number');
CRUD::field('phone.prefix')->type('text');
CRUD::field('phone.type')->type('select_from_array')->options(['mobile' => 'Mobile Phone', 'landline' => 'Landline', 'fax' => 'Fax']);
belongsTo (n-1 relationship)
- example:
Phone -> User- a Phone belongs to one User; a Phone can only belong to one User
- the foreign key is stored on the Phone (
user_idonphonestable)
- how to use:
- the
belongsTorelationship should be properly defined in the Phone model; - you can easily add a dropdown to let the admin pick which User the Phone belongs; you can use any of the dropdown fields, but for convenience we've made a list here, and broken them down depending on aproximately how many entries the dropdown will have:
- for 0-10 dropdown items - we recommend you use the
selectfield; - for 0-500 dropdown items - we recommend you use the
select2orrelationshipfield; - for 500-1.000.000+ dropdown items - we recommend you load the dropdown items using AJAX, by using the
relationshipfield and Fetch operation or by using theselect2_from_ajaxfield;
- the
// inside PhoneCrudController::setupCreateOperation()
CRUD::field('user'); // notice the name is the relationship name and backpack will auto-infer the field type as [`relationship`](#relationship)
CRUD::field('user_id')->type('select')->model('App\Models\User')->attribute('name')->entity('user'); // notice the name is the foreign key attribute
CRUD::field('user_id')->type('select2')->model('App\Models\User')->attribute('name')->entity('user'); // notice the name is the foreign key attribute- notes:
- if you choose to use the
relationshipfield, you can also use the InlineCreate operation, which will add a [+ Add Item] button next to the dropdown, to let the admin create a User in a modal, without leaving the current Create Phone form;
- if you choose to use the
hasMany (1-n relationship)
- example:
Post -> Comment- a Post has many Comments; a Comment can only belong to one Post
- the foreign key is stored on the Comment (
post_idoncommentstable)
- how to use:
- the
hasManyrelationship should be properly defined in the Post model;
- the
// inside PostCrudController::setupCreateOperation()
CRUD::field('comments')->type('repeatable')->fields([['name' => 'comment_text']]); //note comment_text is one field in the comment table.-
you should use the
repeatablefield on the Post create/update form, to add Comments to your Posts, but you'll also need to modify yourstore()andupdate()methods to take that into account, and transform the JSON received from therepeatablefield into actual entries in the database (and back); check out this example here for a full example on how to do it. -
notes:
- you cannot use the InlineCreate operation to have show a [+ Add Item] button next to the dropdown; that's because the Comment needs a
post_id(not nullable); and until the Save button is clicked to submit the Create Post form, there is nopost_id;
- you cannot use the InlineCreate operation to have show a [+ Add Item] button next to the dropdown; that's because the Comment needs a
belongsToMany (n-n relationship)
- example:
User -> Role- a User has many Roles; a Role can also have many Users
- the foreign key is stored on a pivot table (usually the
user_rolestable has bothuser_idandrole_id)
- how to use:
- the
belongsToManyrelationship should be properly defined in both the User and Role models; - you can add a dropdown on your User to pick the Roles that are connected to it; for that, use the
relationship,select_multiple,select2_multipleorselect2_from_ajax_multiplefields;
- the
// inside UserCrudController::setupCreateOperation()
CRUD::field('roles'); //use the relation name here and backpack will assume that it is a [`relationship`](#relationship) field type
CRUD::field('roles')->type('select_multiple');
CRUD::field('roles')->type('select2_multiple');

// inside RoleCrudController::setupCreateOperation()
CRUD::field('users')->type('relationship'); //if you omit the type here, since `users` is a relation in Role model it would be auto-infered by backpack
CRUD::field('users')->type('select_multiple');
CRUD::field('users')->type('select2_multiple');- notes:
- if you choose to use the
relationshipfield type, you can also use the InlineCreate operation, which will add a [+ Add Item] button next to the dropdown, to let the admin create a User/Role in a modal, without leaving the current Create User/Role form;
- if you choose to use the
EXTRA: Saving aditional data in the pivot table
- To be able to save aditional data in the pivot table you should use
repeatablefield, but you'll also need to modify yourstore()andupdate()methods to take that into account, and transform the JSON received from therepeatablefield into actual entries in the database (and back); check out this example here for a full example on how to do it.
morphOne (1-1 polymorphic relationship)
- example:
- Post/User -> Video.
- The User model and the Post model have 1 Video each.
- the
morphOnerelationship should be properly defined in both the Post/User and Video models;
You should now use the repeatable field on the Post/User create/update form, to add a Video to your models, but you'll also need to modify your store() and update() methods to take that into account, and transform the JSON received from the repeatable field into actual entries in the database (and back); check out this example here for a full example on how to do it.
morphMany (1-n polymorphic relationship)
- example:
- Video/Post -> Comment.
- The Video model and the Post model can have multiple Comment model but the comment belong to only one of them.
- the
morphManyrelationship should be properly defined in both the Post/Video and Comment models;
You should now use the repeatable field on the Post/Video create/update form, to add one or more Comment to your models, but you'll also need to modify your store() and update() methods to take that into account, and transform the JSON received from the repeatable field into actual entries in the database (and back); check out this example here for a full example on how to do it.
morphToMany (n-n polymorphic relationship)
- example:
- Video/Post -> Tag.
- The Video model and the Post model can have multiple Tag model and each Tag model can belong to one or more of them.
- the
morphToManyrelationship should be properly defined in both the Post/Video and Tag models;
CRUD::field('tags'); //will assume to be a relationship field type.
CRUD::field('tags')->type('select2_multiple')->model('\Backpack\NewsCRUD\app\Models\Tag')->attribute('name');- notes:
- if you choose to use the
relationshipfield type, you can also use the InlineCreate operation, which will add a [+ Add Item] button next to the dropdown, to let the admin create a User/Role in a modal, without leaving the current Create User/Role form;
- if you choose to use the
EXTRA: Saving aditional data in the pivot table
You should now use the repeatable field on the Post/Video create/update form, to add one or more Tag to your models, but you'll also need to modify your store() and update() methods to take that into account, and transform the JSON received from the repeatable field into actual entries in the database (and back); check out this example here for a full example on how to do it.
hasOneThrough (1-1-1 relationship) and hasManyThrough (1-1-n relationship)
- Both are "read" relations and should not be edited from the far side of the relation. To give some context imagine 3 models: Product, Category and Order.
The Product has a Category (category_id), and the Order has a Product (product_id). We would use
HasOneThroughin theOrdermodel to get theCategorythroughProductmodel.