How I created a custom “webcam” field for Backpack.
I have a project which is being used in exhibitions to print ID cards. People come for spot registrations and collect a physical ID bad...
Karan Datwani
Share:
I have a project which is being used in exhibitions to print ID cards. People come for spot registrations and collect a physical ID bad...
I have a project which is being used in exhibitions to print ID cards. People come for spot registrations and collect a physical ID badge to get entry into the exhibitions.
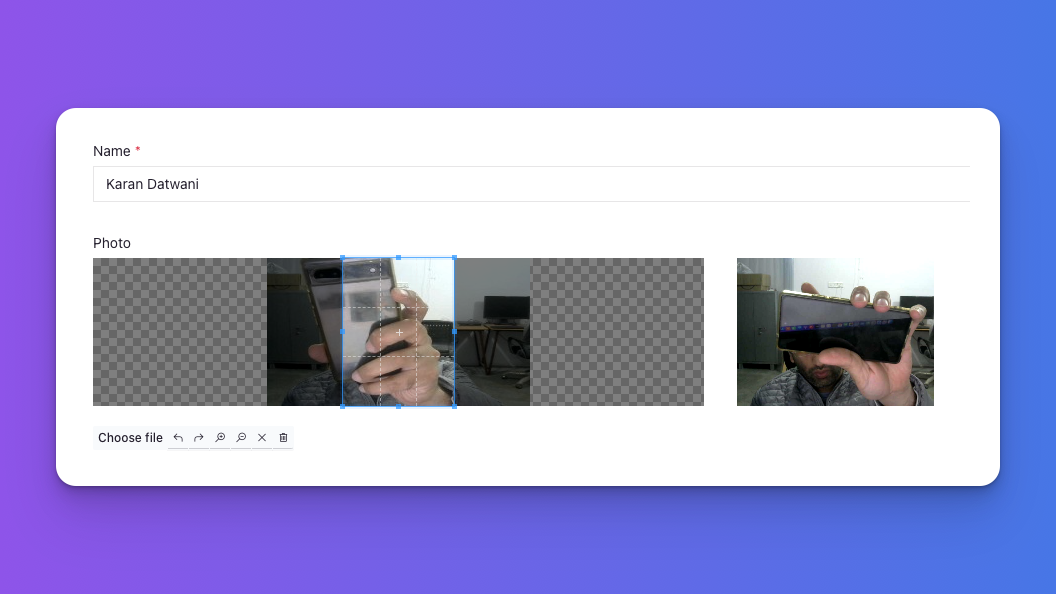
This ID card has name, company name and photo printed of the visitor and this photo is captured using a webcam field live at the registration counter.
My client has been using this project, for more than 5 Years and I've also been using Backpack since that time. I chose Backpack to create the Visitor CRUD. It was blazing fast to set up the project with Backpack.
All fields were available to record everything, except a field to capture live image. Thankfully, Backpack supports the use of custom fields – so I happily took the chance to create a webcam field to fulfil my needs.
Currently, I'm using this custom field for my project. I thought I'd share it with you all. This would be a guide on how to create a custom field for Backpack – in this case, it would be a webcam field.
Creating a custom backpack field requies just one command.
Run following command in ternimal with the field name of your choice:
php artisan backpack:field new_field_name
This creates a new blade file in your application in /resources/views/vendor/backpack/crud/fields with a skeleton for the field.
You can make changes as you like, for me, I first added a webcam input field:
{{-- webcam_field field --}}
...

<input type="hidden" name="{{ $field['name'] }}" data-init-function="bpFieldInitWebcamFieldElement"
    value="{{ $field['value'] }}" @include('crud::fields.inc.attributes')>
+<div class="row">

+    <div class="col">
+        <div id="{{ $field['name'] }}_camera" style="min-width:320px; min-height:240px;"></div>
+    </div>

+    <div class="col">
+        <div id="{{ $field['name'] }}_result" style="">@if($field['value'])<img src="{{ $field['value'] }}"/>@endif</div>
+    </div>

+</div>
Then I added the supporting webcam.js from CDN:
{{-- CUSTOM JS --}}
@push('crud_fields_scripts')
    {{-- How to load a JS file? --}}
+@basset('https://cdnjs.cloudflare.com/ajax/libs/webcamjs/1.0.26/webcam.min.js')

    {{-- How to add some JS to the field? --}}
    @bassetBlock('path/to/script.js')
        <script>
            function bpFieldInitWebcamFieldElement(element) {
                // this function will be called on pageload, because it's
                // present as data-init-function in the HTML above; the
                // element parameter here will be the jQuery wrapped
                // element where init function was defined
-                console.log(element.val());
+                Webcam.attach('#' + element.attr("name") + '_camera');

+                $('#' + element.attr("name") + '_camera').click(function() {
+                    Webcam.snap(function(data_uri) {
+                        element.val(data_uri);
+                        $('#' + element.attr("name") + '_result').html('<img src="' + data_uri + '"/>');
+                    });
+                })
            }
        </script>
    @endBassetBlock
@endpush
This worked!
But, this was not fulfilling my need. I needed a UI to capture, select & crop the visitor's face in a 3:4 ratio to print.
I was too lazy to build all this and I found that the base64_image field does all these stuff; the only difference is, I wanted to use a webcam instead of a file chooser.
So, I ditched the previous field and created a new one using a parameter on the same command to create the field from the existing base64_image one:
php artisan backpack:field new_field_name --from=base64_image
Then I made some small changes to it and voila! I created my own webcam field without much effort, with all features like cropping rotation, file picker and everything which base64_image does.
The code is too long for this post, so for your convenience I've put that in a gist;
https://gist.github.com/karandatwani92/9212ce77dd389be96395866b0ae3780d
This is a basic example of expanding backpack field types to fit in your needs and the possibilities are really endless. You can check more details on the Docs.
Hope this helps. Happy Coding!
Subscribe to our "Article Digest". We'll send you a list of the new articles, every week, month or quarter - your choice.
What do you think about this?
Wondering what our community has been up to?