Multi Auth
Offer your admins more ways to log in: 2FA, magic links, passkeys and social login.
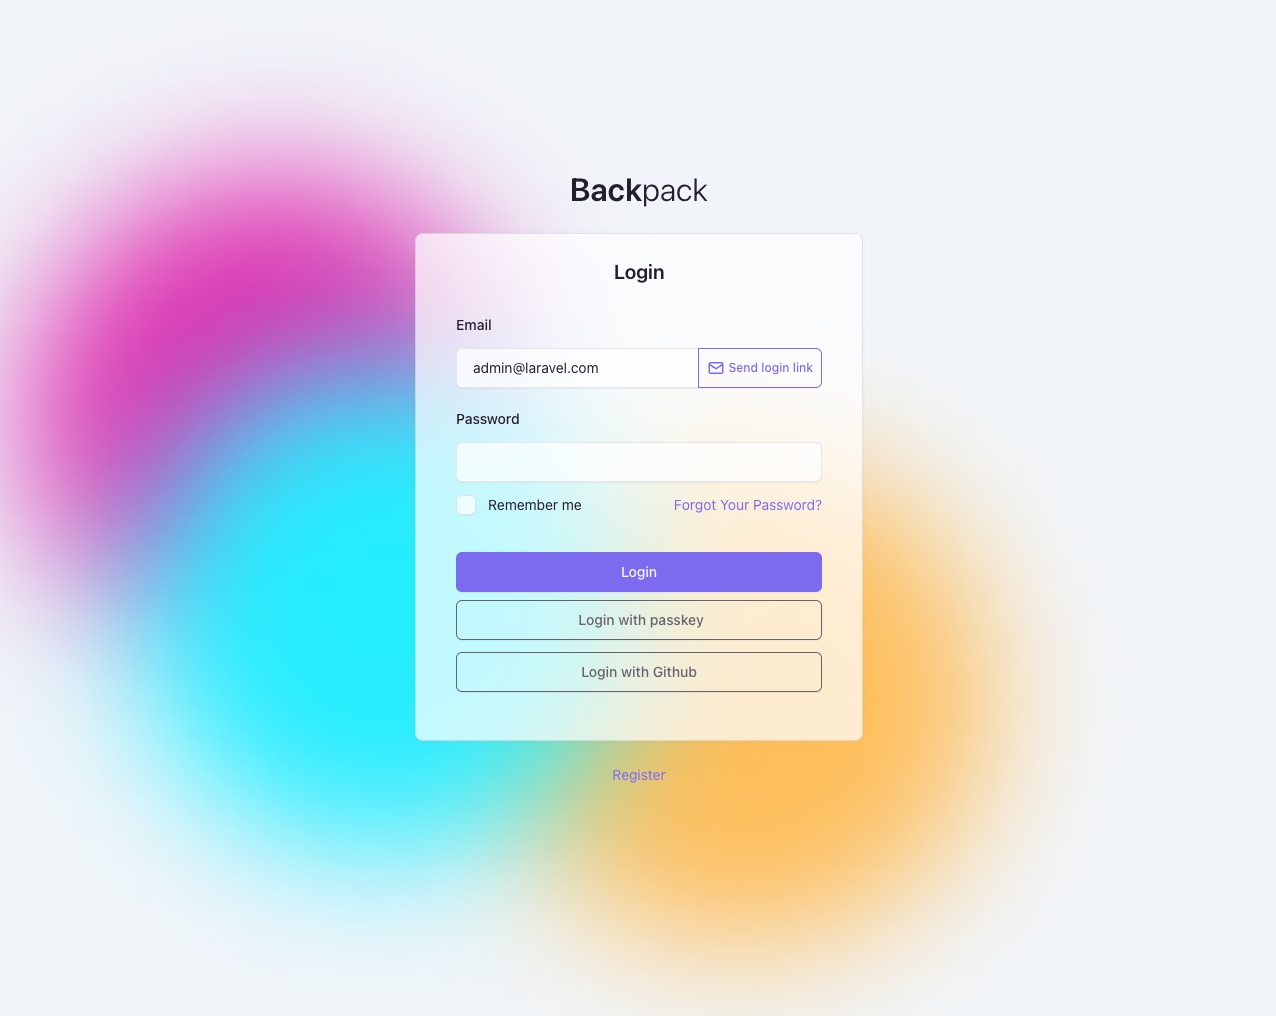
This package makes it dead-simple to offer more login options to your admins. Install and configure this one package to get:
- email & password login (looks the same as Backpack/CRUD, but powered by Fortify)
- two-factor-authentication (2FA)
- magic link login
- passkey login
- social login (Google, Facebook, Apple, Github, etc)
It replaces Backpack\CRUD's authentication entirely, while keeping the existing Backpack login URLs and theme views. Behind the scenes, this package uses Laravel Fortify, Laravel Socialite and custom code for the features they don't support (like magic link).
Installing the package enables it: once you complete the setup steps below, Multi-Auth replaces Backpack's legacy authentication. Don't install it if you want to keep Backpack's built-in authentication.
Requirements
- PHP 8.2 or newer.
- Backpack CRUD 7.x.
- Laravel 12 or 13.
- A working Laravel session guard and password broker.
Installation
Step 1. Disable Backpack\CRUD auth routes
// in config/backpack/base.php
'setup_auth_routes' => false,
'setup_email_verification_middleware' => false,
Step 2. Configure private repository access
composer config http-basic.repo.backpackforlaravel.com your-token-username your-token-password
And in your application's composer.json:
"repositories": [
    {
        "type": "composer",
        "url": "https://repo.backpackforlaravel.com/"
    }
]
Step 3. Install the package
composer require backpack/multi-auth
Multi-auth installs laravel/fortify and laravel/passkeys as dependencies.
Their providers are discovered as usual, but Multi-Auth suppresses their
default routes and registers the Backpack-named routes
(backpack.auth.login, etc.) instead — nothing else is needed.
Step 4. Publish the configuration
php artisan vendor:publish --provider="Backpack\\MultiAuth\\MultiAuthServiceProvider" --tag=backpack-multi-auth-config
Step 5. Clear cache
Multi-Auth is active as soon as it's installed. For an existing Backpack v7
application it requires no extra configuration: when the keys below are left
null, Multi-Auth falls back to the authentication configuration your Backpack
application already has, so no user or password migration is required.
After the installation steps, clear cached configuration and routes and test the normal authentication flow in staging before deploying:
php artisan optimize:clear
php artisan route:list --name=backpack.auth
Test login, logout, password reset, registration when enabled, and email verification when enabled. Existing users, password hashes, reset-token storage, and Backpack theme overrides remain in use.
That's it - you're now ready to enable the logins you need. Follow the steps below for each login method you're interested in.
Uninstall
To return to the legacy Backpack authentication flow, remove the package:
composer remove backpack/multi-auth
Then restore the previous backpack.base auth settings and run
php artisan optimize:clear. Users may need to sign in again.
Two-Factor Authentication
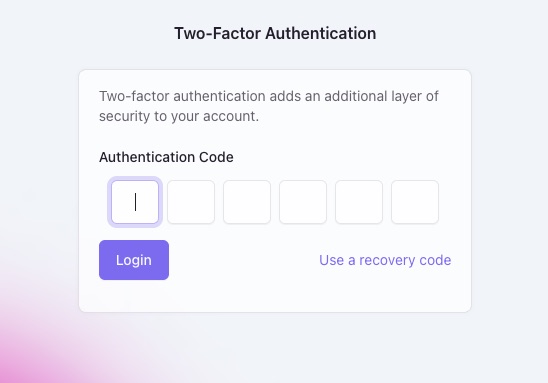
Multi-Auth supports Laravel Fortify's built-in two-factor authentication (TOTP). It is disabled by default.
Step 1. Prerequisites. The password.confirm middleware alias must be registered. Fresh Laravel 12/13
applications include it by default. If your application has a custom HTTP kernel
(app/Http/Kernel.php) and you see a Target class [password.confirm] does not exist error, add the alias manually:
// app/Http/Kernel.php
protected $middlewareAliases = [
    // ...
    'password.confirm' => \Illuminate\Auth\Middleware\RequirePassword::class,
];
Step 2. Enable 2FA feature. Set the feature flag in your environment or config:
BACKPACK_MULTI_AUTH_FEATURES_TWO_FACTOR=true
Or in config/backpack/multi-auth.php:
'features' => [
    'two_factor' => true,
],
Step 3. Set up user model. Add the TwoFactorAuthenticatable trait to your User model:
use Laravel\Fortify\TwoFactorAuthenticatable;

class User extends Authenticatable
{
    use TwoFactorAuthenticatable;
}
Step 4. Publish and run the database migration. To add the required columns:
php artisan vendor:publish --provider="Backpack\\MultiAuth\\MultiAuthServiceProvider" --tag=backpack-multi-auth-migrations-two-factor
php artisan migrate
The combined backpack-multi-auth-migrations tag publishes the migrations of
every feature at once; the feature-specific tags publish only what you need:
| Tag | Publishes |
|---|---|
backpack-multi-auth-migrations |
All feature migrations |
backpack-multi-auth-migrations-two-factor |
2FA columns only |
backpack-multi-auth-migrations-socialite |
Social login columns only |
backpack-multi-auth-migrations-magic-link |
Magic login columns only |
backpack-multi-auth-migrations-passkeys |
Passkeys table only |
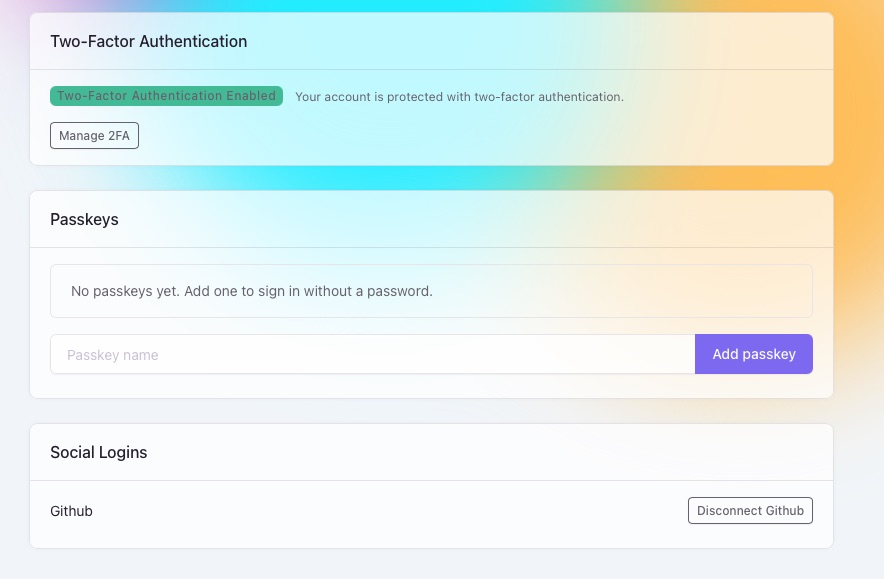
Step 5. Test and use it. Once enabled, the 2FA section appears automatically on the My Account page
(/admin/edit-account-info). Users can also visit /admin/user/two-factor-authentication directly.
The management UI lets users:
- Enable 2FA and scan a QR code with their authenticator app
- Enter a confirmation code to complete setup
- View and regenerate recovery codes
- Disable 2FA
Magic Link Login
Multi-Auth supports passwordless login through a single-use code sent by email. It is disabled by default.
Step 1. Enable the Magic Link login
BACKPACK_MULTI_AUTH_FEATURES_MAGIC_LINK=true
Or in config/backpack/multi-auth.php:
'features' => [
    'magic_link' => true,
],
Step 2. Publish and run the migration that adds the code columns to the users table:
php artisan vendor:publish --provider="Backpack\\MultiAuth\\MultiAuthServiceProvider" --tag=backpack-multi-auth-migrations-magic-link
php artisan migrate
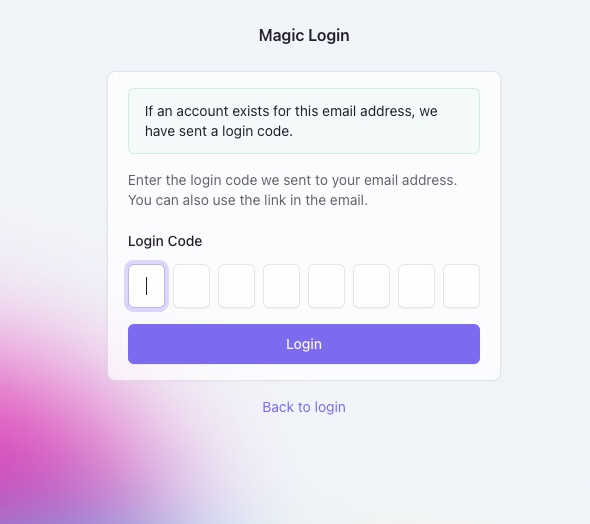
Step 3. Test and use it. When enabled, the login page shows a "Send login link" button next to the email field as soon as a valid-format email is typed. Submitting it:
- Generates a random single-use numeric code (8 digits by default) and sends it by email, together with a login link.
- Redirects to
/admin/login/magic, where the code can be typed into the digit boxes. The response is always the same whether or not the email belongs to an account - no user enumeration. - The emailed link (
/admin/login/magic?code=...) only pre-fills the boxes: logging in still requires an explicit click, so email scanners that follow links cannot consume the code.
Codes are stored only as a SHA-256 hash, expire after 15 minutes by default,
and can be used once. Code requests and verification attempts are rate-limited
per email/IP, per IP and app-wide. When the user has 2FA enabled the
two-factor challenge is skipped after magic-link login, unless
two_factor.require_after.magic_link is set to true.
Step 4. (optional) Customize the Notifications:
MagicLoginNotification and ResetPasswordNotification are resolved through
the container, so you can replace them with your own classes in any service
provider. The replacement receives the same constructor arguments:
$this->app->bind(
    \Backpack\MultiAuth\Notifications\MagicLoginNotification::class,
    \App\Notifications\LoginCode::class, // linkUrl, code, expiresMinutes
);

$this->app->bind(
    \Backpack\MultiAuth\Notifications\ResetPasswordNotification::class,
    \App\Notifications\AdminPasswordReset::class, // token, passwordBroker
);
Passkey Login
Multi-Auth supports passkey (WebAuthn) login through Laravel Fortify's Passkeys integration (laravel/passkeys). It is disabled by default.
Step 1. Enable Passkeys:
BACKPACK_MULTI_AUTH_FEATURES_PASSKEYS=true
Or in config/backpack/multi-auth.php:
'features' => [
    'passkeys' => true,
],
Step 2. Wire the User model. Add the PasskeyAuthenticatable trait to your User model and implement the PasskeyUser contract (the trait provides the required methods, the interface is what laravel/passkeys type-checks at runtime):
use Laravel\Fortify\PasskeyAuthenticatable;
use Laravel\Passkeys\Contracts\PasskeyUser;

class User extends Authenticatable implements PasskeyUser
{
    use PasskeyAuthenticatable;
}
Without the
implements PasskeyUserdeclaration, passkey registration and login fail with "User model must implement the PasskeyUser contract."
Step 3. Publish and run the migration that creates the passkeys table:
php artisan vendor:publish --provider="Backpack\\MultiAuth\\MultiAuthServiceProvider" --tag=backpack-multi-auth-migrations-passkeys
php artisan migrate
Step 4. Test and use it. When enabled:
- The login page shows a "Login with passkey" button. The browser performs
the WebAuthn ceremony and POSTs the credential to
/admin/passkeys/login; after verification the user is logged in and redirected to the dashboard (or their intended URL). - Where the browser supports it (conditional mediation), passkeys are also
offered in the email field's native dropdown, so no button click is needed.
This requires the
webauthnautocomplete token, which the package adds to the login forms automatically. - The "Remember me" checkbox applies to passkey logins too: the button and the autofill flow both forward its state to the login endpoint.
- Authenticated users can register, list and delete passkeys on the My
Account page (
/admin/edit-account-info). Registering or deleting a passkey requires recent password confirmation by default (passkeys.confirm_password). - The password confirmation screen (
password.confirm) offers a "Confirm with passkey" option, so users can confirm recent presence without re-typing their password.
When the user has 2FA enabled the two-factor challenge is skipped after
passkey login, unless two_factor.require_after.passkeys is set to true.
Passkey login is rate-limited (6 requests per minute per IP by default).
Social Login (Socialite)
Multi-Auth ships Laravel Socialite integration for the admin panel. Social login only authenticates linked users. When registration is enabled (the same flag that controls the register page), an unlinked social account can also register - the user is created from the provider's name and email and the provider is linked automatically. Registration never hijacks an existing account: if the provider's email already exists locally, the user is asked to sign in with their password and connect the provider instead. Each user links at most one provider, while the app can support as many providers as you want.
laravel/socialite is an optional dependency: install it only if you use the
social login feature.
Step 1. Install Socialite
composer require laravel/socialite
Step 2. Create the OAuth application. Create an OAuth app in the provider's developer console:
- GitHub → Settings → Developer settings → OAuth Apps → New OAuth App
- Google → Google Cloud Console → Credentials → Create Credentials → OAuth client ID (Web application)
- etc.
Register one callback URL, in the exact format:
{APP_URL}/admin/auth/{provider}/callback
Example: https://admin.example.com/admin/auth/github/callback.
Providers only allow a single callback URL, so the login, account-linking and
password-confirmation flows all reuse it. It must match config/app.url
exactly, including the scheme (http vs https) - a mismatch is the most
common source of "redirect_uri MUST match" errors.
Step 3. Add the credentials
// config/services.php
'github' => [
    'client_id' => env('GITHUB_CLIENT_ID'),
    'client_secret' => env('GITHUB_CLIENT_SECRET'),
    'redirect' => env('APP_URL').'/admin/auth/github/callback',
],
GITHUB_CLIENT_ID=
GITHUB_CLIENT_SECRET=
Step 4. Add the social login columns. Publish and run the migration that adds provider_name and provider_id columns to the users table:
php artisan vendor:publish --provider="Backpack\\MultiAuth\\MultiAuthServiceProvider" --tag=backpack-multi-auth-migrations-socialite
php artisan migrate
Step 5. Enable social login
BACKPACK_MULTI_AUTH_SOCIALITE_ENABLED=true
Step 6. (Optional) restrict the allowed providers
// config/backpack/multi-auth.php
'socialite' => [
    'providers' => ['github', 'google'],
],
When the whitelist is null, every provider in config/services.php with
credentials filled in automatically gets "Login with X" buttons on the login
and register pages, a "Connect X" section on the My Account page, and a
"Confirm with X" option on the password confirmation screen. No theme changes
are needed - the buttons ship with the Backpack themes and only appear when
social login is enabled.
Users who signed up socially (and therefore have no known password) confirm sensitive actions (like enabling 2FA) by re-authorizing with their linked provider - the password confirmation page shows a "Confirm with X" button for them.
To customize how a Socialite user maps to a local user (email matching, role checks, a separate links table...), register a callback in a service provider:
\Backpack\MultiAuth\Support\SocialAuth::findUsersUsing(function ($socialUser, $provider) {
    // Return the local user to authenticate, or null to reject the login.
    return \App\User::where('email', $socialUser->getEmail())->first();
});
By default, enabling or disabling 2FA requires the user to re-enter their
current password (two_factor.confirm_password).
Details
What It Provides
- Fortify-powered login, logout, remember me, password reset, registration, and email verification.
- Zero-configuration compatibility: when nothing is configured, Multi-Auth falls back to the application's existing Backpack settings, keeping the current users, guard, password broker, route prefix, and theme overrides.
- Existing Backpack route names and URLs, including
backpack.auth.loginand/admin/loginby default. - Existing Tabler and CoreUI auth views through Backpack's normal view override system.
- Optional explicit configuration for projects that already use Laravel's standard user, guard, and password-broker configuration.
- Social login through Laravel Socialite (see the Social Login section), including account linking and social registration.
- Passwordless "magic link" login through a single-use email code (see the Magic Link Login section).
- Passwordless passkey login (WebAuthn) through Laravel Passkeys, including passkey management on the My Account page (see the Passkeys section).
What Stays The Same
Multi-Auth is designed so that existing Backpack applications keep working without code changes. All of these continue to work:
backpack_user(),backpack_auth(), andbackpack_guard_name()— Multi-Auth overrides the guard and password-broker config so these helpers always resolve the same guard that Fortify is using.php artisan backpack:user— creates admin users directly, exactly as before.- The
CheckIfAdminmiddleware andbackpack_middleware()helper. - The
AuthenticateSessionmiddleware. - Dashboard routes (
/admin/dashboard) and My Account routes (/admin/edit-account-info,/admin/change-password) — only the legacy auth routes are replaced; everything else stays active. backpack_users_have_email()and all other Backpack helper functions.- Theme views for login, register, password reset, and email verification.
Configuration
Configuration Options
| Key | Purpose |
|---|---|
guard |
Optional guard override. null falls back to backpack.base.guard, then auth.defaults.guard. |
passwords |
Optional password broker override. null falls back to backpack.base.passwords, then auth.defaults.passwords. |
username |
Optional login column override. null falls back to backpack.base.authentication_column, then email. |
username_label |
Optional login field label override. null falls back to backpack.base.authentication_column_name, then a title-cased username. |
email |
Optional email column override. null falls back to backpack.base.email_column, then email. |
user_model |
Optional user model override. null resolves the model from the guard's auth provider. |
features.registration |
Enables or disables registration. null keeps the Backpack v7 setting. Env: BACKPACK_MULTI_AUTH_FEATURES_REGISTRATION. |
features.password_reset |
Enables or disables password reset. null keeps the Backpack v7 setting. Env: BACKPACK_MULTI_AUTH_FEATURES_PASSWORD_RESET. |
features.email_verification |
Enables or disables email verification. null keeps the Backpack v7 setting. Env: BACKPACK_MULTI_AUTH_FEATURES_EMAIL_VERIFICATION. |
features.two_factor |
Enables or disables two-factor authentication. null or false keeps it disabled. Env: BACKPACK_MULTI_AUTH_FEATURES_TWO_FACTOR. |
features.magic_link |
Enables or disables passwordless login through a one-time code sent by email. null or false keeps it disabled. Env: BACKPACK_MULTI_AUTH_FEATURES_MAGIC_LINK. |
features.passkeys |
Enables or disables passkey (WebAuthn) login. null or false keeps it disabled. Env: BACKPACK_MULTI_AUTH_FEATURES_PASSKEYS. |
password_rules |
Validation rules for registration and password reset. Defaults to required,string,min:8,confirmed. |
two_factor.confirm_password |
Require current password before enabling/disabling 2FA. Defaults to true. |
two_factor.require_after.* |
Whether the 2FA challenge is still required after logging in through social login (social), a magic link (magic_link) or a passkey (passkeys). Defaults to false for all three (these login modes skip the challenge); email/password login always requires 2FA when enabled. |
magic_link.expires_minutes |
Minutes until a magic login code expires. Defaults to 15. |
magic_link.code_length |
Number of digits in the magic login code. Defaults to 8. |
magic_link.max_send_attempts |
Max code-send requests per minute, keyed by email address + IP. Defaults to 2. |
magic_link.max_verify_attempts |
Max code-verification attempts per minute, keyed by IP. Defaults to 5. |
magic_link.max_verify_attempts_global |
App-wide cap on code-verification attempts per minute. Defaults to 60. |
passkeys.confirm_password |
Require recent password confirmation before registering or deleting a passkey. Defaults to true. |
email_verification.protect_routes |
Requires verified email addresses for Backpack routes. |
fortify_options |
Raw Fortify options merged last over Multi-Auth defaults. Only for advanced use; config/fortify.php is ignored while Multi-Auth is enabled. |
socialite.enabled |
Enables social login routes. Env: BACKPACK_MULTI_AUTH_SOCIALITE_ENABLED. |
socialite.providers |
Whitelist of allowed providers. null = every provider configured in config/services.php. |
socialite.link_enabled |
Registers the account-linking routes. Defaults to true. |
socialite.redirect_to |
Redirect after successful social login. Defaults to the Backpack dashboard. |
Multi-Auth stops with a clear configuration error when the chosen guard or broker does not exist, is not session-based, or CRUD's old auth routes are still enabled.
Configuring Guard, Broker, Username, and User Model
Multi-Auth resolves every authentication setting with a single fallback chain:
backpack.multi-auth.*— your explicit Multi-Auth configuration.backpack.base.*— Backpack's existing configuration.- Laravel's defaults (
auth.defaults.*,email, etc.).
Projects that already use Laravel's standard authentication configuration can explicitly point Multi-Auth at their own guard and password broker:
// config/backpack/multi-auth.php
'guard' => 'web',
'passwords' => 'users',
When user_model is null, Multi-Auth resolves the user model from the resolved
guard's authentication provider, so it always matches the guard. You can also
override it explicitly:
'user_model' => \App\Models\User::class,
Multi-Auth automatically overrides backpack.base.guard and
backpack.base.passwords to match the resolved guard and broker, so
backpack_user() and all Backpack helpers keep working. No manual config changes
are needed.
Switching the guard or user model can require a user-data migration and changes to custom admin middleware. For existing Backpack v7 projects, leaving the configuration empty and using the Backpack fallbacks is the recommended starting point.
Relationship With config/fortify.php
Multi-Auth is the only configuration file you need for Backpack authentication.
It rebuilds the Fortify configuration from config/backpack/multi-auth.php, so
a published config/fortify.php is ignored. You never need to publish
Fortify's config for Multi-Auth.
config/fortify.php is only relevant when you run standalone Fortify outside
Multi-Auth — for example, a separate frontend login that uses its own guard.
That setup is covered in "Using Fortify for Frontend + Backpack for Admin"
below.
Advanced Fortify settings can still be configured in one place, through the
fortify_options key of config/backpack/multi-auth.php:
'fortify_options' => [
    'limiters' => ['login' => '5,1'],
    'lowercase_usernames' => true,
],
These raw options are merged last, so they win over Multi-Auth's defaults.
Advanced Usage
Overriding the Views
Publish the 2FA views to your application:
php artisan vendor:publish --provider="Backpack\\MultiAuth\\MultiAuthServiceProvider" --tag=backpack-multi-auth-views
Published views land in resources/views/vendor/backpack/multi-auth/auth/:
| View | Purpose |
|---|---|
two-factor-challenge.blade.php |
Login challenge page (TOTP / recovery code) |
two-factor-authentication.blade.php |
Standalone 2FA management page |
_two_factor_section.blade.php |
Partial embedded in the My Account page |
magic-login.blade.php |
Magic link code entry page |
_code_inputs.blade.php |
Shared digit-box code input (2FA + magic link) |
_magic_link_button.blade.php |
"Send login link" button on the login form |
_passkey_login_button.blade.php |
"Login with passkey" button + ceremony on the login form |
_passkeys_section.blade.php |
Partial embedded in the My Account page (register/list/delete passkeys) |
_passkey_helpers.blade.php |
Shared base64url conversion helpers used by the passkey views |
passwords/confirm.blade.php |
Password confirmation prompt |
Using Fortify for Frontend + Backpack for Admin
This is an alternative to Multi-Auth. Use it when you want to keep Backpack's built-in authentication for the admin panel, while adding Laravel Fortify for your frontend users. Multi-Auth is not involved in this setup.
The goal: separate login screens and separate guards — Fortify at /login for
the web guard, and Backpack CRUD at /admin/login for the backpack guard.
What Works
| Concern | Status |
|---|---|
| URL paths | ✅ No collision — /login vs /admin/login |
| Route names (login/logout/register/reset) | ✅ No collision — login vs backpack.auth.login |
| Guard isolation | ✅ Fortify → web, Backpack → backpack |
backpack_user() and backpack_auth() |
✅ Unaffected — they use the backpack guard explicitly |
Making Email Verification Work for Both Guards
Backpack v7 reads verification route names from a config key. Change them to avoid colliding with Fortify's defaults:
// config/backpack/base.php
'email_verification_route_names' => [
    'notice' => 'backpack.verification.notice',
    'verify' => 'backpack.verification.verify',
    'send'   => 'backpack.verification.send',
],

'setup_email_verification_routes' => true,   // keep Backpack's routes active
That's it. Backpack registers its verification routes with the custom names you provided. Fortify keeps the defaults. Both work simultaneously, no route registration needed.
Setup Steps
1. Publish the Fortify config and point it at the frontend guard:
php artisan vendor:publish --provider="Laravel\\Fortify\\FortifyServiceProvider" --tag=fortify-config
// config/fortify.php
'guard' => 'web',
'passwords' => 'users',
'home' => '/dashboard',
3. Keep Backpack's auth routes active:
// config/backpack/base.php
'setup_auth_routes' => true,
'guard' => 'backpack',
4. Set up email verification for both guards (see solution above).
5. Rebuild discovery and clear caches:
composer dump-autoload
php artisan optimize:clear
Result
| Frontend | Admin | |
|---|---|---|
| URL | /login |
/admin/login |
| Guard | web |
backpack |
| Powered by | Fortify | Backpack CRUD (legacy) |
auth()->user() |
Frontend user | Depends on middleware |
backpack_user() |
— | Admin user |
| Email verification | Both ✅ (see solution above) |
| Frontend | Admin | |
|---|---|---|
| URL | /login |
/admin/login |
| Guard | web |
backpack |
| Powered by | Fortify | Backpack CRUD legacy |
auth()->user() |
Frontend user | Depends on middleware |
backpack_user() |
— | Admin user |
Use auth()->guard('web')->user() or Auth::user() on frontend routes, and
backpack_user() on admin routes. The two never interfere.
Security
- Multi-Auth uses Laravel Fortify for authentication, session regeneration, password reset, signed email verification, and login throttling.
- The two-factor challenge, password confirmation screen, magic-link code flow and passkey endpoints are all rate-limited (per challenged user/IP, per IP, and app-wide where appropriate).
- Magic login codes are stored as SHA-256 hashes, are single-use and expire; the emailed link only pre-fills the code and never logs anyone in by itself.
- Logout is POST-only (
GET /admin/logoutis not registered) to avoid CSRF-forged logouts; the Backpack themes submit a hidden form. - Fortify and Passkeys are auto-discovered, but Multi-Auth suppresses their generic routes so they are never registered beside Backpack's routes.
- Use HTTPS in production and keep
APP_KEY, mail credentials, and OAuth credentials out of source control. - Authentication confirms identity; your Backpack middleware and policies still decide which authenticated users may access the admin panel. Review those rules before enabling the package.
- Review login, reset, verification, and rollback behavior in staging before a production rollout.
To report a security issue, email [email protected] rather than opening a public issue.
Support
For bugs and feature requests, use the private support channel provided with your Backpack purchase.
License
This software is proprietary and closed-source. It is released under the End-User License Agreement (EULA) for Private Backpack Addons. A copy of the EULA is included in LICENSE.md.
Package Access
You don't currently have access to this package. To gain access, go ahead and purchase it. You'll get:
Next 12 months
- download or install using Composer;
- all updates (major, minor and patch);
After 12 months
- can still access all versions and updates you paid;
- can still install using Composer;
- no new versions or updates;