Fields
About
Field types define how the admin can manipulate an entry's values. They're used by the Create and Update operations.
Think of the field type as the type of input: <input type="text" />. But for most entities, you won't just need text inputs - you'll need datepickers, upload buttons, 1-n relationship, n-n relationships, textareas, etc.
We have a lot of default field types, detailed below. If you don't find what you're looking for, you can create a custom field type. Or if you just want to tweak a default field type a little bit, you can overwrite default field types.
Mandatory Field Attributes
For each of them, you only need to define it properly in the Controller. All field types will need at least three things:
- the
nameof the column in the database (ex: "title") - the human-readable
labelfor the input (ex: "Title") - the
typeof the input (ex: "text")
So at minimum, your field definition array should look like:
[
    'name' => 'description',
    'type' => 'textarea',
    'label' => 'Article Description',
]
Optional Field Attributes
There are a few optional attributes on all default field types, that you can use to easily achieve a few common cutomizations:
[
    'prefix' => '',
    'suffix' => '',
    'default'    => 'some value', // set a default value
    'hint'       => 'Some hint text', // helpful text, shows up after the input
    'attributes' => [
       'placeholder' => 'Some text when empty',
       'class' => 'form-control some-class',
       'readonly'=>'readonly',
       'disabled'=>'disabled',
     ], // change the HTML attributes of your input
     'wrapperAttributes' => [
       'class' => 'form-group col-md-12'
     ], // change the HTML attributes for the field wrapper - mostly for resizing fields
]
These will help you:
- prefix - add a text or icon before the actual input;
- suffix - add a text or icon after the actual input;
- default - specify a default value for the input, on create;
- hint - add descriptive text for this input;
- attributes - change or add actual HTML attributes of the input (ex: readonly, disabled, class, placeholder, etc);
- wrapperAttributes - change or add actual HTML attributes to the div that contains the input;
Fields API
To manipulate fields, you can use the methods below. As a second parameter, you can specify the operation you want that to work for (create or update). If you want it to work for both, don't use the second parameter.
// add a field to both Create and Update operation
$this->crud->addField($field_definition_array);

// add a field only to the Update operation
$this->crud->addField($field_definition_array, 'update');

// shorthand: add a text field to both Create and Update operations
$this->crud->addField('db_column_name');

// add multiple fields
$this->crud->addFields([$field_definition_array_1, $field_definition_array_2]);

// change the attributes of a field
$this->crud->modifyField($name, $modifs_array);

// remove a field from both operations
$this->crud->removeField('name');

// remove multiple fields from both operations
$this->crud->removeFields($array_of_names);

// remove all fields from all operations
$this->crud->removeAllFields();

// FIELD ORDER

// add a field before a given field
$this->crud->addField($field_definition_array)->beforeField('name');

// add a field after a given field
$this->crud->addField($field_definition_array)->afterField('name');
Extra Fields Features
Fake Fields (all stored as JSON in the database)
In case you want to store insignificant information for an entry that doesn't need a database column, you can add any number of Fake Fields, and all their information will be stored inside one column in the db, as JSON. By default, an extras column is assumed on the database table, but you can change that.
Step 1. Use the fake attribute on your field:
[
    'name' => 'name', // JSON variable name
    'label' => "Tag Name", // human-readable label for the input

    'fake' => true, // show the field, but don't store it in the database column above
    'store_in' => 'extras' // [optional] the database column name where you want the fake fields to ACTUALLY be stored as a JSON array
],
Step 2. On your model, make sure the db columns where you store the JSONs (by default only extras):
- are in your
$fillableproperty; - are on a new
$fakeColumnsproperty (create it now); - are casted as array in
$casts;
If you need your fakes to also be translatable, remember to also place
extrasin your model's$translatableproperty.
Example:
[
    'name' => 'meta_title',
    'label' => "Meta Title",
    'fake' => true,
    'store_in' => 'metas' // [optional]
],
[
    'name' => 'meta_description',
    'label' => "Meta Description",
    'fake' => true,
    'store_in' => 'metas' // [optional]
],
[
    'name' => 'meta_keywords',
    'label' => "Meta Keywords",
    'fake' => true,
    'store_in' => 'metas' // [optional]
],
In this example, these 3 fields will show up in the create & update forms, the CRUD will process as usual, but in the database these values won't be stored in the meta_title, meta_description and meta_keywords columns. They will be stored in the metas column as a JSON array:
{"meta_title":"title","meta_description":"desc","meta_keywords":"keywords"}If the store_in attribute wasn't used, they would have been stored in the extras column.
Split Fields into Tabs
You can now split your create/edit inputs into multiple tabs.
In order to use this feature, you just need to specify the tab name for each of your fields. Example:
$this->crud->addField([ // select_from_array
    'name' => 'select_from_array',
    'label' => "Select from array",
    'type' => 'select_from_array',
    'options' => ['one' => 'One', 'two' => 'Two', 'three' => 'Three'],
    'allows_null' => false,
    'allows_multiple' => true,
    'tab' => 'Tab name here',
]);
If you forget to specify a tab name for a field, Backpack will place it above all tabs.
Default Field Types
address_algolia
Use Algolia Places autocomplete to help users type their address faster. With the store_as_json option, it will store the address, postcode, city, country, latitude and longitude in a JSON in the database. Without it, it will just store the address string.
[   // Address
    'name' => 'address',
    'label' => 'Address',
    'type' => 'address_algolia',
    // optional
    'store_as_json' => true
],
Use attribute casting. For information stored as JSON in the database, it's recommended that you use attribute casting to
arrayorobject. That way, every time you get the info from the database you'd get it in a usable format.
Input preview:

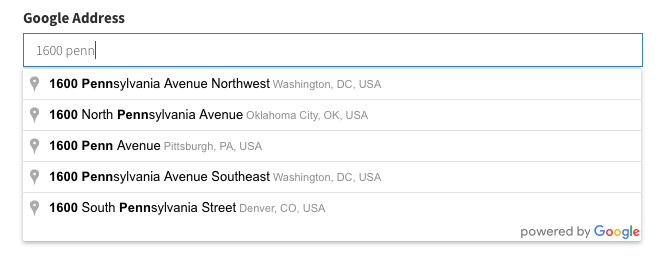
address_google
Use Google Places Search to help users type their address faster. With the store_as_json option, it will store the address, postcode, city, country, latitude and longitude in a JSON in the database. Without it, it will just store the complete address string.
[   // Address
    'name' => 'address',
    'label' => 'Address',
    'type' => 'address_google',
    // optional
    'store_as_json' => true
],
Using Google Places API is dependant on using an API Key. Please get an API key - you do have to configure billing, but you qualify for $200/mo free usage, which covers most use cases. Then copy-paste that key as your services.google_places.key value. So inside your config/services.php please add the items below:
    'google_places' => [
        'key' => 'the-key-you-got-from-google-places'
    ],
Use attribute casting. For information stored as JSON in the database, it's recommended that you use attribute casting to
arrayorobject. That way, every time you get the info from the database you'd get it in a usable format.
Input preview:
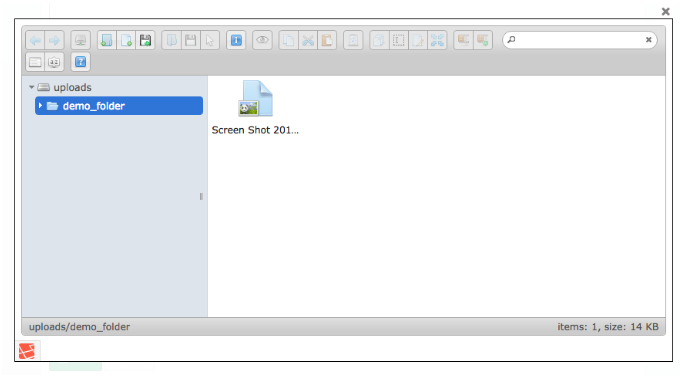
browse
If you've chosen to use elFinder upon Backpack installation, this button allows the admin to open elFinder and select a file from there.
[   // Browse
    'name' => 'image',
    'label' => 'Image',
    'type' => 'browse'
],
Input preview:

Onclick preview:
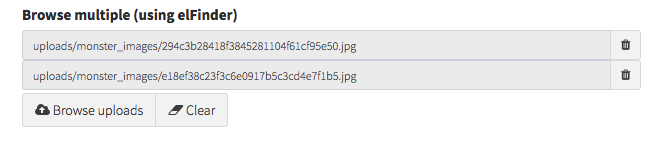
browse_multiple
Open elFinder and select multiple files from there.
[   // Browse multiple
    'name' => 'files',
    'label' => 'Files',
    'type' => 'browse_multiple',
    // 'multiple' => true, // enable/disable the multiple selection functionality
    // 'mime_types' => null, // visible mime prefixes; ex. ['image'] or ['application/pdf']
],
We recommend you cast your attribute as array on your model. That way, when you do $entry->files you get a nice array. The field will work even if you don't cast.
Input preview:
base64_image
Upload an image and store it in the database as Base64. Notes:
- make sure the column type is LONGBLOB;
- detailed instructions and customizations here;
$this->crud->addField([ // base64_image
    'label' => "Profile Image",
    'name' => "image",
    'filename' => "image_filename", // set to null if not needed
    'type' => 'base64_image',
    'aspect_ratio' => 1, // set to 0 to allow any aspect ratio
    'crop' => true, // set to true to allow cropping, false to disable
    'src' => NULL, // null to read straight from DB, otherwise set to model accessor function
]);
Input preview:

checkbox
Checkbox for true/false.
[   // Checkbox
    'name' => 'active',
    'label' => 'Active',
    'type' => 'checkbox'
],
Input preview:

checklist
[
    'label'     => 'Roles',
    'type'      => 'checklist',
    'name'      => 'roles',
    'entity'    => 'roles',
    'attribute' => 'name',
    'model'     => "Backpack\PermissionManager\app\Models\Role",
    'pivot'     => true,
]);
Input preview:

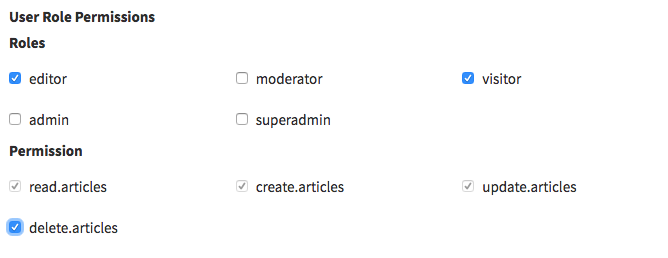
checklist_dependency
// two interconnected entities
'label'             => 'User Role Permissions',
'field_unique_name' => 'user_role_permission',
'type'              => 'checklist_dependency',
'name'              => 'roles_and_permissions', // the methods that defines the relationship in your Model
'subfields'         => [
        'primary' => [
            'label'            => 'Roles',
            'name'             => 'roles', // the method that defines the relationship in your Model
            'entity'           => 'roles', // the method that defines the relationship in your Model
            'entity_secondary' => 'permissions', // the method that defines the relationship in your Model
            'attribute'        => 'name', // foreign key attribute that is shown to user
            'model'            => "Backpack\PermissionManager\app\Models\Role", // foreign key model
            'pivot'            => true, // on create&update, do you need to add/delete pivot table entries?]
            'number_columns'   => 3, //can be 1,2,3,4,6
        ],
        'secondary' => [
            'label'          => 'Permission',
            'name'           => 'permissions', // the method that defines the relationship in your Model
            'entity'         => 'permissions', // the method that defines the relationship in your Model
            'entity_primary' => 'roles', // the method that defines the relationship in your Model
            'attribute'      => 'name', // foreign key attribute that is shown to user
            'model'          => "Backpack\PermissionManager\app\Models\Permission", // foreign key model
            'pivot'          => true, // on create&update, do you need to add/delete pivot table entries?]
            'number_columns' => 3, //can be 1,2,3,4,6
        ],
    ],
],
Input preview:
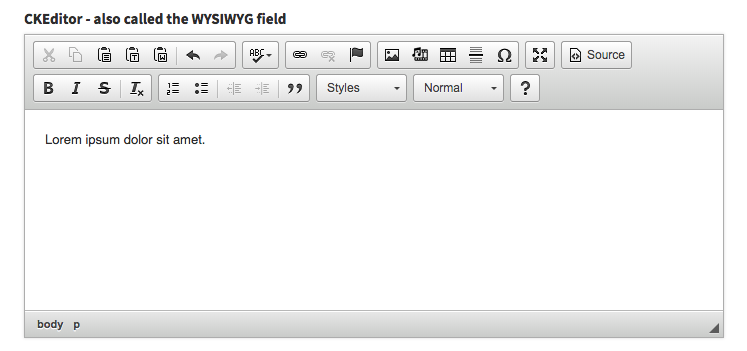
ckeditor
Show a wysiwyg CKEditor to the user.
[   // CKEditor
    'name' => 'description',
    'label' => 'Description',
    'type' => 'ckeditor',
    // optional:
    'extra_plugins' => ['oembed', 'widget']
    'options' => [
    'autoGrow_minHeight' => 200,
    'autoGrow_bottomSpace' => 50,
    'removePlugins' => 'resize,maximize',
    ]
],
Input preview:
color
[   // Color
    'name' => 'background_color',
    'label' => 'Background Color',
    'type' => 'color'
],
Input preview:

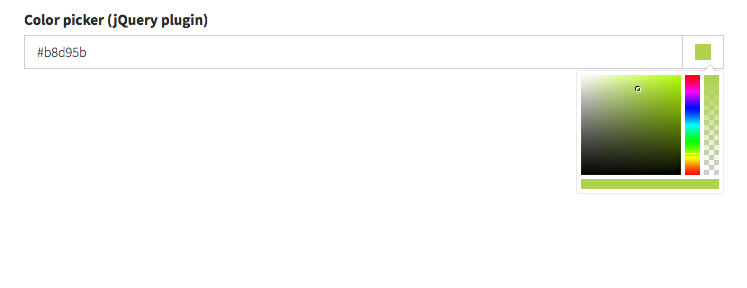
color_picker
Show a pretty colour picker using Bootstrap Colorpicker.
[   // color_picker
    'label' => 'Background Color',
    'name' => 'background_color',
    'type' => 'color_picker',
    'color_picker_options' => ['customClass' => 'custom-class']
]
Input preview:
custom_html
Allows you to insert custom HTML in the create/update forms. Usually used in forms with a lot of fields, to separate them using h1-h5, hr, etc, but can be used for any HTML.
[ // CustomHTML
'name' => 'separator',
'type' => 'custom_html',
'value' => '<hr>'
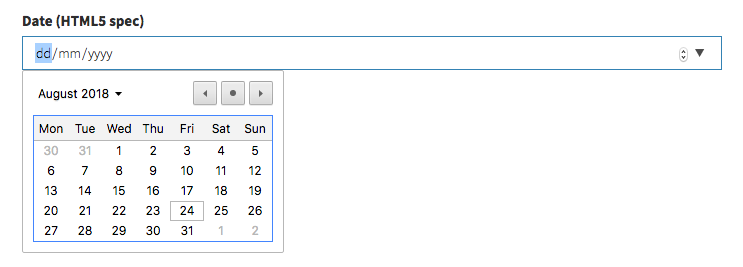
],date
[   // Date
    'name' => 'birthday',
    'label' => 'Birthday',
    'type' => 'date'
],
Input preview:
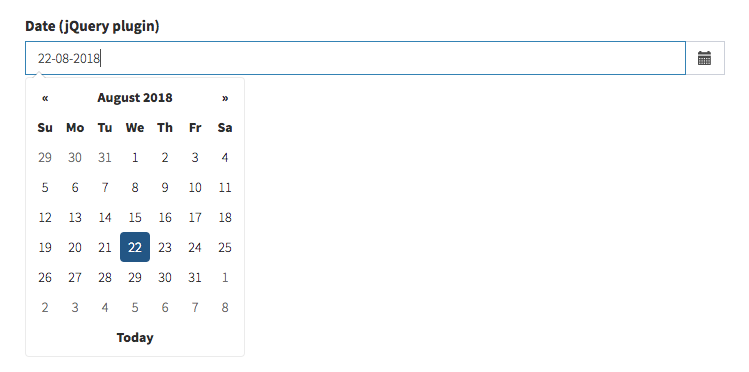
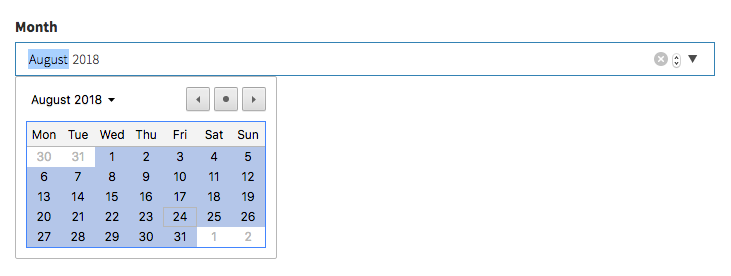
date_picker
Show a pretty Bootstrap Datepicker.
[   // date_picker
   'name' => 'date',
   'type' => 'date_picker',
   'label' => 'Date',
   // optional:
   'date_picker_options' => [
      'todayBtn' => 'linked',
      'format' => 'dd-mm-yyyy',
      'language' => 'fr'
   ],
],
Please note it is recommended that you use attribute casting on your model (cast to date).
Input preview:
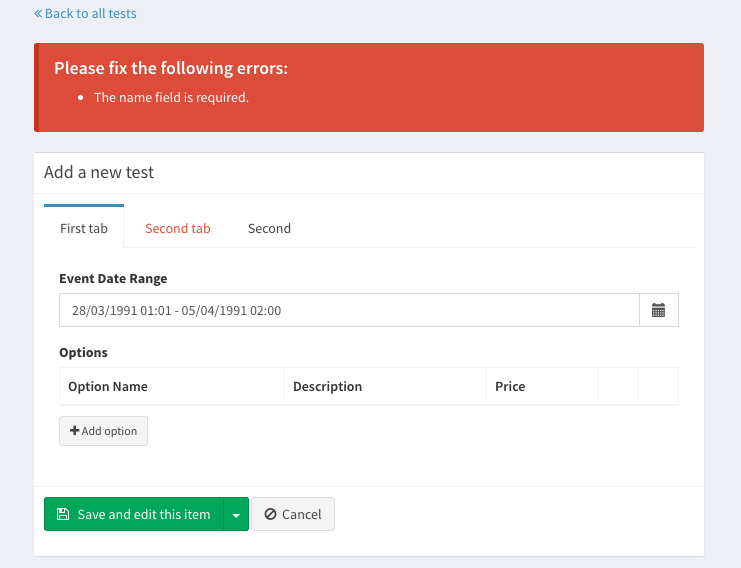
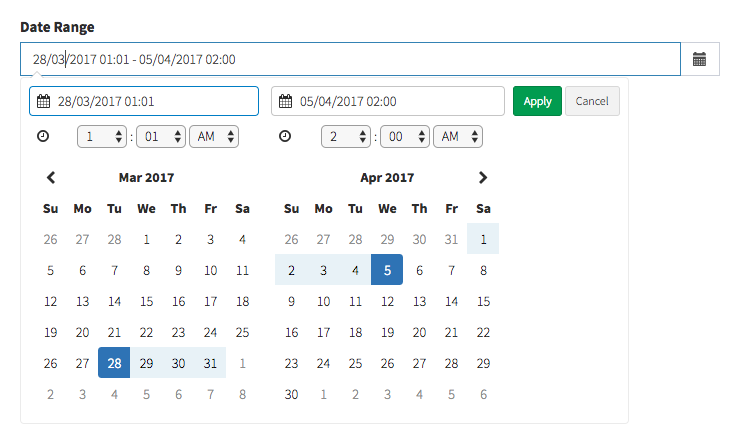
date_range
Starting with Backpack\CRUD 3.1.59
Show a DateRangePicker and let the user choose a start date and end date.
        [
            'name' => 'event_date_range', // a unique name for this field
            'start_name' => 'start_date', // the db column that holds the start_date
            'end_name' => 'end_date', // the db column that holds the end_date
            'label' => 'Event Date Range',
            'type' => 'date_range',
            // OPTIONALS
            'start_default' => '1991-03-28 01:01', // default value for start_date
            'end_default' => '1991-04-05 02:00', // default value for end_date
            'date_range_options' => [ // options sent to daterangepicker.js
                'timePicker' => true,
                'locale' => ['format' => 'DD/MM/YYYY HH:mm']
            ]
        ]
Please note it is recommended that you use attribute casting on your model (cast to date).
Your end result will look like this:
Input preview:
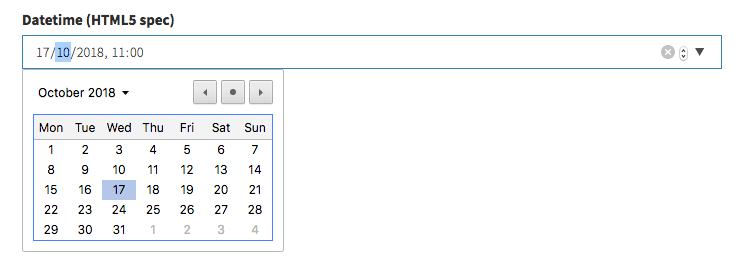
datetime
[   // DateTime
    'name' => 'start',
    'label' => 'Event start',
    'type' => 'datetime'
],
Please note: if you're using datetime attribute casting on your model, you also need to place this mutator inside your model:
    public function setDatetimeAttribute($value) {
        $this->attributes['datetime'] = \Date::parse($value);
    }
Otherwise the input's datetime-local formal will cause some errors.
Input preview:
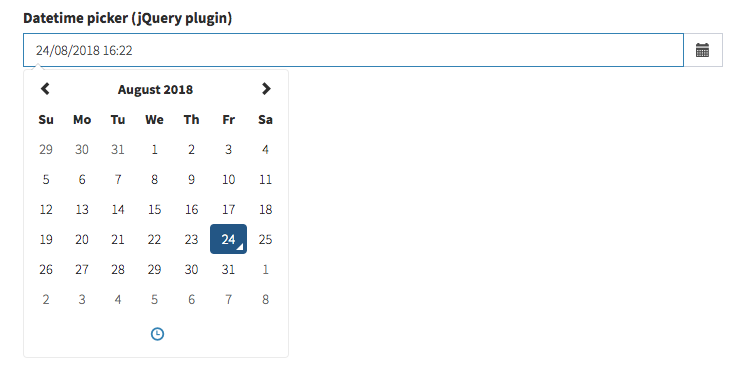
datetime_picker
Show a Bootstrap Datetime Picker.
[   // DateTime
    'name' => 'start',
    'label' => 'Event start',
    'type' => 'datetime_picker',
    // optional:
    'datetime_picker_options' => [
        'format' => 'DD/MM/YYYY HH:mm',
        'language' => 'fr'
    ],
    'allows_null' => true,
    // 'default' => '2017-05-12 11:59:59',
],
Please note: if you're using date attribute casting on your model, you may also need to place this mutator inside your model:
    public function setDatetimeAttribute($value) {
        $this->attributes['datetime'] = \Date::parse($value);
    }
Otherwise the input's datetime-local formal will cause some errors. Remeber to change "datetime" with the name of your attribute (column name).
Input preview:
[   // Email
    'name' => 'email',
    'label' => 'Email Address',
    'type' => 'email'
],
Input preview:

enum
Show a select with the values in the database for that ENUM field. Requires that the db column type is "enum". If the db column allows null, the " - " value will also show up in the select.
[   // Enum
    'name' => 'status',
    'label' => 'Status',
    'type' => 'enum'
],
PLEASE NOTE the enum field only works for MySQL databases.
Input preview:

hidden
Include an in the form.
[   // Hidden
    'name' => 'status',
    'type' => 'hidden'
],
icon_picker
[/block] Show an icon picker. Supported icon sets are fontawesome, glyphicon, ionicon, weathericon, mapicon, octicon, typicon, elusiveicon, materialdesign as per the jQuery plugin, bootstrap-iconpicker.
The stored value will be the class name (ex: fa-home).
[
    'label' => "Icon",
    'name' => 'icon',
    'type' => 'icon_picker',
    'iconset' => 'fontawesome' // options: fontawesome, glyphicon, ionicon, weathericon, mapicon, octicon, typicon, elusiveicon, materialdesign
],
Your input will look like button, with a dropdown where the user can search or pick an icon:
Input preview:
![]()
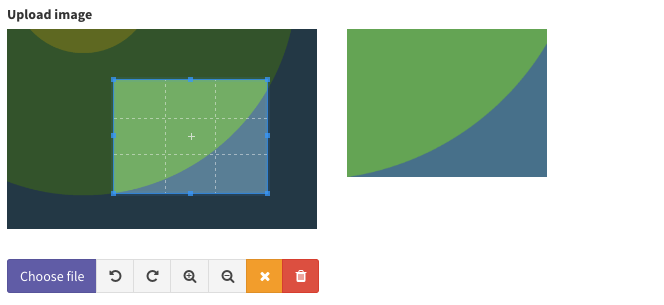
image
Upload an image and store it on the disk.
Step 1. Show the field.
$this->crud->addField([ // image
    'label' => "Profile Image",
    'name' => "image",
    'type' => 'image',
    'upload' => true,
    'crop' => true, // set to true to allow cropping, false to disable
    'aspect_ratio' => 1, // omit or set to 0 to allow any aspect ratio
    // 'disk' => 's3_bucket', // in case you need to show images from a different disk
    // 'prefix' => 'uploads/images/profile_pictures/' // in case your db value is only the file name (no path), you can use this to prepend your path to the image src (in HTML), before it's shown to the user;
]);
Step 2. Set a mutator on your Model, so that the file can be stored. You can use this boilerplate code and modify it to match your use case:
public function setImageAttribute($value)
    {
        $attribute_name = "image";
        $disk = "public_folder";
        $destination_path = "uploads/folder_1/subfolder_3";

        // if the image was erased
        if ($value==null) {
            // delete the image from disk
            \Storage::disk($disk)->delete($this->{$attribute_name});

            // set null in the database column
            $this->attributes[$attribute_name] = null;
        }

        // if a base64 was sent, store it in the db
        if (starts_with($value, 'data:image'))
        {
            // 0. Make the image
            $image = \Image::make($value)->encode('jpg', 90);
            // 1. Generate a filename.
            $filename = md5($value.time()).'.jpg';
            // 2. Store the image on disk.
            \Storage::disk($disk)->put($destination_path.'/'.$filename, $image->stream());
            // 3. Save the path to the database
            $this->attributes[$attribute_name] = $destination_path.'/'.$filename;
        }
    }
The uploaded images are not deleted for you. If you delete an entry (using the CRUD or anywhere inside your app), the image file won't be deleted from the disk. If you're NOT using soft deletes on that Model and want the image to be deleted at the same time the entry is, just specify that in your Model's
deletingevent:public static function boot() { parent::boot(); static::deleting(function($obj) { \Storage::disk('public_folder')->delete($obj->image); }); }
A note about aspect_ratio The value for aspect ratio is a float that represents the ratio of the cropping rectangle height and width. By way of example,
- Square = 1
- Landscape = 2
- Portrait = 0.5
And you can, of course, use any value for more extreme rectangles.
Input preview:
month
[ // Month
'name' => 'month',
'label' => 'Month',
'type' => 'month'
],Input preview:
number
Shows an input type=number to the user, with optional prefix and suffix:
[ // Number
'name' => 'number',
'label' => 'Number',
'type' => 'number',
// optionals
// 'attributes' => ["step" => "any"], // allow decimals
// 'prefix' => "$",
// 'suffix' => ".00",
],Input preview:

page_or_link
Select an existing page from PageManager or an internal or external link. It's used in the MenuManager package, but can be used in any other model just as well. Its definition looks like this:
[ // PageOrLink
'name' => 'type',
'label' => "Type",
'type' => 'page_or_link',
'page_model' => '\Backpack\PageManager\app\Models\Page'
],Input preview:

password
[ // Password
'name' => 'password',
'label' => 'Password',
'type' => 'password'
],Input preview:

radio
Show radios according to an associative array you give the input and let the user pick from them. You can choose for the radio options to be displayed inline or one-per-line.
[
'name' => 'status', // the name of the db column
'label' => 'Status', // the input label
'type' => 'radio',
'options' => [ // the key will be stored in the db, the value will be shown as label;
0 => "Draft",
1 => "Published"
],
// optional
//'inline' => false, // show the radios all on the same line?
],Input preview:

range
[ // Range
'name' => 'range',
'label' => 'Range',
'type' => 'range'
],Input preview:

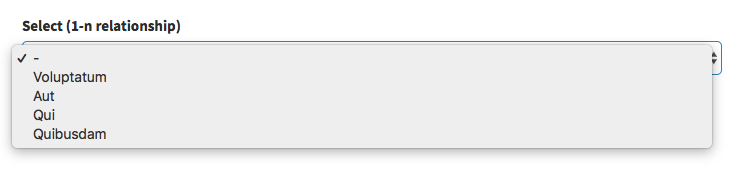
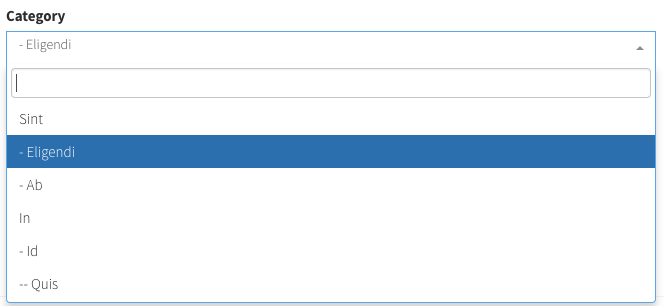
select (1-n relationship)
Show a Select with the names of the connected entity and let the user select one of them. Your relationships should already be defined on your models as hasOne() or belongsTo().
[ // Select
'label' => "Category",
'type' => 'select',
'name' => 'category_id', // the db column for the foreign key
'entity' => 'category', // the method that defines the relationship in your Model
'attribute' => 'name', // foreign key attribute that is shown to user
'model' => "App\Models\Tag",
// optional
'options' => (function ($query) {
return $query->orderBy('name', 'ASC')->where('depth', 1)->get();
}), // force the related options to be a custom query, instead of all(); you can use this to filter the results show in the select
],Input preview:
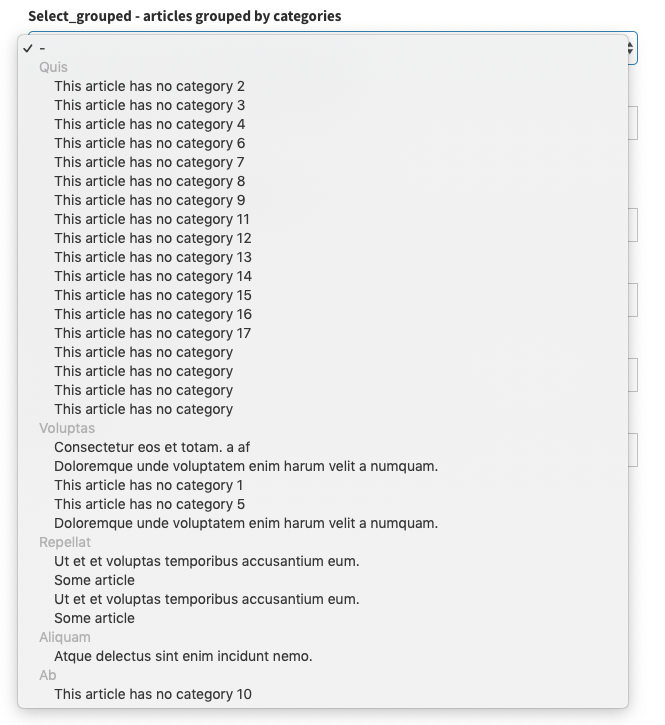
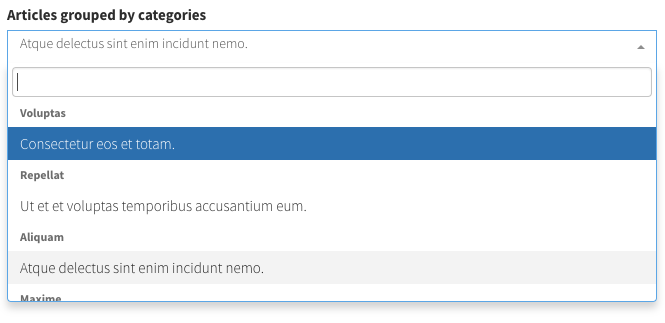
select_grouped
Display a select where the options are grouped by a second entity (like Categories).
[ // select_grouped
'label' => 'Articles grouped by categories',
'type' => 'select_grouped', //https://github.com/Laravel-Backpack/CRUD/issues/502
'name' => 'article_id',
'entity' => 'article',
'attribute' => 'title',
'group_by' => 'category', // the relationship to entity you want to use for grouping
'group_by_attribute' => 'name', // the attribute on related model, that you want shown
'group_by_relationship_back' => 'articles', // relationship from related model back to this model
],Input preview:
select2 (1-n relationship)
Works just like the SELECT field, but prettier. Shows a Select2 with the names of the connected entity and let the user select one of them. Your relationships should already be defined on your models as hasOne() or belongsTo().
[ // Select2
'label' => "Category",
'type' => 'select2',
'name' => 'category_id', // the db column for the foreign key
'entity' => 'category', // the method that defines the relationship in your Model
'attribute' => 'name', // foreign key attribute that is shown to user
'model' => "App\Models\Tag", // foreign key model
// optional
'options' => (function ($query) {
return $query->orderBy('name', 'ASC')->where('depth', 1)->get();
}), // force the related options to be a custom query, instead of all(); you can use this to filter the results show in the select
],Input preview:
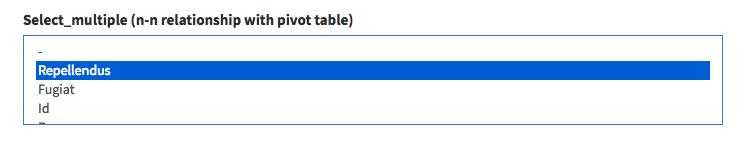
select_multiple (n-n relationship)
Show a Select with the names of the connected entity and let the user select any number of them. Your relationships should already be defined on your models as hasMany() or belongsToMany().
[ // SelectMultiple = n-n relationship (with pivot table)
'label' => "Tags",
'type' => 'select_multiple',
'name' => 'tags', // the method that defines the relationship in your Model
'entity' => 'tags', // the method that defines the relationship in your Model
'attribute' => 'name', // foreign key attribute that is shown to user
'model' => "App\Models\Tag", // foreign key model
'pivot' => true, // on create&update, do you need to add/delete pivot table entries?
// optional
'options' => (function ($query) {
return $query->orderBy('name', 'ASC')->where('depth', 1)->get();
}), // force the related options to be a custom query, instead of all(); you can use this to filter the results show in the select
],Input preview:
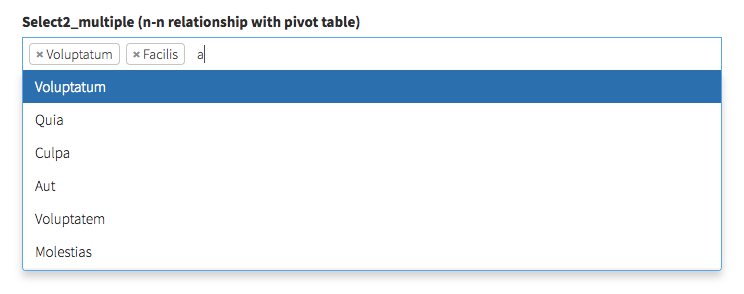
select2_multiple (n-n relationship)
[Works just like the SELECT field, but prettier]
Shows a Select2 with the names of the connected entity and let the user select any number of them. Your relationships should already be defined on your models as hasMany() or belongsToMany().
[ // Select2Multiple = n-n relationship (with pivot table)
'label' => "Tags",
'type' => 'select2_multiple',
'name' => 'tags', // the method that defines the relationship in your Model
'entity' => 'tags', // the method that defines the relationship in your Model
'attribute' => 'name', // foreign key attribute that is shown to user
'model' => "App\Models\Tag", // foreign key model
'pivot' => true, // on create&update, do you need to add/delete pivot table entries?
// 'select_all' => true, // show Select All and Clear buttons?
// optional
'options' => (function ($query) {
return $query->orderBy('name', 'ASC')->where('depth', 1)->get();
}), // force the related options to be a custom query, instead of all(); you can use this to filter the results show in the select
],Input preview:
select2_nested
Display a select2 with the values ordered hierarchically and indented, for an entity where you use Reorder. Please mind that the connected model needs:
- a
children()relationship pointing to itself; - the usual
lft,rgt,depthattributes;
[ // select2_nested
'name' => 'category_id',
'label' => "Category",
'type' => 'select2_nested',
'entity' => 'category', // the method that defines the relationship in your Model
'attribute' => 'name', // foreign key attribute that is shown to user
// 'model' => "App\Models\Category", // force foreign key model
],Input preview:
select2_grouped
Display a select2 where the options are grouped by a second entity (like Categories).
[ // select2_grouped
'label' => 'Articles grouped by categories',
'type' => 'select2_grouped', //https://github.com/Laravel-Backpack/CRUD/issues/502
'name' => 'article_id',
'entity' => 'article',
'attribute' => 'title',
'group_by' => 'category', // the relationship to entity you want to use for grouping
'group_by_attribute' => 'name', // the attribute on related model, that you want shown
'group_by_relationship_back' => 'articles', // relationship from related model back to this model
],Input preview:
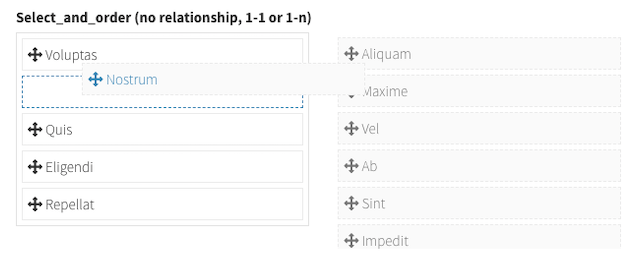
select_and_order
Display items on two columns and let the user drag&drop between them to choose which items are selected and which are not, and reorder the selected items with drag&drop.
Its definition is exactly as select_from_array, but the value will be stored as JSON in the database: ["3","5","7","6"], so it needs the attribute to be cast to array on the Model:
protected $casts = [
'featured' => 'array'
];Definition:
[ // select_and_order
'name' => 'featured',
'label' => "Featured",
'type' => 'select_and_order',
'options' => [
1 => "Option 1",
2 => "Option 2"
]
],Also possible:
[
'name' => 'featured',
'label' => 'Featured',
'type' => 'select_and_order',
'options' => Product::get()->pluck('title','id')->toArray(),
],Input preview:
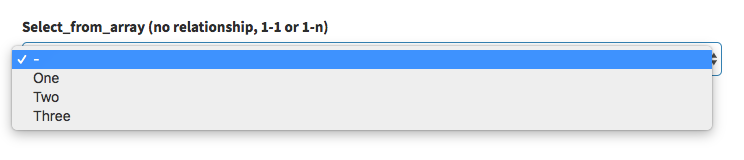
select_from_array
Display a select with the values you want:
[ // select_from_array
'name' => 'template',
'label' => "Template",
'type' => 'select_from_array',
'options' => ['one' => 'One', 'two' => 'Two'],
'allows_null' => false,
'default' => 'one',
// 'allows_multiple' => true, // OPTIONAL; needs you to cast this to array in your model;
],Input preview:
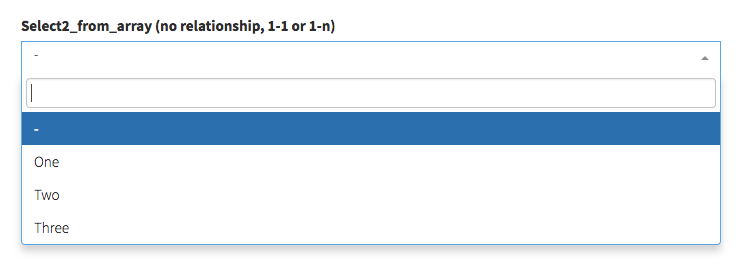
select2_from_array
Display a select2 with the values you want:
[ // select_from_array
'name' => 'template',
'label' => "Template",
'type' => 'select2_from_array',
'options' => ['one' => 'One', 'two' => 'Two'],
'allows_null' => false,
'default' => 'one',
// 'allows_multiple' => true, // OPTIONAL; needs you to cast this to array in your model;
],Input preview:
select2_from_ajax
Display a select2 that takes its values from an AJAX call.
[
// 1-n relationship
'label' => "End", // Table column heading
'type' => "select2_from_ajax",
'name' => 'category_id', // the column that contains the ID of that connected entity
'entity' => 'city', // the method that defines the relationship in your Model
'attribute' => "name", // foreign key attribute that is shown to user
'model' => "App\Models\Category", // foreign key model
'data_source' => url("api/category"), // url to controller search function (with /{id} should return model)
'placeholder' => "Select a category", // placeholder for the select
'minimum_input_length' => 2, // minimum characters to type before querying results
// 'dependencies' => ['category'], // when a dependency changes, this select2 is reset to null
// 'method' => 'GET', // optional - HTTP method to use for the AJAX call (GET, POST)
]Of course, you also need to create a controller and routes for the data_source above. Here's an example:
Route::get('/api/category', 'Api\CategoryController@index');
Route::get('/api/category/{id}', 'Api\CategoryController@show');<?php
namespace App\Http\Controllers\Api;
use Illuminate\Http\Request;
use App\Http\Controllers\Controller;
use Backpack\NewsCRUD\app\Models\Category;
class CategoryController extends Controller
{
public function index(Request $request)
{
$search_term = $request->input('q');
$page = $request->input('page');
if ($search_term)
{
$results = Category::where('name', 'LIKE', '%'.$search_term.'%')->paginate(10);
}
else
{
$results = Category::paginate(10);
}
return $results;
}
public function show($id)
{
return Category::find($id);
}
}Input preview:
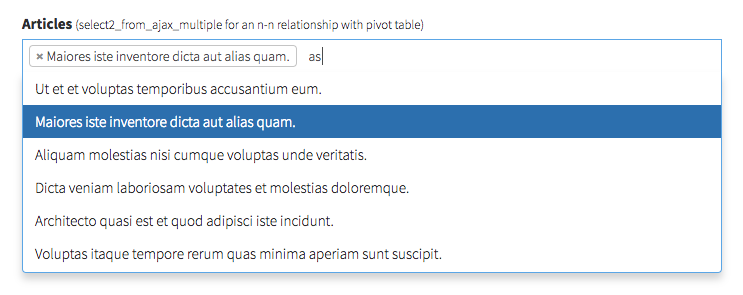
select2_from_ajax_multiple
Display a select2 that takes its values from an AJAX call. Same as select2_from_ajax above, but allows for multiple items to be selected. The only difference in the field definition is the "pivot" attribute.
[
// n-n relationship
'label' => "End", // Table column heading
'type' => "select2_from_ajax_multiple",
'name' => 'city_id', // the column that contains the ID of that connected entity
'entity' => 'city', // the method that defines the relationship in your Model
'attribute' => "name", // foreign key attribute that is shown to user
'model' => "App\Models\City", // foreign key model
'data_source' => url("api/cities"), // url to controller search function (with /{id} should return model)
'placeholder' => "Select a city", // placeholder for the select
'minimum_input_length' => 2, // minimum characters to type before querying results
'pivot' => true, // on create&update, do you need to add/delete pivot table entries?
]Of course, you also need to create a controller and routes for the data_source above. Here's an example:
Route::get('/api/category', 'Api\CategoryController@index');
Route::get('/api/category/{id}', 'Api\CategoryController@show');<?php
namespace App\Http\Controllers\Api;
use Illuminate\Http\Request;
use App\Http\Controllers\Controller;
use Backpack\NewsCRUD\app\Models\Category;
class CategoryController extends Controller
{
public function index(Request $request)
{
$search_term = $request->input('q');
$page = $request->input('page');
if ($search_term)
{
$results = Category::where('name', 'LIKE', '%'.$search_term.'%')->paginate(10);
}
else
{
$results = Category::paginate(10);
}
return $results;
}
public function show($id)
{
return Category::find($id);
}
}Input preview:
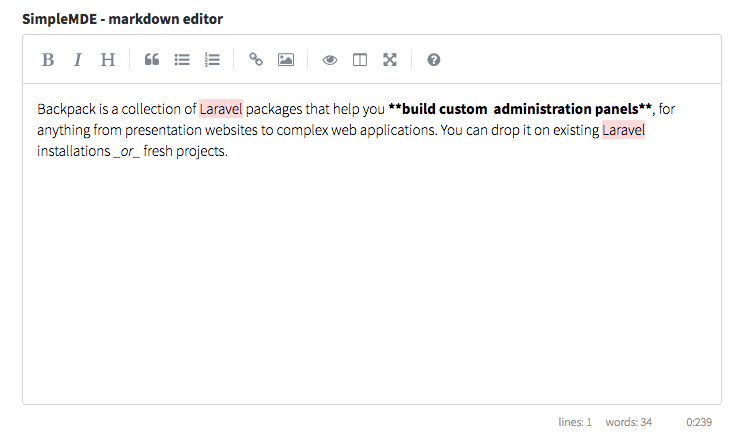
simplemde
Show a SimpleMDE markdown editor to the user.
[ // SimpleMDE
'name' => 'description',
'label' => 'Description',
'type' => 'simplemde',
// optional
// 'simplemdeAttributes' => [
// 'promptURLs' => true,
// 'status' => false,
// 'spellChecker' => false,
// 'forceSync' => true,
// ],
// 'simplemdeAttributesRaw' => $some_json
],Input preview:
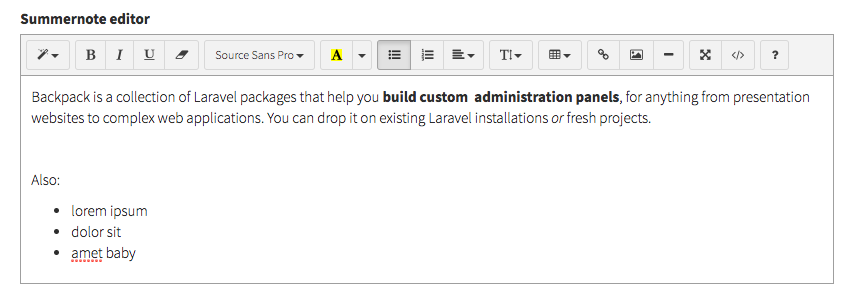
summernote
Show a Summernote wysiwyg editor to the user.
[ // Summernote
'name' => 'description',
'label' => 'Description',
'type' => 'summernote',
// 'options' => [], // easily pass parameters to the summernote JS initialization
],Input preview:
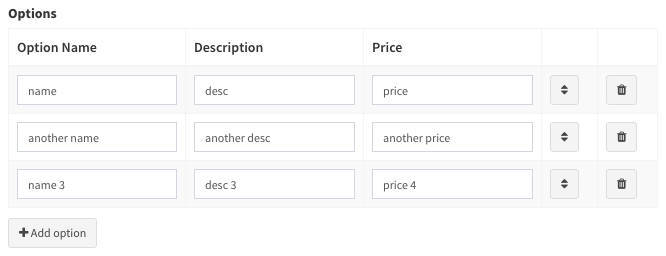
table
Show a table with multiple inputs per row and store the values as JSON in the database. The user can add more rows and reorder the rows as they please.
[ // Table
'name' => 'options',
'label' => 'Options',
'type' => 'table',
'entity_singular' => 'option', // used on the "Add X" button
'columns' => [
'name' => 'Name',
'desc' => 'Description',
'price' => 'Price'
],
'max' => 5, // maximum rows allowed in the table
'min' => 0, // minimum rows allowed in the table
],It's highly recommended that you use attribute casting on your model when working with JSON stored in database columns, and cast your this attribute to either
objectorarray.
Input preview:
text
The basic field type, all it needs is the two mandatory parameters: name and label.
[ // Text
'name' => 'title',
'label' => "Title",
'type' => 'text',
// optional
//'prefix' => '',
//'suffix' => '',
//'default' => 'some value', // default value
//'hint' => 'Some hint text', // helpful text, show up after input
//'attributes' => [
//'placeholder' => 'Some text when empty',
//'class' => 'form-control some-class'
//], // extra HTML attributes and values your input might need
//'wrapperAttributes' => [
//'class' => 'form-group col-md-12'
//], // extra HTML attributes for the field wrapper - mostly for resizing fields
//'readonly'=>'readonly',
],You can use the optional 'prefix' and 'suffix' attributes to display something before and after the input, like icons, path prefix, etc:
Input preview:

textarea
Show a textarea to the user.
[ // Textarea
'name' => 'description',
'label' => 'Description',
'type' => 'textarea'
],Input preview:

time
[ // Time
'name' => 'start',
'label' => 'Start time',
'type' => 'time'
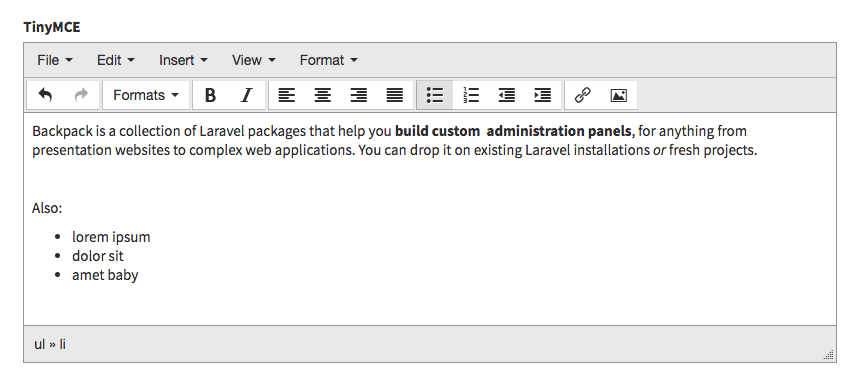
],tinymce
Show a wysiwyg (TinyMCE) to the user.
[ // TinyMCE
'name' => 'description',
'label' => 'Description',
'type' => 'tinymce'
],Input preview:
upload
Step 1. Show a file input to the user:
[ // Upload
'name' => 'image',
'label' => 'Image',
'type' => 'upload',
'upload' => true,
'disk' => 'uploads' // if you store files in the /public folder, please omit this; if you store them in /storage or S3, please specify it;
],Step 2. In order to save/update/delete the file from disk&db, we need to create a mutator on your model:
public function setImageAttribute($value)
{
$attribute_name = "image";
$disk = "public";
$destination_path = "folder_1/subfolder_1";
$this->uploadFileToDisk($value, $attribute_name, $disk, $destination_path);
}How it works:
The field sends the file, through a Request, to the Controller. The Controller then tries to create/update the Model. That's when the mutator on your model will run. That also means we can do any file validation (file, image, mimetypes, mimes) in the Request, before the file is stored on the disk.
The uploadFileToDisk() method will take care of everything for most use cases:
/**
* Handle file upload and DB storage for a file:
* - on CREATE
* - stores the file at the destination path
* - generates a name
* - stores the full path in the DB;
* - on UPDATE
* - if the value is null, deletes the file and sets null in the DB
* - if the value is different, stores the different file and updates DB value
* /
public function uploadFileToDisk($value, $attribute_name, $disk, $destination_path) {}If you wish to have a different functionality, you can delete the method call from your mutator and do your own thing.
The uploaded files are not deleted for you. When you delete an entry (wether through CRUD or the application), the uploaded files will not be deleted.
If you're NOT using soft deletes on that Model and want the file to be deleted at the same time the entry is, just specify that in your Model's deleting event:
public static function boot()
{
parent::boot();
static::deleting(function($obj) {
\Storage::disk('public_folder')->delete($obj->image);
});
}Input preview:

upload_multiple
Shows a multiple file input to the user and stores the values as a JSON array in the database.
Step 1. Show a multiple file input to the user:
[   // Upload
    'name' => 'photos',
    'label' => 'Photos',
    'type' => 'upload_multiple',
    'upload' => true,
    'disk' => 'uploads' // if you store files in the /public folder, please omit this; if you store them in /storage or S3, please specify it;
],
Step 2. In order to save/update/delete the files from disk&db, we need to create a mutator on your model:
public function setPhotosAttribute($value)
    {
        $attribute_name = "photos";
        $disk = "public";
        $destination_path = "folder_1/subfolder_1";

        $this->uploadMultipleFilesToDisk($value, $attribute_name, $disk, $destination_path);
    }
Step 3. Since the filenames are stored in the database as a JSON array, we're going to use attribute casting on your model, so every time we get the filenames array from the database it's converted from a JSON array to a PHP array:
    protected $casts = [
        'photos' => 'array'
    ];
How it works:
The field sends the files, through a Request, to the Controller. The Controller then tries to create/update the Model. That's when the mutator on your model will run. That also means we can do any file validation (file, image, mimetypes, mimes) in the Request, before the files are stored on the disk.
The uploadMultipleFilesToDisk() method will take care of everything for most use cases:
/**
     * Handle multiple file upload and DB storage:
     * - if files are sent
     *     - stores the files at the destination path
     *     - generates random names
     *     - stores the full path in the DB, as JSON array;
     * - if a hidden input is sent to clear one or more files
     *     - deletes the file
     *     - removes that file from the DB.
     * /
public function uploadMultipleFilesToDisk($value, $attribute_name, $disk, $destination_path) {}
If you wish to have a different functionality, you can delete the method call from your mutator and do your own thing.
The uploaded files are not deleted for you. When you delete an entry (wether through CRUD or the application), the uploaded files will not be deleted.
If you're NOT using soft deletes on that Model and want the files to be deleted at the same time the entry is, just specify that in your Model's deleting event:
    public static function boot()
    {
        parent::boot();
        static::deleting(function($obj) {
            if (count((array)$obj->photos)) {
                foreach ($obj->photos as $file_path) {
                    \Storage::disk('public_folder')->delete($file_path);
                }
            }
        });
    }
You might notice the field is using a clear_photos variable. Don't worry, you don't need it in your db table. That's just used to delete photos upon "update". If you use $fillable on your model, just don't include it. If you use $guarded on your model, place it in guarded.
Input preview:

url
[/block]
[   // URL
    'name' => 'link',
    'label' => 'Link to video file',
    'type' => 'url'
],
video
Allow the user to paste a Youtube/Vimeo link. That will get the video information with Javascript and store it as a JSON in the database.
Field definition:
[   // URL
    'name' => 'video',
    'label' => 'Link to video file on Youtube or Vimeo',
    'type' => 'video',
],
An entry stored in the database will look like this:
$video = {
    id: 234324,
    title: 'my video title',
    image: 'https://provider.com/image.jpg',
    url: 'http://provider.com/video',
    provider: 'youtube'
}
So you should use attribute casting in your model, to cast the video as array or object.
view
Load a custom view in the form.
[
        'name' => 'custom-ajax-button',
        'type' => 'view',
        'view' => 'partials/custom-ajax-button'
],
Note: the same functionality can be achieved using a custom field type, or using the custom_html field type (if the content is really simple).
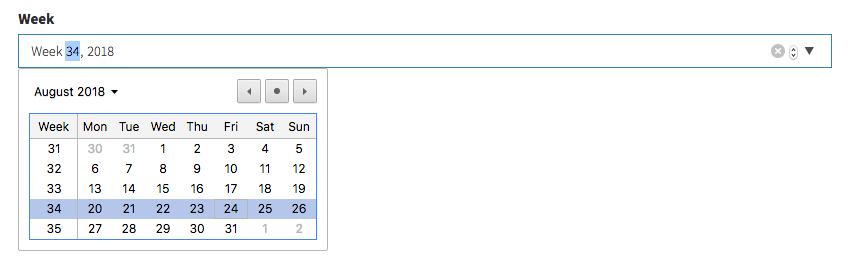
week
[   // Week
    'name' => 'first_week',
    'label' => 'First week',
    'type' => 'week'
],
Input preview:
wysiwyg
Show a wysiwyg (CKEditor) to the user.
[   // WYSIWYG Editor
    'name' => 'description',
    'label' => 'Description',
    'type' => 'wysiwyg'
],
Overwriting Default Field Types
The actual field types are stored in the Backpack/CRUD package in /resources/views/fields. If you need to change an existing field, you don't need to modify the package, you just need to add a blade file in your application in /resources/views/vendor/backpack/crud/fields, with the same name. The package checks there first, and only if there's no file there, will it load it from the package.
To quickly publish a field blade file in your project, you can use php artisan backpack:crud:publish fields/field_name. For example, to publish the number field type, you'd type php artisan backpack:crud:publish fields/number
Please keep in mind that if you're using your file for a field type, you're not using the package file. So any updates we push to that file, you're not getting them. In most cases, it's recommended you create a custom field type for your use case, instead of overwriting default field types.
Creating a Custom Field Type
If you need to extend the CRUD with a new field type, you create a new file in your application in /resources/views/vendor/backpack/crud/fields. Use a name that's different from all default field types. That's it, you'll now be able to use it just like a default field type.
Your field definition will be something like:
[
  // Custom Field
  'name' => 'address',
  'label' => 'Home address',
  'type' => 'address'
  /// 'view_namespace' => 'yourpackage' // use a custom namespace of your package to load views within a custom view folder.
],
And your blade file something like:
<!-- field_type_name -->
<div @include('crud::inc.field_wrapper_attributes') >
    <label>{!! $field['label'] !!}</label>
    <input
        type="text"
        name="{{ $field['name'] }}"
        value="{{ old($field['name']) ? old($field['name']) : (isset($field['value']) ? $field['value'] : (isset($field['default']) ? $field['default'] : '' )) }}"
        @include('crud::inc.field_attributes')
    >

    {{-- HINT --}}
    @if (isset($field['hint']))
        <p class="help-block">{!! $field['hint'] !!}</p>
    @endif
</div>

@if ($crud->checkIfFieldIsFirstOfItsType($field))
  {{-- FIELD EXTRA CSS  --}}
  {{-- push things in the after_styles section --}}

      @push('crud_fields_styles')
          <!-- no styles -->
      @endpush

  {{-- FIELD EXTRA JS --}}
  {{-- push things in the after_scripts section --}}

      @push('crud_fields_scripts')
          <!-- no scripts -->
      @endpush
@endif

// Note: most of the times you'll want to use @if ($crud->checkIfFieldIsFirstOfItsType($field, $fields)) to only load CSS/JS once, even though there are multiple instances of it.
Inside your custom field type, you can use these variables:
$crud- all the CRUD Panel settings, options and variables;$entry- in the Update operation, the current entry being modified (the actual values);$field- all attributes that have been passed for this field;