1. Basics
Duration: 5 minutes
Are you already comfortable with Laravel? In order to understand this series and make use of Backpack, you'll need to have a decent understanding of the Laravel framework. If you don't, please go ahead and watch this excellent intro series on Laracasts and accommodate yourself with Laravel first.
What is Backpack?
A software that helps Laravel professionals build administration panels - secure areas where administrators login and create, read, update and delete application information. It is not a CMS, it is more a framework that lets you build your own CMS. You can install it in your existing project or in a totally new project.
It's designed to be flexible enough to allow you to build admin panels for everything from simple presentation websites to CRMs, ERPs, eCommerce, eLearning, etc. We can vouch for that, because we have built all that stuff using Backpack already.
How to use?
Backpack consists of two core packages:
- Backpack\Base - provides the design of the admin area (based on AdminLTE)
- Backpack\CRUD - empowers you to create CRUDs, really fast
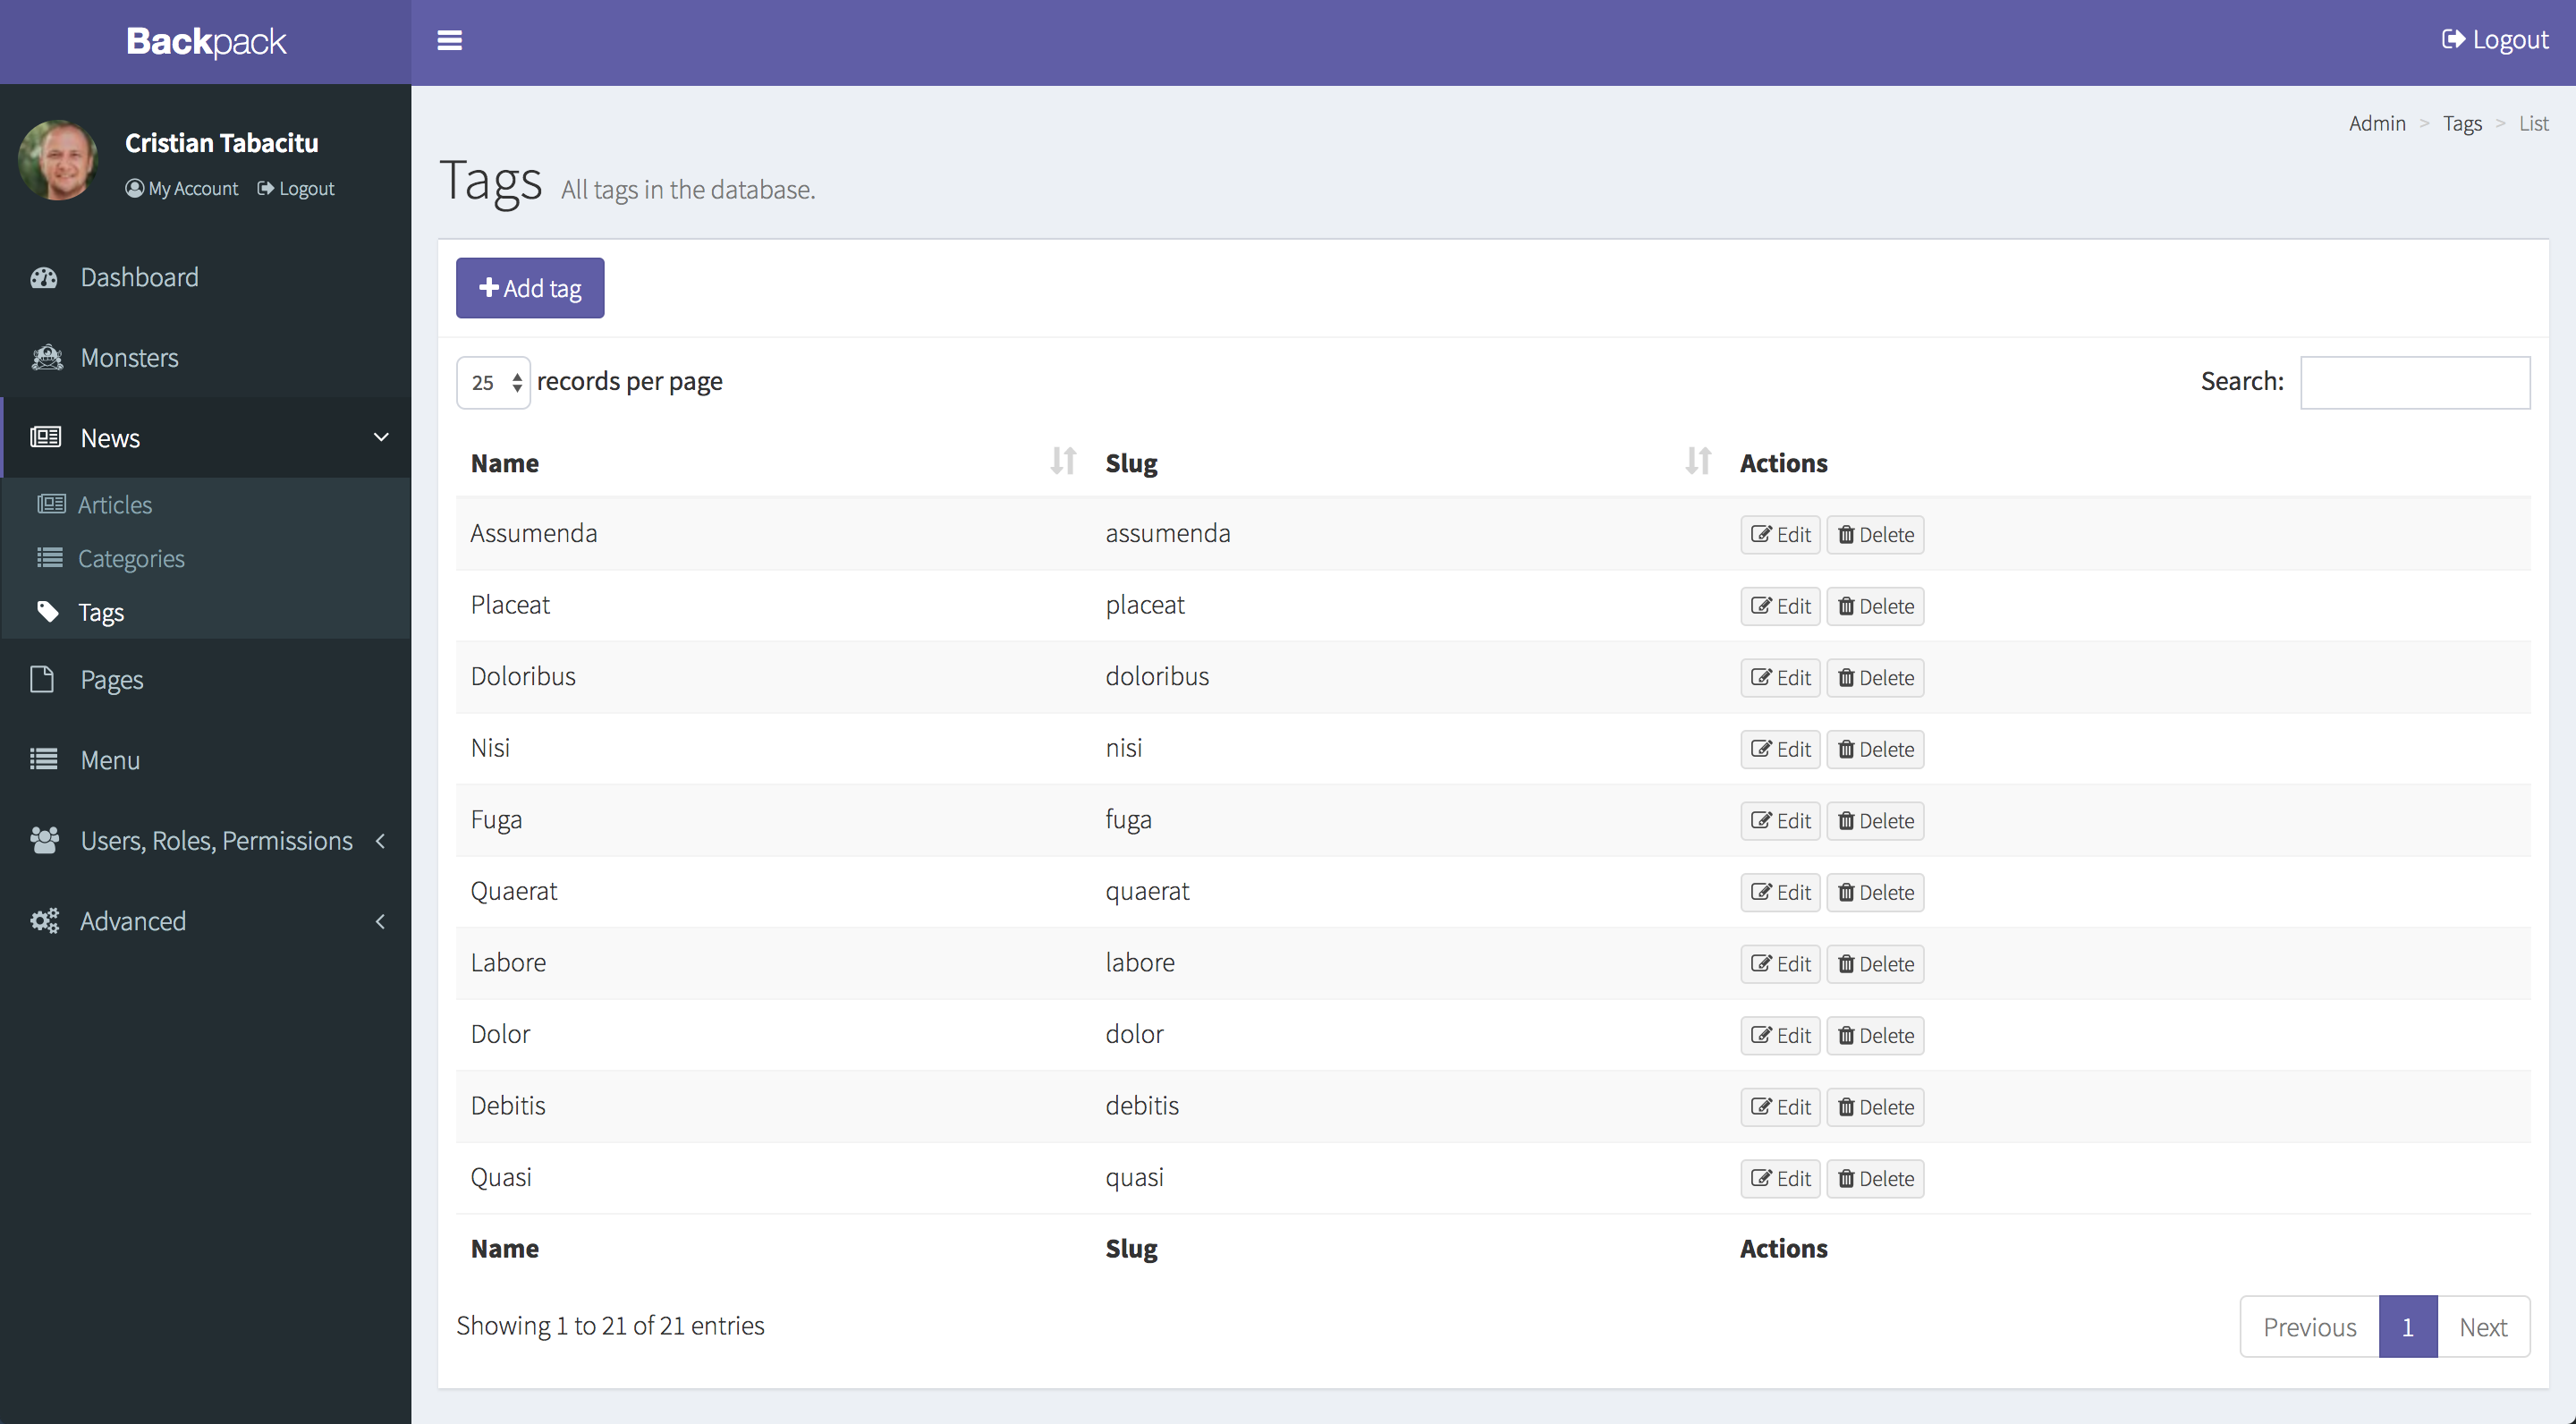
A CRUD is what we call a section of your admin panel that lets the admin Create, Read, Update or Delete entries of a certain entity (or Model). So you can have a CRUD for Products, a CRUD for Articles, a CRUD for Categories, or whatever else you might want to create, read, update or delete.
For the purpose of this series, we'll show examples on the Tag entry. This is what it could look like:
Core Packages
Backpack\Base
Backpack/Base is the package that will handle the authentication and provide you with minimal admin area functionality. Your admin will be able to login and change his password or email. And that's pretty much it.
Thanks to Base, after you install Backpack (don't do it now), you'll be able to log into your admin panel at http://yourapp/admin. You can change the URL prefix from admin to something else in your config/backpack/base.php file, along with a bunch of other configuration options. Click here to browse the configuration file and see what it can do for you.
Backpack\Base pulls in the free AdminLTE theme and enhances the design a little bit. So any front-end block that AdminLTE has, you'll also be able to use in your custom pages. It also includes a system for bubble notifications, which you can use across the admin panel. You can easily trigger notification bubbles in PHP or trigger notification bubbles in JavaScript.
Backpack\CRUD
This is where it gets interesting. As soon as you install Backpack in your project, you can create CRUDs for your admins to easily manipulate DB information. Let's browse through a simple example, of creating a CRUD administration panel for a Tag entity:
# STEP 1. create migration
php artisan make:migration:schema create_tags_table --model=0 --schema="name:string:unique"
php artisan migrate

# STEP 2. create a model, a request and a controller for the admin panel
php artisan backpack:crud tag #use singular, not plural

# STEP 3. add a route to routes/backpack/custom.php (under the admin prefix and auth middleware):
php artisan backpack:base:add-custom-route "CRUD::resource('tag', 'TagCrudController');"

# STEP 4. add a sidebar item
php artisan backpack:base:add-sidebar-content "<li><a href='{{ backpack_url('tag') }}'><i class='fa fa-tag'></i> <span>Tags</span></a></li>"
This will create a simple CRUD panel, which you should now be able to see in the Sidebar.
For a simple entry like this, the generated CRUD panel will even work "as is", no need for customizations. But don't expect this for more complex entities. They will usually require have particularities and need customization. That's where Backpack shines - modifying anything in the CRUD Panel is easy and intuitive, once you understand how it works.
The code above would generate:
- a migration file
- a model (
app\Models\Tag.php) - a request file, for form validation (
app\Http\Requests\TagCrudRequest.php) - a controller file, where you can customize how the CrudPanel looks and feels (
app\Http\Controllers\Admin\TagCrudController.php) - a route, as a line inside
routes/backpack/custom.php
We won't be covering the migration, model and request files here, as they are in no way custom. The only thing you need to make sure is that the Model is properly configured (db table, relationships, $fillable or $guarded properties, etc) and that it uses our CrudTrait. What we will be covering is TagCrudController - which is where most of your logic will reside. Here's a copy of a simple one you might use to achieve the above:
<?php namespace App\Http\Controllers\Admin;

use Backpack\CRUD\app\Http\Controllers\CrudController;

// VALIDATION: change the requests to match your own file names if you need form validation
use App\Http\Requests\TagCrudRequest as StoreRequest;
use App\Http\Requests\TagCrudRequest as UpdateRequest;

class TagCrudController extends CrudController {

  public function setup()
  {
      $this->crud->setModel("App\Models\Tag");
      $this->crud->setRoute("admin/tag");
      $this->crud->setEntityNameStrings('tag', 'tags');

      $this->crud->setColumns(['name', 'slug']);
      $this->crud->addField([
        'name' => 'name',
        'type' => 'text',
        'label' => "Tag name"
      ]);
      $this->crud->addField([
        'name' => 'slug',
        'type' => 'text',
        'label' => "URL Segment (slug)"
      ]);
  }

  public function store(StoreRequest $request)
  {
    return parent::storeCrud();
  }

  public function update(UpdateRequest $request)
  {
    return parent::updateCrud();
  }
}
You should notice:
- It uses basic inheritance (
TagCrudController extends CrudController); so if you want to modify a behaviour (save, update, reorder, etc), you can easily do that by overwriting the corresponding method in yourTagCrudController; - The request file is typehinted in the
store()andupdate()methods; Since in case form validation fails, the information won't even reach these methods; - All the CRUD setup is usually done in the
setup()method;
That's all for today! If you want to learn more, go ahead and read the next lesson of this series.